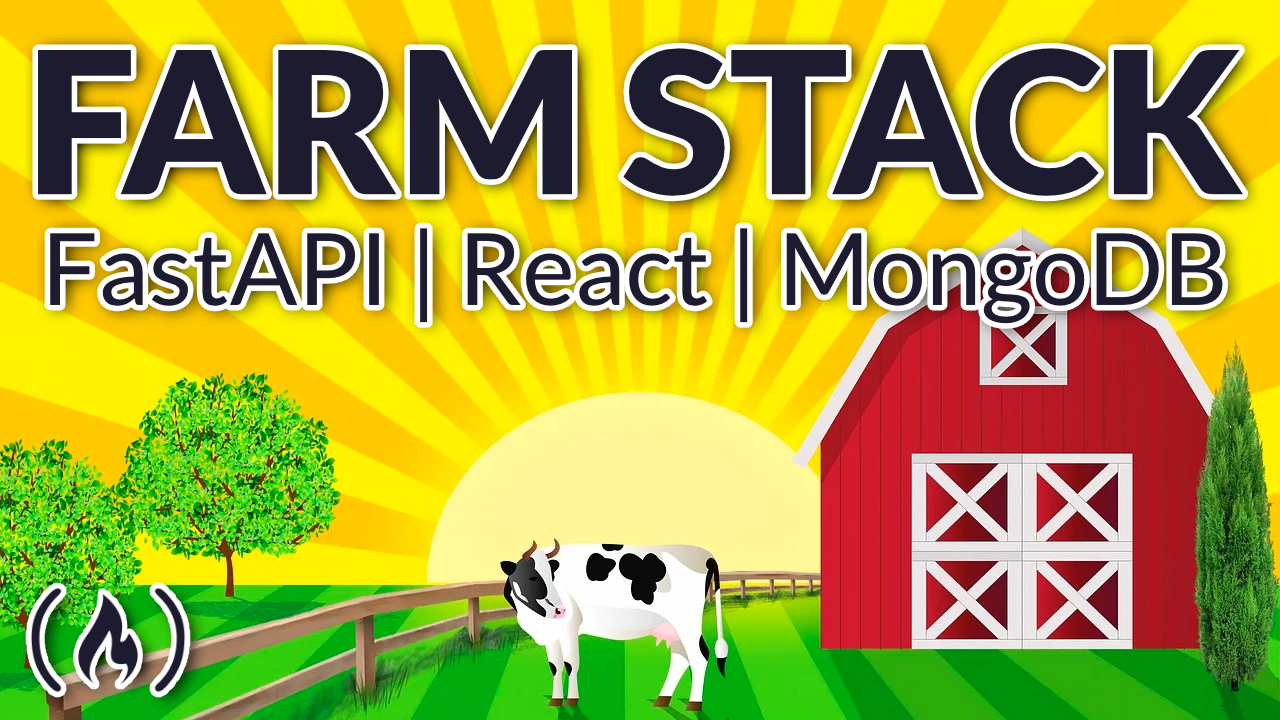
The FARM stack is FastAPI, React, and MongoDB. It is a simpler form of the MERN stack that can make developing apps even faster.
We just released a FARM stack course on the freeCodeCamp.org YouTube channel. You will learn how to create a basic CRUD application.
FastAPI is where your server side code lives. You will learn how to connect this with a mongoDB database. Then you will learn to connect the backend to the frontend. A React app will send and receive HTTP requests to and from the server.
Bek Brace developed this course. Bek is a developer who has created many courses on his YouTube channel.
Here are the sections in this course:
- FARM STACK Explained (Theory)
- Backend build (FastAPI)
- MongoDB Queries
- Frontend Design
- App Testing
Watch the full course below or on the freeCodeCamp.org YouTube channel (1-hour watch).
Transcript
(autogenerated)
In this course you will go to the farm. The farm stack is Fast API, React, and GraphQL.
Bek Brace will teach you how to use this stack to make a full stack web app.
Hey, what's going on guys, this is big breeze.
I hope you're all doing well.
Welcome to the forums.
That course in today's course, the technologies that we're going to be using are some of my favorite ones.
We're going to work with fast API, React js, and MongoDB, which are the components of the farm stack.
And you probably have heard of this suffix stack in other terms, like the myrn stack, which stands for MongoDB Express, react, and Node JS.
And what's meant by stack simply is a set of technologies that you can use together to create a web application, for instance.
So farm stands for fast API, react, and MongoDB.
And we're going to build our app using fast API for the back end server, React for the front end client, and MongoDB for the backend database server.
So this is for data persistence.
And in my opinion, farm stack resembles the MEAN stack or the myrn.
Stack even The only difference is the fast API.
Because react and MongoDB are the same in the three stacks.
In Maine, we use Angular, no GS, and in myrn, we use react and Node JS.
Fast API, of course, is a modern and fast web framework for building API's created by Sebastian Ramirez.
And this uses ASCII.
And ASCII stands for asynchronous server gateway interface.
And this is just the interface between your application and the server.
And the response time is lightning fast.
And this is one of the big advantages of having as the server implementation on your side also fast API one of its biggest features that it supports coroutines and concurrency without the need to import the async IO module in Python.
And in a way, it's faster than Express, which is no GS framework.
And Express is the E in the mean and myrn stacks, as we said.
So fast API also has interactive API documentation.
And it helps you to think the different HTTP requests like get post put and delete visually using open API, which is itself based on JSON schema.
And I have a full crash course on fast API, you will find a card appearing now if you're interested to check it out.
react, of course, is the most famous JavaScript front end library for building user interfaces, especially sbas, or single page applications, as per the Stack Overflow survey for 2020.
React GS is just below jQuery.
So as you can read here that jQuery is still King.
But it's slowly losing ground to react js and angular year over year as per the most loved framework is just the second after ASP dotnet core.
And the most wanted actually is react GS the most wanted in the market.
And I believe the link to the surveys for Stack Overflow in the description section below.
If you would like to check out other statistics very interesting.
You'll find here that the most dreaded language is VBA.
And I've been working with VB for some time now at work, especially the debugging system is truly awful.
So no wonder that it's the most dreaded language.
Alright, following that Objective C, Perl, assembly C, PHP, and so on.
So surprisingly, rust is the most loved language following that TypeScript then Python, but actually the most wanted language on the market is Python, followed by JavaScript them by go Lang.
And I also have a react tutorial for beginner back end developers, you will find a card appearing now check it out if you like.
Last, but not least, we need the persistence.
So we'll be using MongoDB, which is the letter M in form.
And I never did a tutorial on MongoDB on the channel.
So this is the first one.
And I'll try to be as much detailed as I can.
And I've received a few requests to create a crash course on MongoDB and Maria dB.
So MongoDB course is almost ready and will be uploaded soon.
MongoDB is a no SQL database management system.
And no SQL stands for not only SQL, and it's based on what we call the document model or collections of documents.
So even the normal SQL system like MySQL, Postgres, or Oracle, if you have a table if you have a database that consists of different tables, and each table has some rows and columns, here in the no SQL world, you have a collection of documents.
And a document is just the file written in JSON format, and converted to be sawn or binary JSON, which is the zeros and ones for the computer to compile and understand.
So in SQL world if you have a database of different tables, and each table has a set of rows and columns in mind dB, you have a database also.
But it consists of collections that consists of documents.
And each document has different fields like ID, name, last name, for instance, all these are fields in MongoDB document.
Last Word, I would like to say about MongoDB, that it was created in 2009.
And it's the leading no SQL system on the market now.
So enough me talking, and let's go ahead and start by creating our application.
Our application basically is a crud application.
So the front end is going to send HTTP requests to the backend, the backend is going to fetch all the data from the database in MongoDB, the MongoDB is going to send the data to fast API to the back end server, then the back end server using axios technology will send their response to the React front end, which you will be seeing on the screen.
So from front end to back end, the back end to front end.
Alright, you will need obviously to have Python installed, you will need also no GS because we will need NPM.
In order to create our react application, as far as MongoDB, you will need to have an account on MongoDB Atlas.
So you can click on Start free.
And you will feel the data here your company How are using MongoDB, your email, first name, last name and password.
And once you do that, you will have here look included with your free cloud database, you will have one free tier to have a cluster of computers with 512 megabytes of storage.
Okay, it's just it's not physical computer, but logical one.
So you'll have shared DRAM, you'll have 512 megabytes of storage, highly available replica sets, enter an encryption to meet it patches and REST API.
Okay, all of that is included in your free tier.
Alright, so once you log in, you will not find this in clusters, you will find a green button in the middle telling you to create a new cluster.
Okay, so this is cluster zero.
This is here how to connect your collections.
And we said that collections is the equivalent of tables in SQL world can also have another cluster, but I'm not going to do it because you're allowed only with one cluster.
I have my region here in Belgium, because I live in Poland.
And I've already tried the one in Germany, but it was not so efficient.
So I created a new one with Belgium with Google Cloud.
Okay, you will have different options.
So let me show you, you will have Google Cloud you will have is your I used Google Cloud, as you can see here, and I use the one you can see here, that free tier available.
Alright, if you're in Brazil, in the US, and Australia, Finland, all of these are free, the ones only with a free tier available tag.
And once you know what you want to choose, you can click on it and create free cluster, I can create another one because I already have a free tier free cluster.
And you can see here that they charge you for a second one for zero point $44 per hour.
All right, yeah, but it's just pretty straightforward.
You will choose whatever and then you will hit on create cluster, it will take some time to deploy and you will be ready to go.
How you can connect is by clicking on Connect.
And you will have different tools.
So you can connect to your application, you can use the Mongo shell, which is just a simple terminal to interact with your database using command line and using the MongoDB compass, I highly recommend that you install the compass and the shell.
So we're back to the MongoDB homepage, you can go to software, click on community server.
And you'll find here on premises, alright MongoDB locally, so you have MongoDB community server, you can download that.
So MongoDB offers both an enterprise and community version of its powerful distributed document database.
So don't mind the enterprise just focus on the community server, you can download that it's Microsoft installer MSI file.
So this is the first thing you need to do.
Also, you need to go to developer tools.
And here you can download the MongoDB compass and a MongoDB shell.
Okay, so MongoDB compass, and you can click here on trade now, and it took you back to the tools and you can download it here.
And the same thing goes to MongoDB shell and if you're not sure how to do that, please let me know in the comment section below.
And I will create a quick video to show you how to set up everything in the path all right in the environment variable So once everything is installed properly, you can go ahead and type Mongo D version.
And you will get this DB version 4.46.
okay with this JSON data, K, the version get version, and so on.
Also, to access the MongoDB shell, you can go ahead and type Mongo s h.
And you can take a look to the available databases.
So you can say show DBS and you will get the default databases provided by MongoDB.
Okay, and let me show you the MongoDB compass.
So this is how it looks like.
So in order to connect, we can say Mongo DB, colon slash slash 120 7.0.
Point 0.1, or localhost on port 27, zero 17.
Click on Connect.
Okay, if you want to create a database, you can create that easily.
Let's say for instance, we'll have a database with the name of sales.
Let's have a collection of employees, for instance, okay, and create database.
And immediately, you have your sales database created.
And if you refresh here show DBS, you will find that the sales has appeared here.
So let's roll up our sleeves and start by creating our back end server with fast API.
Welcome back.
So the first thing that I want to do is I want to create a folder that will contain both back end and front end folders.
So let's go to the desktop.
And let's create a folder farm stack underscore project.
First, we will care about the backend folder.
So let's create that.
And let's open this with Visual Studio code.
Alright, great.
So the first thing that I want to do here is to create requirements dot txt.
And this is for the dependencies and will need to have three dependencies.
So the first one is fast API, obviously.
So fast API with version zero, point 65.1.
Also, I will need unicorn.
And unicorn is just the fast as the server implementation that helps in the interaction between your application that we're going to build and the backend.
So this is the core of fast API, especially that fast API is in a synchronous framework, which heavily depends on a sink await syntax.
And therefore the use for an ASCII server was essential.
So the version is zero.
Point 14.0.
And also, I will need motor and motor is 2.4.
point zero, which are actually is a full featured non blocking IO MongoDB driver.
So this works for Python in general.
And it's working with fast API, of course, in our case, and also works with her native framework.
tornador is also an awesome a synchronous framework.
And mature works with all kinds of async IO applications as MongoDB driver.
So this is what matorral goes.
Alright, so let's go ahead and activate our virtual environment, or use Pipi and V if you don't have been v installed, you can install it via pip install PIP in V.
Alright, but I have it already.
So I will not do that.
Let's go ahead and activate that by saying Pipi and V shell.
Alright, great.
Now we have our virtual environment activated and the PIP file is created.
But still, we will need to install the dependencies.
So what we're going to say is Pipi and V install dash r requirements dot txt, right and hit Enter.
And let's close the requirements.
We don't need that anymore.
And I will need three files.
First is main.py.
So main.py, I will need also one for the database.
So we'll call it database.pi.
And the third one for the model, just to create our main to do class.
Alright, so let's go ahead and start importing from fast API.
I want to import fast with a capital F.
API all capitalized.
And also I want to import something very important which is called course middleware.
So from fast API dot, middleware, dot course.
All right, I want to import course middleware and course stands for cross origin resource sharing.
I talked a lot about this in all our Django projects course refers to the situation when your front end client Which is running on the browser, it has naturally JavaScript code.
This JavaScript code communicates with your back end, in our case communicates with our fast API back end server.
And in this case, the back end is in a different origin than the front end.
And origins simply is just the combination of protocol, domain and port.
So you can see here that the protocol can be either HTTP or HTTPS domain, for example, our localhost or whatever, and the port might be any port.
So react will have, for example, Port 3000.
And our fast API will have a port of 8000.
And we will need some sort of permission for the back end to interact with a different origin, a different port in this case.
So this is what we're going to do.
Okay, let me just close that.
And let's just instantiate the fast API class by creating an object called app.
Okay, so this is app object.
And here I want to specify the origins.
So in this case, localhost on port 3000 of react.
And if you won't do this, there will be no connection between both there will be no permission, okay, for the headers, the methods, so we will need to allow headers and methods.
Okay, so in the origins, this is going to be a list with https colon slash slash localhost colon 3000.
Next thing that we want to do is we want to take our app object, and we want to add the middleware, add middleware, this one, okay, so this method will take first of all, the course, middleware, course, middleware.
Next, I want to allow origins to be equal to the origins list.
Also the credentials, we will set it to true, and I want to allow methods, we will set it to everything or star.
And also we want to allow headers.
And let's just go ahead and create a basic route.
So app app app, this is the creator dot get method and just type slash, this is an empty route.
Basically, we want to create a method or function, we'll call it trade routes.
And we want to return something like let's say ping pong.
Alright, so let's check out first if the main page is working or not.
And in order to run server, we'll say UV corn main app.
And I want to work on our reload mode.
So you don't have to disconnect from the server and reconnect again, in order to see the changes on the application.
This happens instantaneously once you refresh the page.
Alright, perfect.
So let's go ahead and open that.
And we get ping pong.
Now the cool thing about fast API that you can access this documents called swagger, swagger UI.
And I've talked about this many times in all my vast API projects on the channel in the course, I have also another video on vasti, API's introduction.
And I showed everything in details about the swagger UI, right? So make sure to check that out.
All right, great.
So this is good.
But this is useless to us, it's just to make sure that the server is responding.
So basically, in the to do application, we need four main, four main operations write the crud operation.
So we need to read all to dues, we'll need to post a to do update, and delete.
And we can also get to do by ID, if you want a specific to do you can get it by its ID.
Right.
So let's work on that very quickly.
Let's just minimize this for now and maximize this.
So let's have another decorator dot get.
And here we want to access API slash to do let's now work with a sink await code.
So we will define a method we will call it get to do and open close paren column.
And for now, we'll say return just one.
So I will need the same code basically, for the to do by ID.
So here I want to have an input of ID.
Alright, so I need the to do by this specific ID and I will change the method Naturally, so we're gonna say get to do is the same by ID.
And here I will pass the ID as a parameter or an input.
I also want to post an ID.
So it's the same code as the get.
But instead of gap, we'll change that to boast.
And here we'll say, post to do.
And we will pass the input as to do, I want also to update and delete, right, so I will need two more functions.
Okay, selling just organizes a little bit.
So here, I want to update the to do by its ID.
So I will need to enter the ID of the to do that I would like to modify or edit.
And here I want to change the method will say, put to do and instead of to do we want the ID because we want that ID to change.
And I want to change the actual beta of that to do.
And, last but not least, we want to delete out to do, okay, so, also to do by ID, if we want to access a specific to do item, and we want to delete it, so I need to specify the ID for that.
And here, I will change the method, say, delete.
And instead of to do I want to delete that to do item with that specific ID, first API object has no Oh, sorry, put, there's no HTTP request called update, or get post, put and delete.
Alright, so we're good to go.
Let's actually take a look to what we have.
Let's refresh the page.
And boom, we have all the methods that we have created.
So we have get all to dues post or to do get to do by ID, but to do and delete to do.
Alright, perfect.
So far, so good.
Now what they want to do is, I want to go to model.py.
And I want to import from pedantic and pedantic actually helps you to auto create your JSON schemas from the model.
So we're going to create a class now.
And it works like an object relational mapper.
So it will take from the model, and we'll connect with our database that we're going to create in a second.
So we want to import B's model class, then I want to create a class called to do with Bayes model as a parameter.
And I want two things only I want the title, which is a string.
And I want a description, description, which is also a string.
And that's all what I need to do.
So let's close model.py.
And let's work on our database now.
So here, what I want to do is to import the to do class from the model.py.
So from model I want to import to do.
And also I want to import the motor module.
So import what or dot motor underscore a sync i O.
Okay, so this is the Mongo DB driver.
All right, and let me just open the MongoDB campus.
So everything will be clear to you guys.
But in the meantime, I want to create a client object.
And this is going to be equal to one Tor dot Mordor underscore a sink IO.
And I want to access the async IO model client, this one right here.
And this is essentially for the connection between the database.pi and Mongo DB.
So we will need to pass in a string, Mongo DB, colon, slash slash, and local host colon 27, zero 17, which is the default port for MongoDB.
As we said before, this is column.
Alright, so this is a very important step.
And we have our Mongo DB campus is ready.
But we'll leave it for now.
Let's continue.
Let's actually create the database I will call it just a database.
And this is going to be equal to our client dot our database, let's call it to do list and inside our database, we want to create The collection.
So our collection, which is the same thing as a table in SQL, so the collection is going to be equal to the database.
And we want to have a name for the collection.
Let's call it just to do.
Right, so we have a database called to do list.
And we have a collection, which is called to do.
Alright, great.
Now let's go ahead and work on our main functions.
So the first function that I want to create here is to fetch one to do.
So we'll say a sink deaf, and I'm going to say fetch one to do.
And it's going to take the title as an input.
And here, the document is going to be equal to the collection dot find one.
And I want to specify the title to be equal to whatever title is going to be entered.
Okay, so the title is set to whatever title here.
and here also, I want to wait for that, right, and then I want to return that document.
Okay, so this is the first get, so we want to get one to do.
There is no doubt here.
So in order to get one to do we get it by title, and take a look to model, this is the title or the ID, which is set in our function in the main.py file.
Okay.
So I hope that's clear for you guys.
Next, I want to get all the to dues.
So we'll say def, fetch all to dues.
And I don't want any parameters.
And let's create a list of to dues.
And let's declare a variable called cursor.
And cursor is going to be equal to the collection dot a method called find.
And what we want to do essentially is to loop over any document in the cursor.
So let's again, use the sink, keyword for document in cursor, I want to expand in the to dues list, whatever to do with any document.
Okay.
So this is basically the data that I'm going to retrieve, and I want to return everything in that collection.
And finally, I want to return all the to dues.
Alright, so don't forget that this to do is the main class that we have defined in the model.py.
Next thing that we want to do is to create a to do so let's actually create a to do by the finding create, to do function.
And here we want to take to do as the main parameter or main input.
So the document is going to be equal to the to do.
And oops, what did I do since then I want to declare a result variable in order to await for the collection to insert that document in the collection.
So let's, uh, wait for the collection to insert one, this is a method called insert one.
And we will insert whatever document that we're going to create, okay, whatever, post or whatever to do item that we're going to create.
And also I want to return that document.
Next, we want to update it to do so a sync.
def, and we will call it up date to do and this takes the title and the description.
Okay, both are set in the model class in the in the model.py in the to do class.
Oh, okay.
And by the way, if you're wondering what's insert one method, what's that? Find as well.
These are MongoDB functions or methods.
Okay, so we are writing MongoDB code actually, inside our Python file.
So the motor module which is the MongoDB driver helps us to connect the database.py file with our MongoDB database.
Alright, so let's get back to our code.
So await the collection to an Another MongoDB method called update one.
So how MongoDB works, when we want to update one item, we want to choose a specific item.
And in order to do that, we will need to have a criteria.
So which item do we want to update.
In this case, we want to choose by the title.
So the title, whatever title is set to, and Next, I will have the actual item that I want to update.
So I want to use the set operator by using the dollar sign set.
This is inside double quotes.
And this is set to whatever the description that I'm choosing, and the actual description that I'm updating.
So we will have another set of curly braces.
And here I want the description that I have chosen to update for the actual description that I want to enter or update.
Right, I hope you guys following then I want to render that document or return that documents.
So I will declare another variable called document to await the collection dot find one with the title that corresponds to that item that I have updated, okay, and will return that document.
Alright, so this is the update to do.
The last method is to delete a to do.
So I'm going to call it remove underscore to do.
And it takes a title as a parameter.
So if we want to delete an item, we should enter the title first.
And let's await for the collection to delete one, which is another MongoDB method.
And we'll set the title to be equal whatever is the title that we have entered.
And we want to return a boolean value.
And we'll set it to true.
Alright, great.
So let's save that.
And let's go ahead to main.pi in order to modify these functions that we have created based on these functions in the database file.
Right, so this is 3000, the React JS sport, I want to import also from fast API HTTP exception.
And this is just for errors and exceptions.
So actually, this class what it does, it generates some exception information for us.
All right, perfect, then what I want to do now is to import from database, all the functions that we have created.
So let's actually go to database dot p y.
And let's take this from here, copy.
So this is the first one.
Alright, so we have imported the functions from database file.
Next, what we want to do is to work on these methods.
And let's start by the get to do in order to return just one, we want to have a response, right.
So response is going to be equal to a weight for fetch all the to dues, which is there you go.
Alright, one of those functions that we have created in database.pi.
And you can see here that this actually returns a coroutine.
Right, and I've talked a lot about co routines, concurrent code concurrency in general, in different videos before, I will leave all the links in description below, you can check them out.
So we want to fetch all the two dues, and we want to return the response.
The second function is to do by title, so we'll substitute the ID with the title.
Okay, and we want the response model to be equal to the to do class.
So the response model is equal to the to do class in our model.py file.
In here also, instead of ID, we want a title.
Let's have a response as well.
And our response is going to be equal to fetch want to do by title and don't forget the await.
And I want to handle exceptions.
So I will say if the response if response means if response is true.
We don't have any errors.
Then we will return the response.
Otherwise, we will raise an HTTP exception.
And this is going to be 404.
And the 404 is a status code four page not found, then what they want to say is, there is no to do item with this title.
Alright, let's actually make it nicer.
So let's put a format string.
And let's return that title, whatever title that we're trying to retrieve.
So let's move on to the next function, which is posting to do, I want also the response model to be equal to the to do class.
And here, I want to set the to do to be equal to the to do class.
And I want to take that to do take a look, here, we have set the document to to do, and we are going to insert a document in the collection.
So this is a JSON, but we want to convert that to a dictionary.
In order to do that, we will declare a variable called response.
And response is going to be equal to the Create to do function that we have defined.
And I will take the to do and I will convert it to dictionary.
And again, I want some exception handling.
So response, then returned a response.
Otherwise, I want to raise HTTP exception.
In here, we'll say we'll enter 400.
Something went wrong.
By the way, 400 is the status code for bad request, okay, so you can type something went wrong or bad request.
Alright, the next function that we want to modify is put to do so we want to change the ID by let's actually change all IDs by title, we will take the response model also, and we will set it to the to do class.
And for the main function, we want the title, we will set it to string and also the data, we will set it to strength and date.
Also, we want to change it to description or desk in the database in the update function, you see here, title and desk.
So the response is going to be equal to the update to the function.
And this takes the title and the description.
And also it wants some exception handling.
So again, we can take this one, and we'll paste it here with the same status code for all four.
And last but not least, we have the Delete function.
So let's remove that.
And let's have a response as usual.
And we will take the Remove to do remove to do function.
And we'll remove the item by the title.
If you remember here, we have set the title and also I want some exception handling.
So if response is returned is okay.
We want to return a message saying successfully deleted to do item.
Otherwise, we want to raise exception, we can take this one.
we'll paste it here.
And that's basically it.
So we have the the lead the put the posts, get to do by the title by ID, and get all to dues.
Alright, cool.
We are pretty much done with our database side.
Now let's go ahead and check out the swagger UI or the fast API docs, and how we can connect it to the MongoDB database.
And we'll see this interaction with the MongoDB campus.
Right so let's do it.
Alright, so we have here our fast API docs or the swagger UI, where we can interact with our database.
And I have on the other side, my Mongo campus is opened.
And let me show you until I was connected.
Let me Disconnect for the moment and show you what I did.
So as I showed you at the beginning of the tutorial, you can copy MongoDB colon slash slash localhost, right? And connect.
And boom, you're connected.
And here you have the to do list that we have created.
And this is because of the motor MongoDB driver.
So let's actually try that out.
Let's go ahead and try to post a to do.
So let's say, to do item one.
And in the description, let's say for instance, walk the dog.
Execute, right within have any problems.
So let's check that out here in the to do list.
To do.
And boom, we have to do item one, walk the dog.
Alright, let's reset, cancel, let's close that.
And let's check out here in the gap to dues so try it out.
Execute.
And we have the same to do item one, walk the dog.
Let's have another one, for example posts.
And let's say to do item two, and here, let's say run two kilometers.
Alright, then let's execute.
Okay, cool.
Let's refresh here, and boom to do item to run two kilometres.
Alright, so it's working perfectly, our fast API back end server is interacting with MongoDB database.
Alright, so let's delete.
To do it should be the same as in the title.
So let's say that I want to delete to do item two.
So to do item space to execute.
Alright, successfully deleted to do item.
And if we will refresh, he disappeared.
Alright, so in the next part, we're going to move on to fleshing out the front end with react js.
Welcome back.
So as our back end is working perfectly and interacting with the MongoDB server, we will now need to create our front end site, and we will make it communicate with the back end.
So let's go ahead and create our react app.
And I will use create react app COI for that.
But before we'll need to go to desktop.
And we will need to access farm stack underscore project folder.
Alright, and just to make sure that we have only one folder, which is the back end.
And now we can use that command NP x, which stands for node package execute.
And I will use create react app.
And for more information about create react app, please check out the card that will appear right now.
And this will take you to a react and Django video tutorial for back end developers.
So there I talked a lot about create react app, what it is and what it's doing for your project.
Following that the name of the project or the name of the folder, so we'll call it front end.
And the installation of the project is going to take some time.
So I will pause the video here.
And then we'll be back when it's all done.
Alright, cool.
So we have our front end project ready.
In order to run it, we need to see the two front end to change directory to front end folder, then NPM start.
Alright, great.
So this is the default react application, the development server is running on port 3000 are listening on port 3000.
Just before we go on, I need just to exit the server.
And we will need to install two things.
The first is axios.
So sending requests from the client to the server and getting the responses from the server or the back end server to the client is the role of axios.
Also we need bootstrap.
So boot strap.
And yeah, that's all oops, what did I do npm install axios bootstrap.
Alright, cool.
So let's go ahead and open the app with Visual Studio code.
We just let's CD out and open the whole folder with Visual Studio code.
By the way, this j s hint has been bothering me for some time.
If you have the same issue or if you dealt with this issue, please let me know because I've installed GSN globally, but seems that now I think happened really.
But I think it won't affect our project.
So let's ignore that for the moment.
And let's go ahead and import bootstrap slash dist slash CSS slash bootstrap, dot min dot CSS.
Alright.
Just to import bootstrap this the first thing we need to do index dot j s, okay.
And that's pretty much it for index dot j s, which is the main entry point for our application, app dot j, s four, we're going to spend most of the time I want to chillie get rid of all that.
And let's just type hello world.
formstack.
Alright, cool.
Let's delete the logo, we don't need that.
So see, even if you have here, our red line, yellow line truly doesn't affect anything.
We just, it's annoying really.
If you happen to know the solution for this, please let me know in the comment section below, because I really couldn't find a suitable solution to solve this problem.
So let's get rid of everything.
We will leave the app.
Let me actually delete all of that.
And we'll leave the app.
This is the class name.
For the app application.
It has a class name of app.
So here we will have some just general settings.
So the text align, we'll leave it to the center.
margin, we'll give it zero padding, we'll set it to zero, and font family, we will use this one.
Alright.
And that's all.
So we'll close the app dot CSS.
And let's go ahead and work on the app file.
So I'll just delete that.
Or we'll leave it just we'll leave it just for sanity check.
So before we do anything, we will need to import react first, right, so it just make this bigger for you guys.
So we will import react.
Also, we will need two functions use state and use effect from react.
We also want to import axios from axios.
And also we want to import the bootstrap.
So let's go here.
We'll import bootstrap.
Let's first work on the visual side, then we will work on the logic.
So let's go ahead and have a div with a class name of app with lists group item.
These are bootstrap classes.
Also, we want to justify content center align items center with a horizontal margin set to auto.
So in order to add styling to JSX, we will have double curly braces and inside you can enter whatever style that you want.
So I want to set the width to 400 pixels.
And also I want the background color to be white, and the margin top to be 15 pixels.
And inside the div I will have a title with h1 tag, we will call it Task Manager.
Alright, great.
So this has a class name of card with text white primary background, which is the blue one and margin bottom set to one below the task manager I want to add h6 tag with three words fast API, react and MongoDB.
Then I will have another div with a class name of card body.
Inside that main Dave, I want to have an h5 tag with a class name of card and I will say add your task.
This has a dark background with margin bottom three, and the text is white to have the contrast.
The next thing that I want to do is to create two input fields, one for the title and the other one for the description and a button This button is to add your task.
So in order to do that, I will wrap everything around a span this span will have a class name of card text.
So this is the first input and this is the second input for the description.
So both they have MB two or margin bottom two with form control with different names, title in and d s in and both they have placeholders so one with title and the other one with description.
The next element in our application is the Add task button.
So it has a class name of btn with btn outline primary.
Alright, so I've given it a border radius with 50 pixels to give it that rounded shape around the button.
And also set the font weight to bold.
And this is everything inside the span.
So the idea here is when you will enter the title and the description, and you will add the task, the task will appear below here with one button only, which is the Delete below the span.
And on the same line with the add your task h5 tag, I want to add another h5 tag with your tasks, let's actually give the button some margin bottom in order to have some space.
So MB, we'll set it to two, that's better.
And then what we want to do is to display all of your to do is below your tasks.
Alright, so let's have a div.
Inside that div, we should plug all of our to do items.
And this should be an external component.
And down here below, I want to create a copyright mark.
And you're free to change the colors if you want.
Of course, this has a background of warning, which is the yellow one, right? With a class of card decks dark BG warning, padding why on the vertical axis with one and margin bottom of zero, just don't forget to delete that Dave below.
And that one, because I've written it again.
Okay.
So it's the same thing.
Once we save, nothing will change.
Alright, so before we move on and create our components folder with the different components, there are a couple of things that we need to do in our function.
The first thing we need to do is to create different variables, one for the to do list, one for the title, and another one for the description, and all of them will be set to use date.
So set to do list will be set to use date with an array of empty object.
And inside here, we will append the items each time you will add a task.
Also, we will set the title.
And we'll use the state for just anti strained, nothing for the moment, the same thing goes for the description.
And once you add a title and description, hit Add task, everything here will change.
So this is the usefulness of use state function.
The next thing we want to do is to read all the to dues for that I will use use effect method.
And we'll use use effect in order to accept the HTTP request methods like get post and so on.
So the first thing we want to do is to read all of the to dues.
And this, what we'll do is that it will send a get request to the fast API back end server, okay, then, this callback will return a promise and we handle promises with that then, and having a response as an input, we should access all the data inside that input, or the response.
All right, and all of that is wrapped inside the set to do list that we have defined here above.
And the last thing we need here is to post a to do to add a task actually when we click on the Add task button.
So this add to do handler variable, which is set to a callback function, which doesn't take anything as an input, returns that post request.
So the first parameter is the origin.
So HTTP localhost Port 8000 for the API and to do, and we want to display the title for whatever title it is, and the same for the description.
And then we have a callback as a response that goes for the response as an input, and we can console log rez or we can just alert dress, this is just for verification step.
Now what we'll need to update both input fields and the Add task button.
Alright, so the first input field which concerns the title, we will update it with the on change attribute, this takes and event as a parameter, then it returns set title which we have set here above and inside the set title we have a parameter of event dot target dot value, the same exact thing goes for input.
So input also we will have on change attribute with an event that set the description for event dot target dot value.
Last but not least, we have the button so for to button we have apt to do handler function here.
So the button should be updated in order to reflect the changes that will occur when we click on the button.
And don't forget to re add the margin bottom three in order to push the your tasks a little bit below.
So this is pretty much everything that we need to do for Abdo j s The last thing that we need to do do is to add the to do items inside both div tags.
So let's go ahead to our source folder.
And let's create a folder called components.
And inside components, I will create a file I will call it to do dot j s, and another file called to do list view dot j, s To Do List View dot j s.
First of all, let's go to to do and let's import axios and react.
Now I want to create a to do item function that it will take as a parameter props.
Inside that function, I will declare a variable called Delete to do handler, and I will set this to a callback function that takes title as a parameter in order to delete whatever to do item that we want to specify by the title.
And what we want to return actually is the item itself.
And next to that item, we will have a delete button.
So you can see here we have a div with a paragraph span with a style.
And we will enter or we will plug the props.to do dot title.
So the title first, and this is going to be bold, then a colon, and then we want to have the description next to it.
And then after we'll have a button with onClick attribute is going to be set to a callback function which doesn't take anything as a parameter, and it will return to the lead to do handler function that we have created above here.
Again, it will take props.to do the title.
And why is that because we want to search that item in function of title.
So the main criteria for deletion is the title, also will will have a class name with a button.
And all of that is again bootstrap classes.
So now we have our to do dot j s ready, we want to import that in the to do list views dot j s.
But before we do that, we need first to export the to do item function.
Alright, in order to import it in the to do list view dot j s, so we will import the to do item from current directory.
Where is the to do dot j s.
Alright, and then I will need the function that I'm going to plug inside my app dot j s here.
So all the items that will appear below should be created in our to do ListView dot j s.
So let's go ahead and create that function, we'll call it to do view and he takes props as a parameter.
And what it will return simply a ul or unordered list.
And the props.to do list dot map which is one of the array methods like reduce filter and sort.
And we're going to map whatever to do and plug it inside that to do item.
So that to do item that we have imported from the to do dot j s here.
Alright, so this is how it's working.
And let's not forget to export it.
So in order to test everything together, let's go ahead and open our back end server.
So we'll go to back end.
And UV corn main app load.
Okay, good.
So it's listening on port 8000.
So if we will refresh the page.
Okay, cool.
Just make this a little bit bigger, there is something very important that we forgot to do is to import the to do view from the to do list.
Alright, so we'll need to do that below the bootstrap.
And now instead of that comment, we will add our actual to do item.
Alright, perfect.
So we have our front end, running on that instance of the terminal.
And we will need also to open a new terminal instance for the back end.
So unicorn main app, reload.
Okay, great.
So let's open our fast API swagger.
Alright, so for the moment, our database doesn't hold any data.
So this collection has no data, as you can see here in the MongoDB report.
On this side, we have our back end server, our fast API server.
This is the React application, our client, and here we have our database server, our MongoDB database server.
So let's try to add a to do item.
So we'll say to do one, study rust language.
At ask ambu to do one study rust language.
Alright, and if we will refresh here, we will have this document created in our database.
So we'll have an ID, which is very similar to the primary key in the SQL world.
This is auto generated by MongoDB.
We'll have our title and description.
Right, let's try to add another one to do to run 10 kilometers at dusk, refresh, the same sleep at 9pm, add task, refresh, and so on.
So you can see what's happening.
It will delete, let's say, to do to delete it from here, refresh, it will disappear.
Let's add another one.
So let's say to do for sketching at dusk.
So it adds below.
And if you will go to the backend, you will find the same information.
So let's try to access actually API slash to do and you will find all of our to dues.
All right, everything here.
Similarly in the docs, when you will hit when you will click on get to do try it now or try it out.
Execute, you will find your two dues.
This JSON format right and let's refresh that as well.
So to be identical Okay, so this was an introduction to the farm stack and how we can work with the three technologies.
If you liked the video, please like it, share and subscribe to the channel.
And I appreciate your support guys.
Thank you very much.
If you have any questions, please let me know in the comments section below.
Take it easy