

We've all encountered the frustration of waiting through long loading screens, only to find ourselves stuck with unresponsive pages. You see loading spinners everywhere, but nothing seems to move forward. Let me paint a clearer picture for you:
This typically happens because the website is trying to fetch all the necessary data as soon as you land on the page. It could be that a API request is being processed, or multiple APIs are fetching data sequentially, causing delays in loading the page.
The result? A poor user experience. You might think, "How can such a large company not prioritize user experience? This is disappointing." Consequently, users often leave the site, affecting key metrics and potentially impacting revenue.
But what if you could fetch the data for these heavy pages ahead of time, so that by the time a user lands on the page, they can interact with it instantly?
This is where the concept of prefetching comes in, and that's exactly what we'll be diving into in this blog post. So without further ado, let's get started!
Table of Contents
Prefetching as a Solution
Here’s the revised version with just the grammar and spelling corrected:
For the problem above, what we want is to fetch the data for a given page before it's loaded onto the website so that the user doesn’t need to fetch the data on page load. This is called prefetching. From a technical perspective, its definition is as follows:
It is a way to fetch the required data beforehand so that the main component doesn’t need to wait for the data, thus enhancing the experience.
This can improve the user experience, boosting the customer’s confidence in your website.
Prefetching is a simple yet elegant solution that is more user-centric than a standard process. To implement prefetching, we need to understand the user’s behavior on the website. That is, the most visited pages, or which components fetch data on small interactions (such as hover).
After analyzing such scenarios, it makes sense to apply prefetching to them. However, as developers, we should be mindful of using this concept. Too much prefetching can also slow down your website since you're trying to fetch a lot of data for future scenarios, which might block the fetching of data for the main page.
How Prefetching Improves User Experience
Let us look at couple of scenarios where prefetching is beneficial:
Loading data/page earlier for the most visited link from your landing page. For example, consider that you have a “contact us” link. Let’s assume that this is the link that users mostly check and it contains a lot of data when it loads. Rather than loading the data when the contact us page loads, you can simply fetch the data on the homepage so that you don’t have to wait at the Contact Us page for the data. You can read more about prefetching pages here.
Prefetching table data for later pages.
Fetching data from a parent component and loading it in the child component.
Prefetching data that needs to be displayed in a popover.
These are some of the ways to achieve prefetching in your application and how it helps improve the user experience.
In this blog post we will be discussing about the last scenario: “prefetching data that needs to be displayed in the popover”. This is a classic example where prefetching can be beneficial and provides a smoother experience to the user.
Understanding The Problem
Let me define the problem here. Imagine the following scenario:
You have a component that displays specific information.
There is an element inside this component that shows another popover/tooltip when you hover on it.
The popover fetches data when it loads.
Now imagine that the user hovers on the element and needs to wait for the data to be fetched and displayed in the popover. During this wait, they see the skeleton loader.
The scenario will look like this:
It’s just frustrating how long the user has to wait whenever they hover on the image:
To solve this problem, there are two solutions that can help you get started and optimize the solution according to your needs.
Solution #1: Prefetching Data in the Parent Component
This solution is inspired from Martin Fowler’s blogpost. It allows you to fetch the data before the popup appears, instead of fetching on component load.
The popup appears when you hover on it. We can fetch the data when the mouse enters the parent component. Before the actual component—the image—is hovered on, we’ll have the data for the popover and will pass it to the popover component.
This solution doesn’t remove the loading state all together but it helps to significantly lower the chances of seeing the loading state.
Solution #2: Prefetch Data on Page load
This solution is inspired by x.com where, for the popover component, they fetch the data partially on the main page load and fetch the rest of the data when the component mounts.
As you can see from the above video, the user’s profile details are viewed in the popover. If you look closely, the details related to followers are fetched later.
This technique is highly efficient when you have a lot of data to be displayed in the popover but fetching them can be costly on popover mount or on the main page load.
A better solution would be to partially load the required data on the main page and load the rest of the data when the component mounts.
In our example, we fetched the data for the popover when the cursor entered the image’s parent element. Now imagine that you need to fetch additional details once the popover data is loaded. So based on the above x.com’s method, we can fetch additional data on popover load. Here is the outcome of it:
Here, we do the following things:
We fetch the main data which is just necessary to render the popover when mouse enters the parent component of the image.
This gives us enough time to fetch the main data.
On popover load, we fetch another data, which is the album count. While the user reads data like name and email, we’ll have the next data ready to be seen.
This way, we can make small and smart tweaks to minimize the blank staring of loaders on the screen 😊.
How to Implement Prefetching with React
In this section we’ll briefly go through the how to implement the above prefetching example app.
Project Setup
To get started with creating the prefetching app, follow the process below:
You can use vitejs (this is what I used) or create-react-app to create your app. Paste the command below in your terminal:
yarn create vite prefetch-example --template react-ts
Once the app has been created, you should have the following folder structure when you open the prefetch-example folder with VS Code.
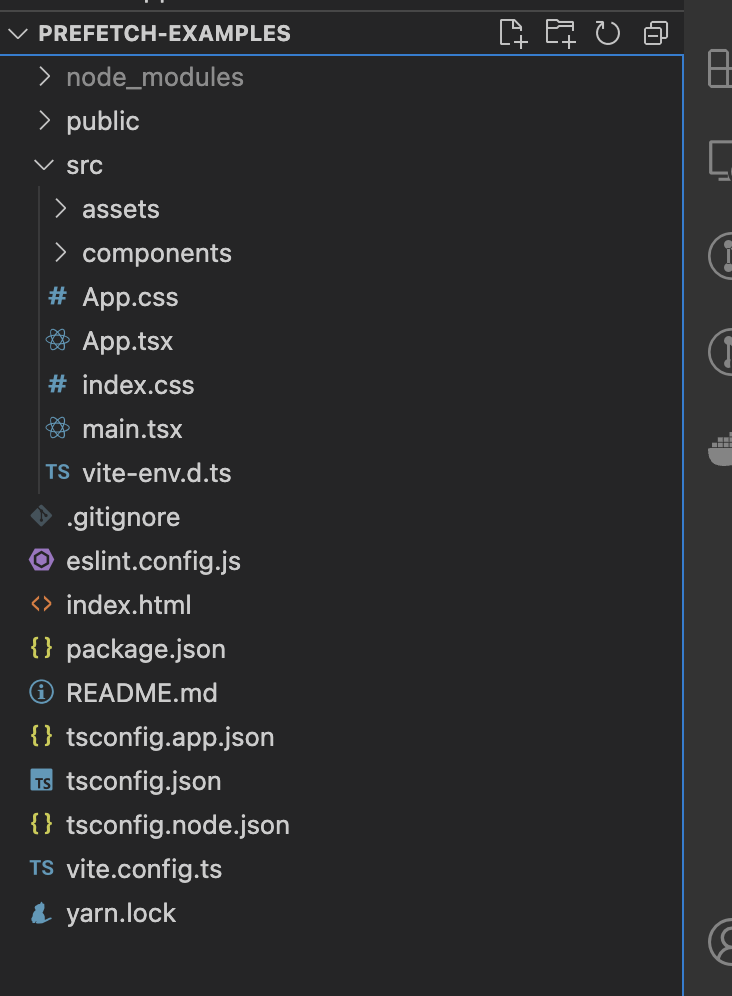
Now let us dive into the components that we are going to be building for this app.
Components
In this example we are going to be using 3 components:
PopoverExampleUserProfileUserProfileWithFetching
PopoverExample Component
Let us start with the first component which is the PopoverExample. This component displays an image avatar and some text to the right side of it. It should look like this:

The purpose of this component is to serve as an example similar to the real life scenarios. The image in this component loads a popover component when it is hovered on.

Here’s the code for the component:
import { useState } from "react";
import { useFloating, useHover, useInteractions } from "@floating-ui/react";
import ContentLoader from "react-content-loader";
import UserProfile from "./UserProfile";
import UserProfileWithFetching from "./UserProfileWithFetching";

export const MyLoader = () => (
    <ContentLoader
        speed={2}
        width={340}
        height={84}
        viewBox="0 0 340 84"
        backgroundColor="#d1d1d1"
        foregroundColor="#fafafa"
    >
        <rect x="0" y="0" rx="3" ry="3" width="67" height="11" />
        <rect x="76" y="0" rx="3" ry="3" width="140" height="11" />
        <rect x="127" y="48" rx="3" ry="3" width="53" height="11" />
        <rect x="187" y="48" rx="3" ry="3" width="72" height="11" />
        <rect x="18" y="48" rx="3" ry="3" width="100" height="11" />
        <rect x="0" y="71" rx="3" ry="3" width="37" height="11" />
        <rect x="18" y="23" rx="3" ry="3" width="140" height="11" />
        <rect x="166" y="23" rx="3" ry="3" width="173" height="11" />
    </ContentLoader>
);
export default function PopoverExample() {
    const [isOpen, setIsOpen] = useState(false);
    const [isLoading, setIsLoading] = useState(false);
    const [data, setData] = useState({});

    const { refs, floatingStyles, context } = useFloating({
        open: isOpen,
        onOpenChange: setIsOpen,
        placement: "top",
    });

    const hover = useHover(context);

    const { getReferenceProps, getFloatingProps } = useInteractions([hover]);

    const handleMouseEnter = () => {
        if (Object.keys(data).length === 0) {
            setIsLoading(true);
            fetch("https://jsonplaceholder.typicode.com/users/1")
                .then((resp) => resp.json())
                .then((data) => {
                    setData(data);
                    setIsLoading(false);
                });
        }
    };

    return (
        <div
            id="hover-example"
            style={{
                display: "flex",
                flexDirection: "row",
                alignItems: "center",
                textAlign: "left",
            }}
            onMouseEnter={handleMouseEnter}
        >
            <span
                style={{
                    padding: "1rem",
                }}
            >
                <img
                    ref={refs.setReference}
                    {...getReferenceProps()}
                    style={{
                        borderRadius: "50%",
                    }}
                    src="https://cdn.jsdelivr.net/gh/alohe/avatars/png/vibrent_5.png"
                />
            </span>
            <p>
                Lorem Ipsum is simply dummy text of the printing and typesetting
                industry. Lorem Ipsum has been the industry's standard dummy text ever
                since the 1500s, when an unknown printer took a galley of type and
                scrambled it to make a type specimen book. It has survived not only five
                centuries, but also the leap into electronic typesetting, remaining
                essentially unchanged. It was popularised in the 1960s with the release
                of Letraset sheets containing Lorem Ipsum passages, and more recently
                with desktop publishing software like Aldus PageMaker including versions
                of Lorem Ipsum.
            </p>
            {isOpen && (
                <div
                    className="floating"
                    ref={refs.setFloating}
                    style={{
                        ...floatingStyles,
                        backgroundColor: "white",
                        color: "black",
                        padding: "1rem",
                        fontSize: "1rem",
                    }}
                    {...getFloatingProps()}
                >
                    {isLoading ? (
                        <MyLoader />
                    ) : (
                        <UserProfile hasAdditionalDetails {...data} />
                    )}
                    {/* <UserProfileWithFetching /> */}
                </div>
            )}
        </div>
    );
}
There are couple of things happening here, let me explain them step-by-step:
We have a parent
divnamedhover-examplethat contains an image and some text.Next, we conditionally rendered a
divwith class name offloating. This is the actual popover component that opens when you hover on the image.- We made use of the
floating-uilibrary and its basic hover example to achieve the hover effect for the popover.
- We made use of the
Inside the popover we conditionally loaded the
UserProfileand the skeleton loader. This loader appears when we are fetching the data for the user’s profile. More on this later.We made use of the react-content-loader library in the
MyLoadercomponent. This library also has a website that helps you to create loaders, you can check it out here.
UserProfile Component
Now that we have defined our Popover example, it is time for us to get into the details of the UserProfile component.
This component appears inside the popover component. The purpose of this component is to load the name email phone website details which are fetched from JSON placeholder API.
To demonstrate the prefetching example, we have to make sure that the UserProfile component only acts as a presentational component; that is, no explicit fetching logic is present inside of it.
The key thing to note about this component is that fetching the data happens from the parent component which is the PopoverExample component. In this component, we start fetching the data when the mouse enters this component (the mouseenter event). This is the solution #1 we discussed previously.
This gives you enough time for fetching the data until the user hovers on the image. Here’s the code:
import { useEffect, useState } from "react";
import ContentLoader from "react-content-loader";

const MyLoader = () => (
    <ContentLoader
        speed={2}
        viewBox="0 0 476 124"
        backgroundColor="#d1d1d1"
        foregroundColor="#fafafa"
    >
        <rect x="4" y="43" rx="0" ry="0" width="98" height="30" />
    </ContentLoader>
);

export default function UserProfile(props: Record<string, string | boolean>) {
    const { name, email, phone, website, hasAdditionalDetails } = props;
    const [isLoading, setIsLoading] = useState(false);
    const [additionalData, setAdditionalData] = useState(0);

    useEffect(() => {
        if (hasAdditionalDetails) {
            setIsLoading(true);
            fetch("https://jsonplaceholder.typicode.com/albums")
                .then((resp) => resp.json())
                .then((data: Array<unknown>) => {
                    const albumCount = data.reduce((acc, curr) => {
                        if (curr.userId === 1) acc += 1;

                        return acc;
                    }, 0);
                    setAdditionalData(albumCount);
                })
                .finally(() => {
                    setIsLoading(false);
                });
        }
    }, [hasAdditionalDetails]);

    return (
        <div id="user-profile">
            <div id="user-name">name: {name}</div>
            <div id="user-email">email: {email}</div>
            <div id="user-phone">phone: {phone}</div>
            <div id="user-website">website: {website}</div>
            {hasAdditionalDetails && (
                <>
                    {isLoading ? (
                        <MyLoader />
                    ) : (
                        <div id="user-albums">Album Count: {additionalData}</div>
                    )}
                </>
            )}
        </div>
    );
}
This component makes use of the hasAdditionalDetails prop. The purpose of this prop is to load additional data when the component mounts. It illustrates the solution #2 mentioned above.
UserProfileWithFetching Component
This component is pretty similar to that of the UserProfile component. It just contains the logic for fetching data when the component loads. The purpose of this component is to show what the general solution without the prefetching technique would look like.
So this component will always load the data when the component mounts, which displays the skeleton loader.
Here is the code:
import { useEffect, useState } from "react";
import { MyLoader } from "./PopoverExample";

export default function UserProfileWithFetching() {
    const [isLoading, setIsLoading] = useState(false);
    const [data, setData] = useState<Record<string, string>>({});

    useEffect(() => {
        setIsLoading(true);
        fetch("https://jsonplaceholder.typicode.com/users/1")
            .then((resp) => resp.json())
            .then((data) => {
                setData(data);
                setIsLoading(false);
            });
    }, []);

    if (isLoading) return <MyLoader />;

    return (
        <div id="user-profile">
            <div id="user-name">name: {data.name}</div>
            <div id="user-email">email: {data.email}</div>
            <div id="user-phone">phone: {data.phone}</div>
            <div id="user-website">website: {data.website}</div>
        </div>
    );
}
The entire code for this app can be found here.
Too much prefetching can also cause slowness
A word of advice, too much prefetching is not good because:
It might slow your app down.
It can degrade user experience if prefetching is not applied strategically.
Prefetching needs to be applied when you know the behavior of the user. That is, you are able to predict the user movement by metrics and be able to tell if they visit a page often. In that case, prefetching is a good idea.
So remember to always apply prefetching strategically.
Summary
That’s all folks! Hope you like my blog post. In this blogpost, you learned that implementing prefetching can significantly enhance your web application’s speed and responsiveness, improving user satisfaction.
For further reading, please refer to the below articles:
For more content, you can follow me on Twitter, GitHub, and LinkedIn.