

Today's companies are data factories. Every interaction, transaction, and internal process generates a constant stream of information.
This data holds immense value, promising to improve decision-making, streamline operations, and unlock deep customer insights.
But data often remains siloed and inaccessible. It may be spread across different departments and systems, and it can be challenging to understand and utilize effectively.
This is where the concept of Retrieval-Augmented Generation (RAG) technology comes in. By combining the power of retrieval-based techniques and modern generative AI tools, you can build Retrieval-Augmented Generation (RAG) chat applications that allow you to interact with your data using a simple chat interface.
 What is Retrieval-Augmented Generation (RAG)?
But before you can chat about your data, a lot of “legwork” is involved. Setting up the infrastructure – the pipeline, vector database, message broker, and knowledge retrieval – is a complex and time-consuming process. This is where the open source tool Agent Cloud comes in.
In this guide, you'll learn all about Agent Cloud and what it can do. We'll start by looking at some background info and the current problems we're dealing with. Then, we'll see how Agent Cloud can help solve them.
How I Started Working with Agent Cloud
I'm passionate about new technology and developer tools, and I sit somewhere between Product Marketing, Growth, and Developer Advocacy. I specialize in the creation of high-quality, technical written content for educational purposes.
I've been involved with the web for ~14 years, the last 4 of which have been documented in punishing detail on my website.
I liked being a Software Engineer but, what I really love to do is code, design, develop, and then write.
Earlier this year I met Andrew (founder of Agent cloud) in a private Slack group. He was seeking someone who could not only write about the product but also discuss and teach people about what they're building. I reached out to him, and after two rounds of discussions, we began working together.

I started with building some cool RAG chatbots in my local and later wrote a couple of comprehensive guides on "How to Build a RAG Chatbot with Agent Cloud".
In this article, I'll teach you how to build a RAG chat app using Agent Cloud to privately and securely talk with your Google Sheets data. I'll also talk about why I think Agent Cloud is good open source developer tool.
Table of Contents:
- What is Agent Cloud?
- What is RAG?
- Challenges of Building a RAG Chatbot Without Agent Cloud
- Prerequisites
- How to Set Up Agent Cloud via Docker
- How to Add Models in Agent Cloud
- How to Create Your GCP Service Account Key
- How to Enable Google Sheets API
- How to Set Up your Data Sources
- How to Set Up tools
- How to Set Up an Agent
- How to Create a Task
- How to Set Up your App
- Conclusion
What is Agent Cloud?
Agent Cloud is an open-source platform that lets you build private, secure chat applications powered by large language models (think ChatGPT).
It streamlines this process by providing a "RAG as a service" offering and a built-in pipeline that allows you to split, chunk, and embed data from over 300 sources (including Google Sheets, Salesforce, Atlassian Confluence, BigQuery, MongoDB, Postgres Data, SharePoint, and OneDrive).

What is Retrieval-Augmented Generation?
RAG is a process for enhancing the accuracy of large language models. It does this through the on-demand retrieval of external data and by injecting context into the prompt, at runtime.
This data can come from various sources, such as your customers' documentation/web pages (through scraping), and data or documents from dozens (if not hundreds) of 3rd party applications like their Databases, Google BigQuery, HubSpot, Google Ads, Google Analytics 4 (GA4) and so on.
For those who want to dive deeper into Retrieval-Augmented Generation and understand its broader applications and significance, I highly recommend reading this comprehensive blog by NVIDIA. It offers valuable insights and context that complement the practical aspects covered in this article.
Challenges of Building a RAG Chatbot Without Agent Cloud
If you're working with these AI tools on a daily basis, it becomes easy to understand the value they bring and realize the significance of Agent Cloud in simplifying the chatbot development process.
But to fully appreciate its benefits, you should understand how chatbot development was handled before such tools were available.
Before tools like Agent Cloud, creating a RAG (Retrieval-Augmented Generation) chatbot was a daunting and resource-intensive task. You had to manually integrate various components, which required significant expertise in multiple areas.
Here are some challenges faced and the solutions the Agent Cloud team had to devise:
Data Retrieval and Management:
 List of data sources
- Problem: Ensuring that the chatbot could efficiently retrieve and manage data from sources like Google Sheets, Databases, and so on.
- Without Agent Cloud: Developers had to write custom scripts for data retrieval, often using APIs to fetch data from Google Sheets. This involved handling data formatting, error checking, and real-time updates manually. It was a time-consuming process prone to errors.
- Agent Cloud's Solution: Automates data retrieval and management, ensuring seamless and accurate integration with minimal manual intervention.
Natural Language Processing (NLP):
- Problem: Implementing NLP to understand user queries and generate human-like responses.
- Without Agent Cloud: Developers needed to integrate standalone NLP engines such as TensorFlow. This required training models on vast datasets, fine-tuning them for accuracy, and constantly updating them to handle new queries effectively.
- Agent Cloud's Solution: Offers built-in NLP capabilities, significantly reducing setup time and providing high-quality language understanding out of the box.
Scalability and Maintenance:
- Problem: Ensuring the chatbot could handle increasing data loads and user interactions.
- Without Agent Cloud: Building a scalable architecture meant investing in robust server infrastructure, writing efficient code, and continuously monitoring and maintaining the system to handle growth.
- Agent Cloud's Solution: Designed to scale effortlessly, allowing developers to focus on improving functionality rather than managing infrastructure.
User Interaction and Experience:
 Agent cloud app UI
- Problem: Creating an engaging and user-friendly interface.
- Without Agent Cloud: Developers had to build custom interfaces, often from scratch, which required additional design and development resources. Ensuring smooth interactions and responsiveness was a major challenge.
- Agent Cloud's Solution: Provides pre-built templates and easy integration options, enhancing the user experience with minimal effort.
By understanding these challenges, you can see how a tool like Agent Cloud helps the process of building RAG chatbots. It addresses the pain points of manual data handling, complex NLP integration, scalability issues, and user interface design, providing an all-in-one solution that saves time and resources.
Prerequisites
You don't need any prior knowledge of RAG chat apps or Google Sheets to follow along because Agent Cloud handles the data splitting, encoding, storage, and synchronization. This allows you to focus on talking to your data and interpreting the results.
How to Set Up Agent Cloud via Docker
First, you'll need to install Docker on your system if you don't have it already. Docker is a platform for running containerized applications.
Open your terminal and run the following command to clone the Agent Cloud repository from GitHub:
git clonehttps://github.com/rnadigital/agentcloud.git |
Use the following command to move into the newly cloned agentcloud directory:
cd agentcloud |
To run Agent Cloud locally, execute this command:
chmod +x install.sh && ./install.sh |
This command will grant executable permissions to the install.sh script and then run it. The script will download the necessary Docker images and start the Agent Cloud containers within your Docker environment.
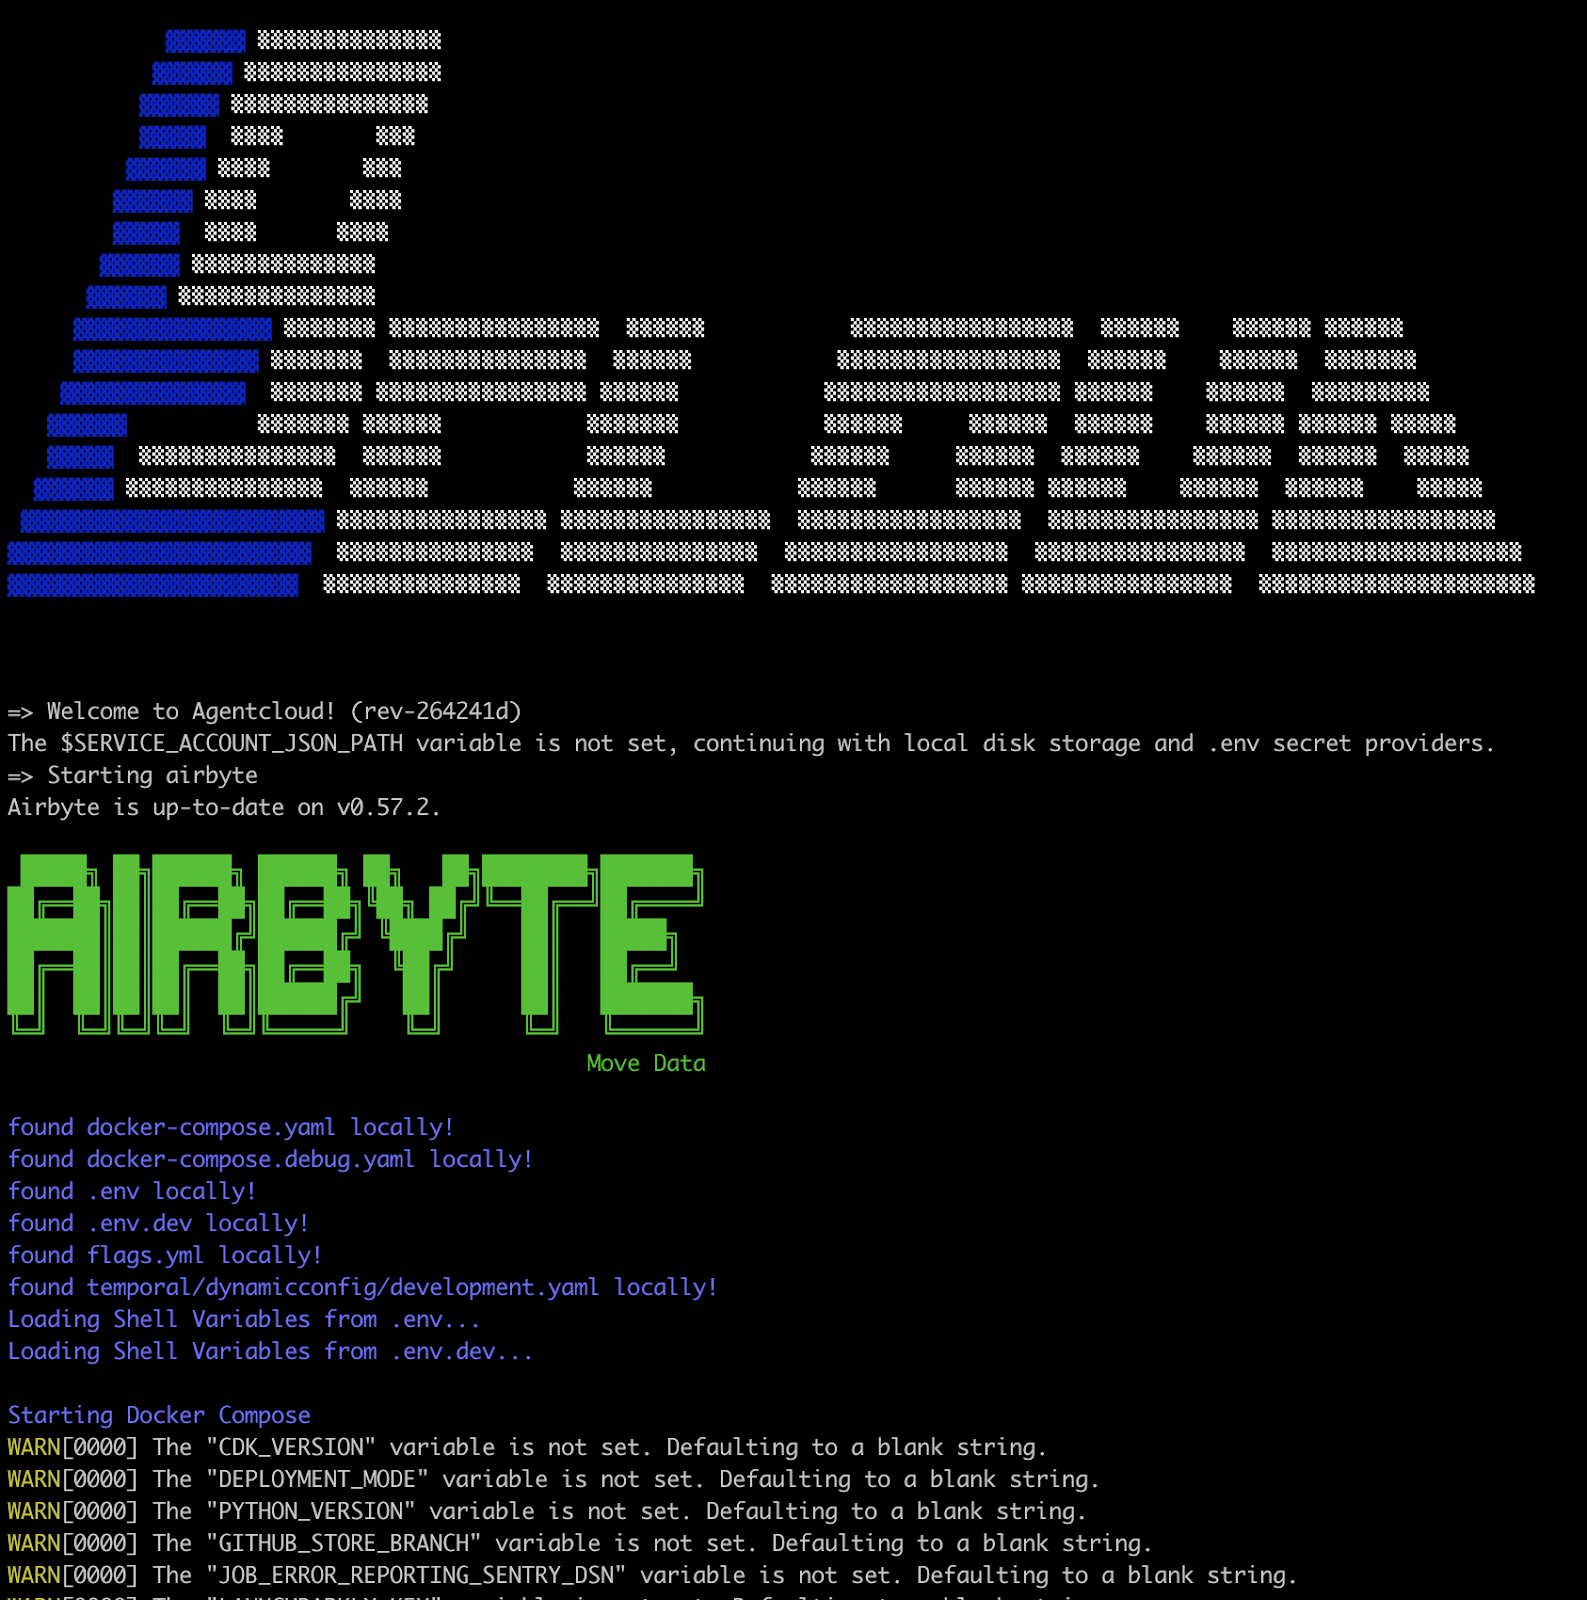
Once the installation script finishes successfully, you can view the running Agent Cloud containers in the Docker application.

Once everything is up and running, you can access the Agent Cloud user interface in your web browser.
Navigate to the URL:
http://localhost:3000/register |
This will typically open the registration page where you can create an account to use Agent Cloud.
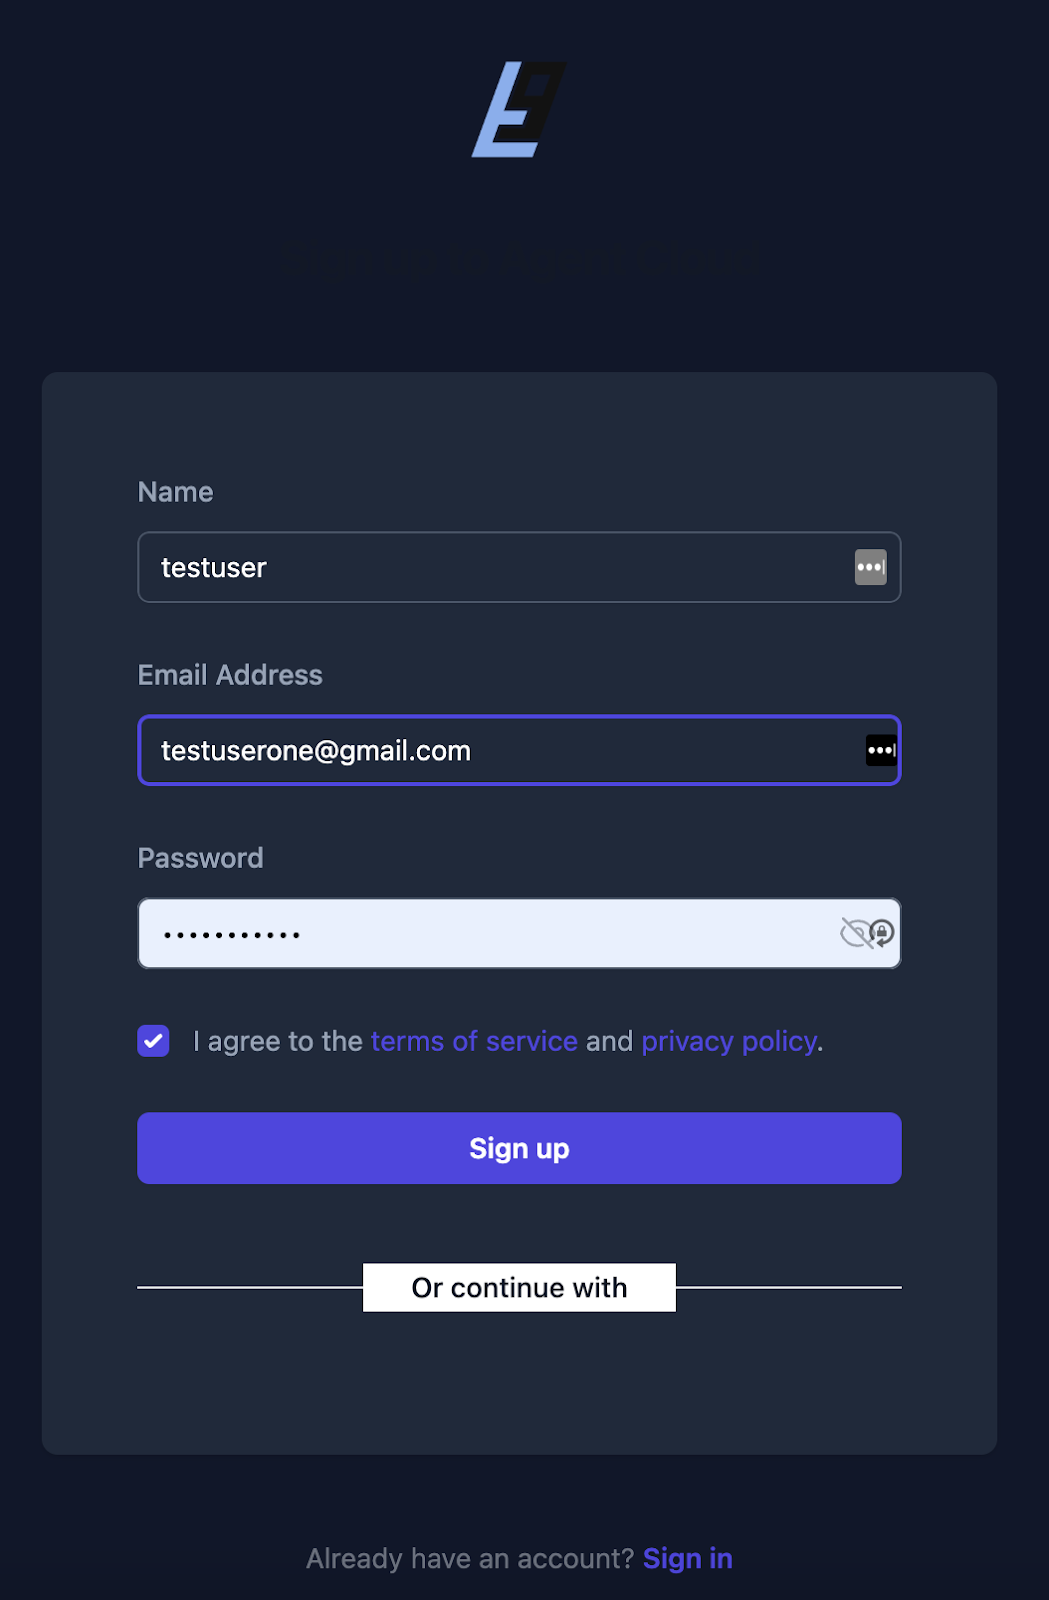
You can now log in using the credentials you created during signup.
Once you've successfully registered and logged in, you'll be greeted by the Agent Cloud user interface. This interface provides a central hub for managing your data sources, agents, tasks, models, applications, credentials, and so on.
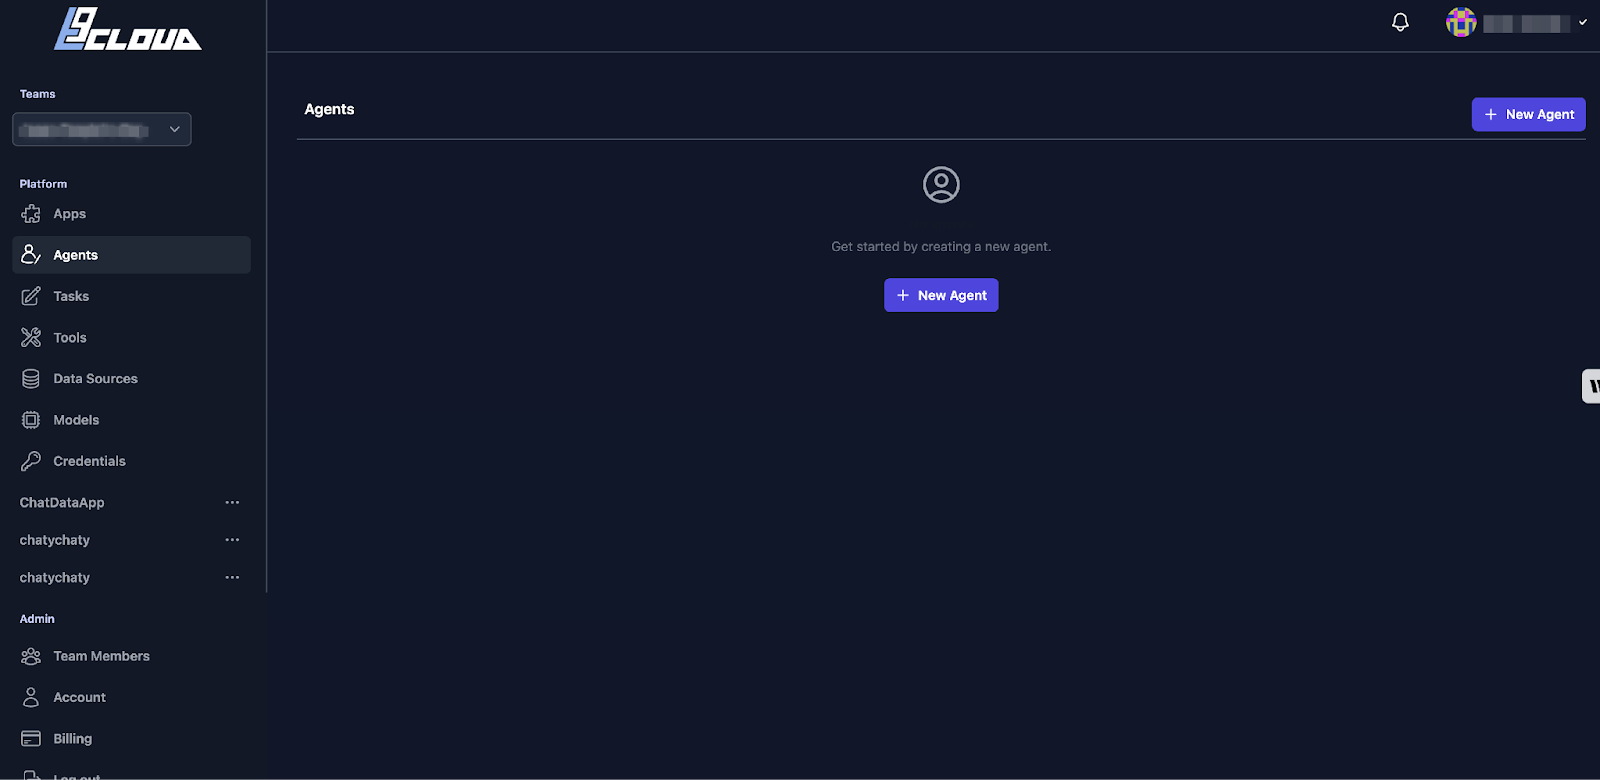
Congratulations! You've successfully set up Agent Cloud. Now let's move on to the next step and build our RAG chat application using Google Sheets as the data source.
How to Add Models in Agent Cloud
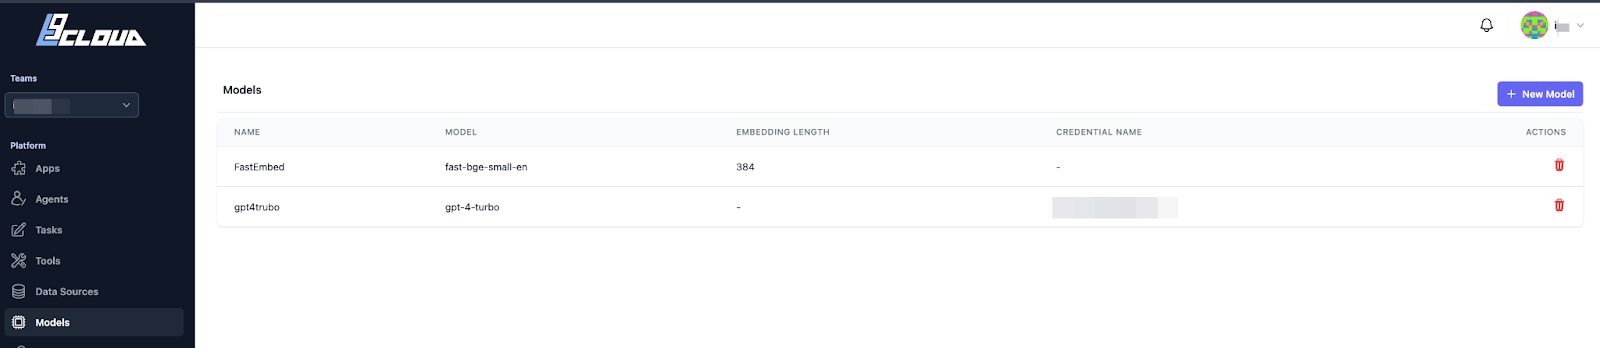
Go to the Models tab in Agent Cloud. Click the Add Models button to add two types of models.
- A fast embed model is a lightweight model that runs locally on your machine. It splits and chunks your data before embedding it.
- OpenAI is a popular cloud-based LLM provider.
How to Create Your GCP Service Account Key
Agent Cloud offers two authentication methods for accessing your Google Sheets data:
- Google (Auth) – This method involves directly authorizing Agent Cloud through your Google account.
- Service Key Account – This approach utilizes a service key, a credential specifically created for application access to Google Cloud Platform (GCP) services, including Google Sheets.
For this guide, I'll focus on the service key account method, which is generally considered a more secure and streamlined approach for application-to-application communication.
Here is what you’ll need:
- A Google Cloud Platform (GCP) project with the Google Sheets API enabled.
- A service account key is created within your GCP project. This key will be used to authenticate Agent Cloud.
I'll walk you through creating a service account key in your GCP project and configuring Agent Cloud to use it to access your Google Sheets data.
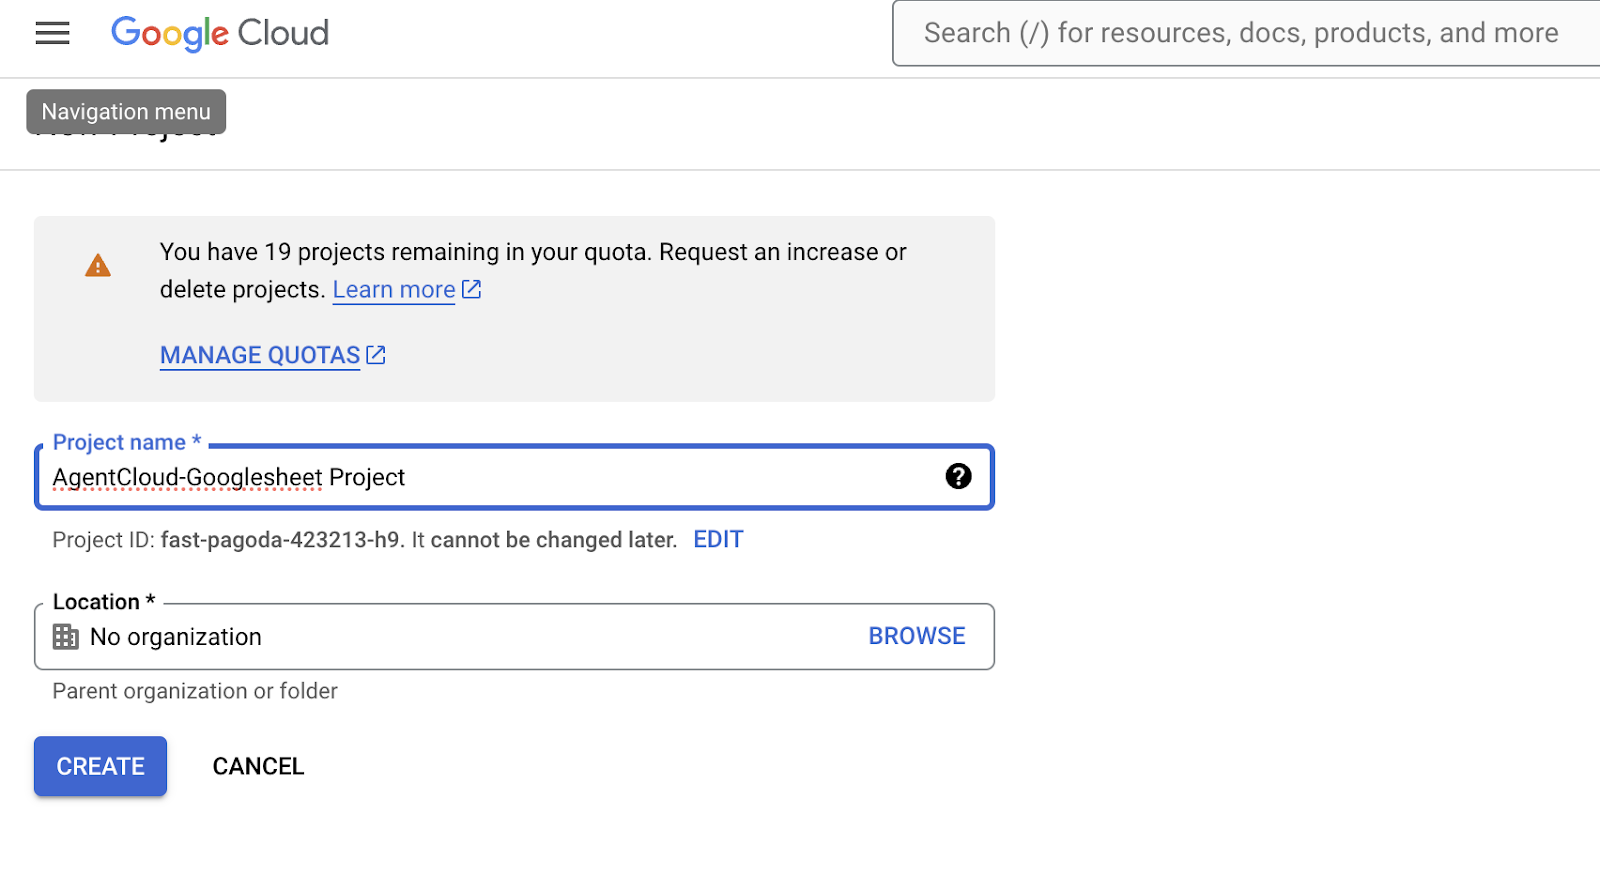
First, create a Google Cloud Platform account. Then create a new project. You can give your project any name that you prefer.
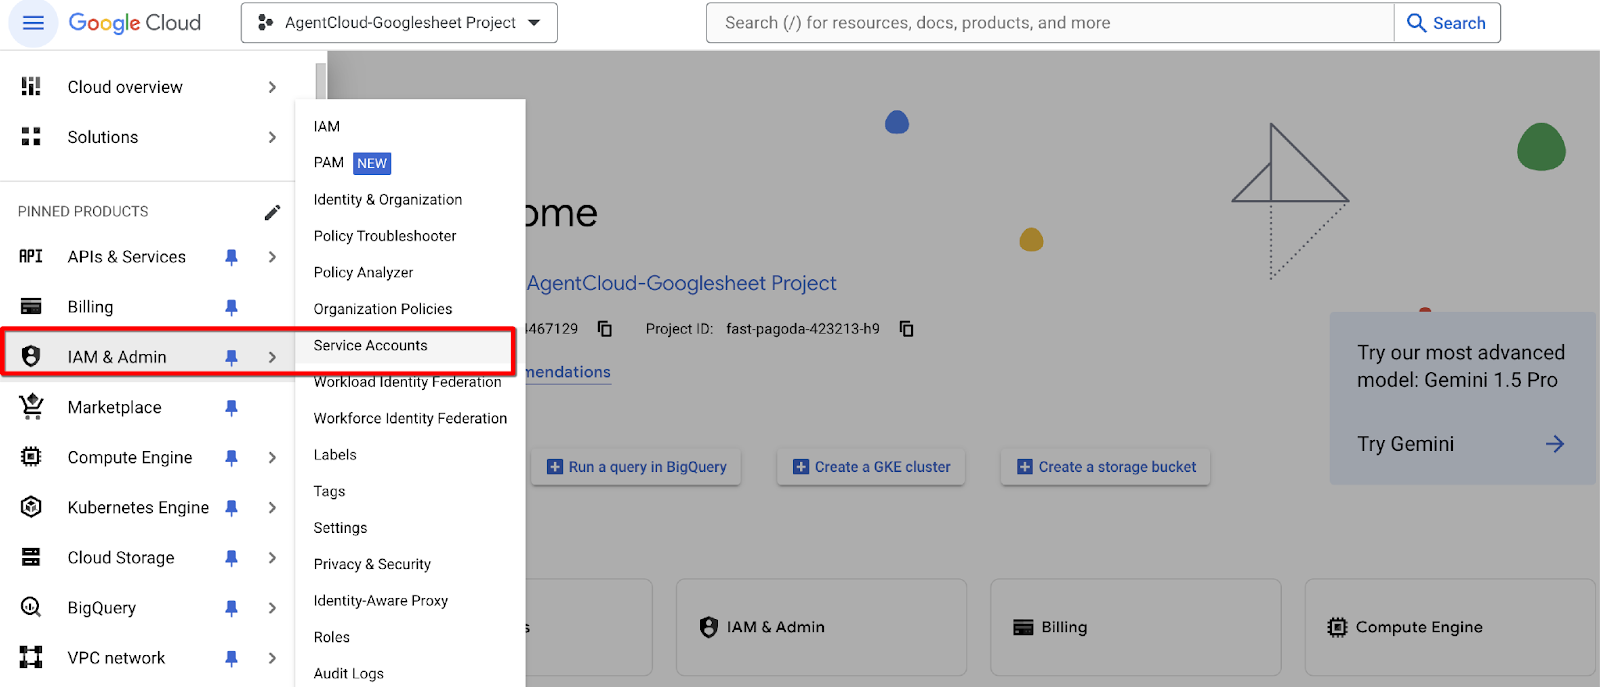
Navigate to the "IAM & Admin" section and select "Service Accounts."
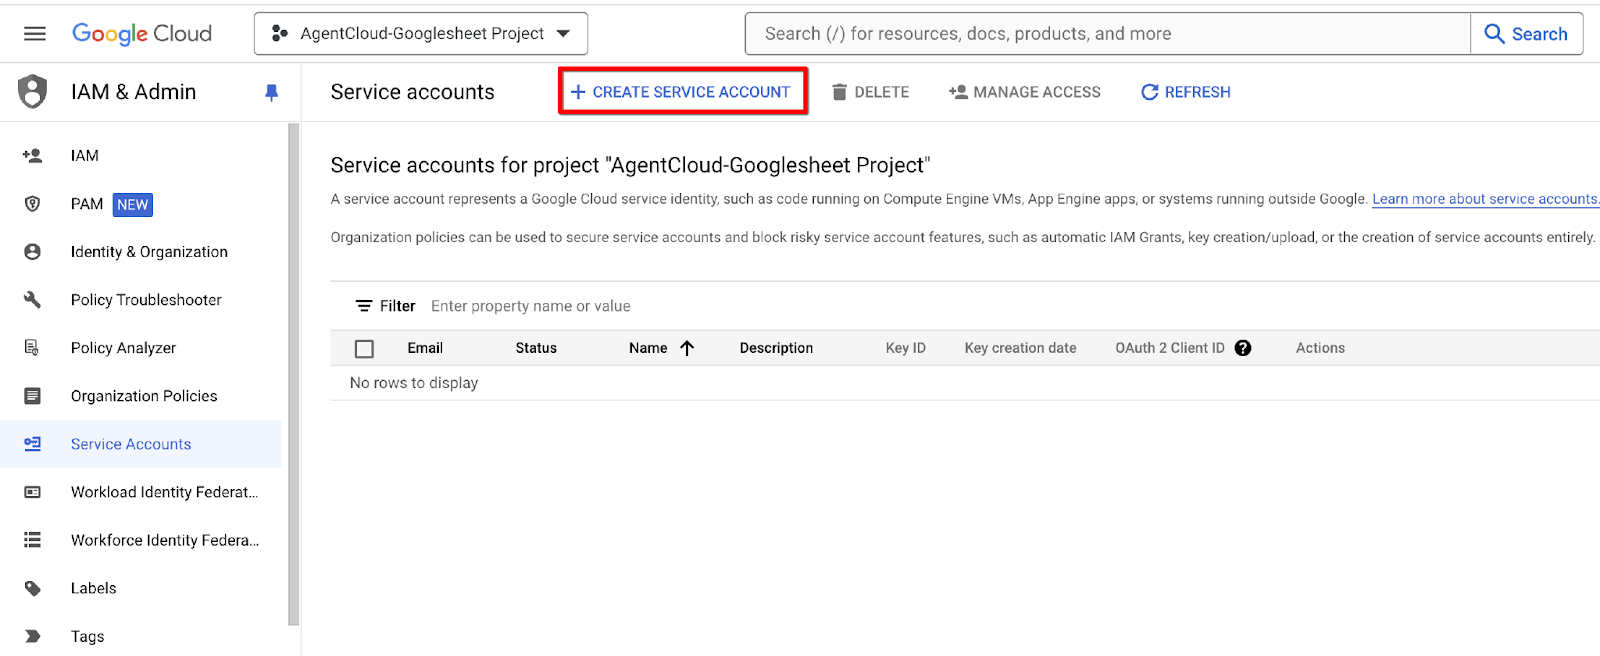
Click "Create Service Account" and provide a name and description.
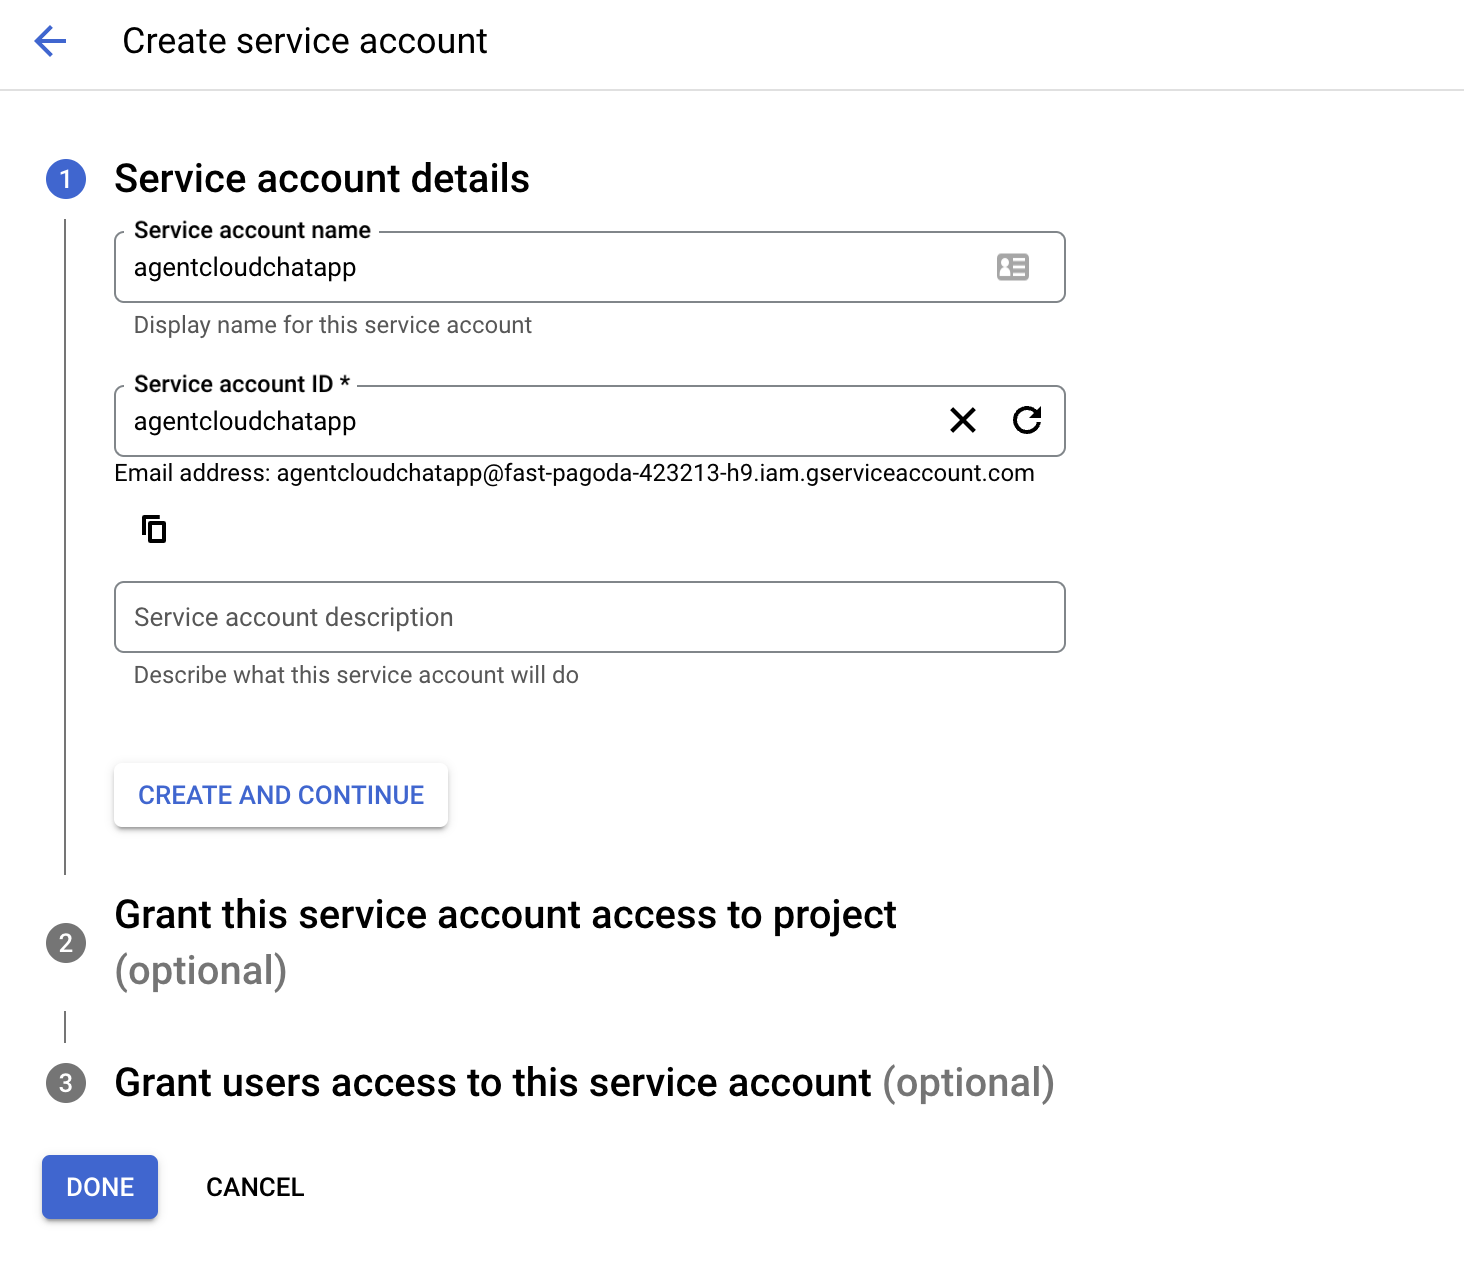
Enter your service account name and unique service ID, then click Done.
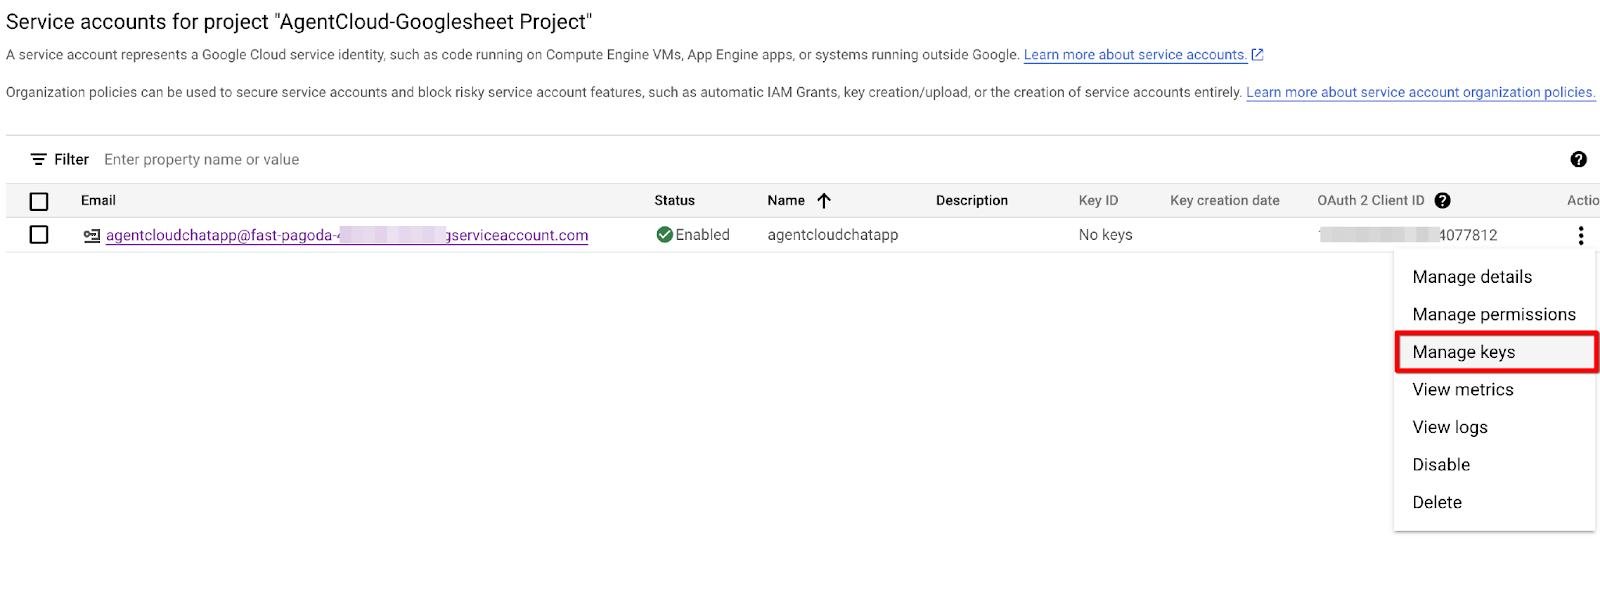
Under the actions tab, click the manage keys option.
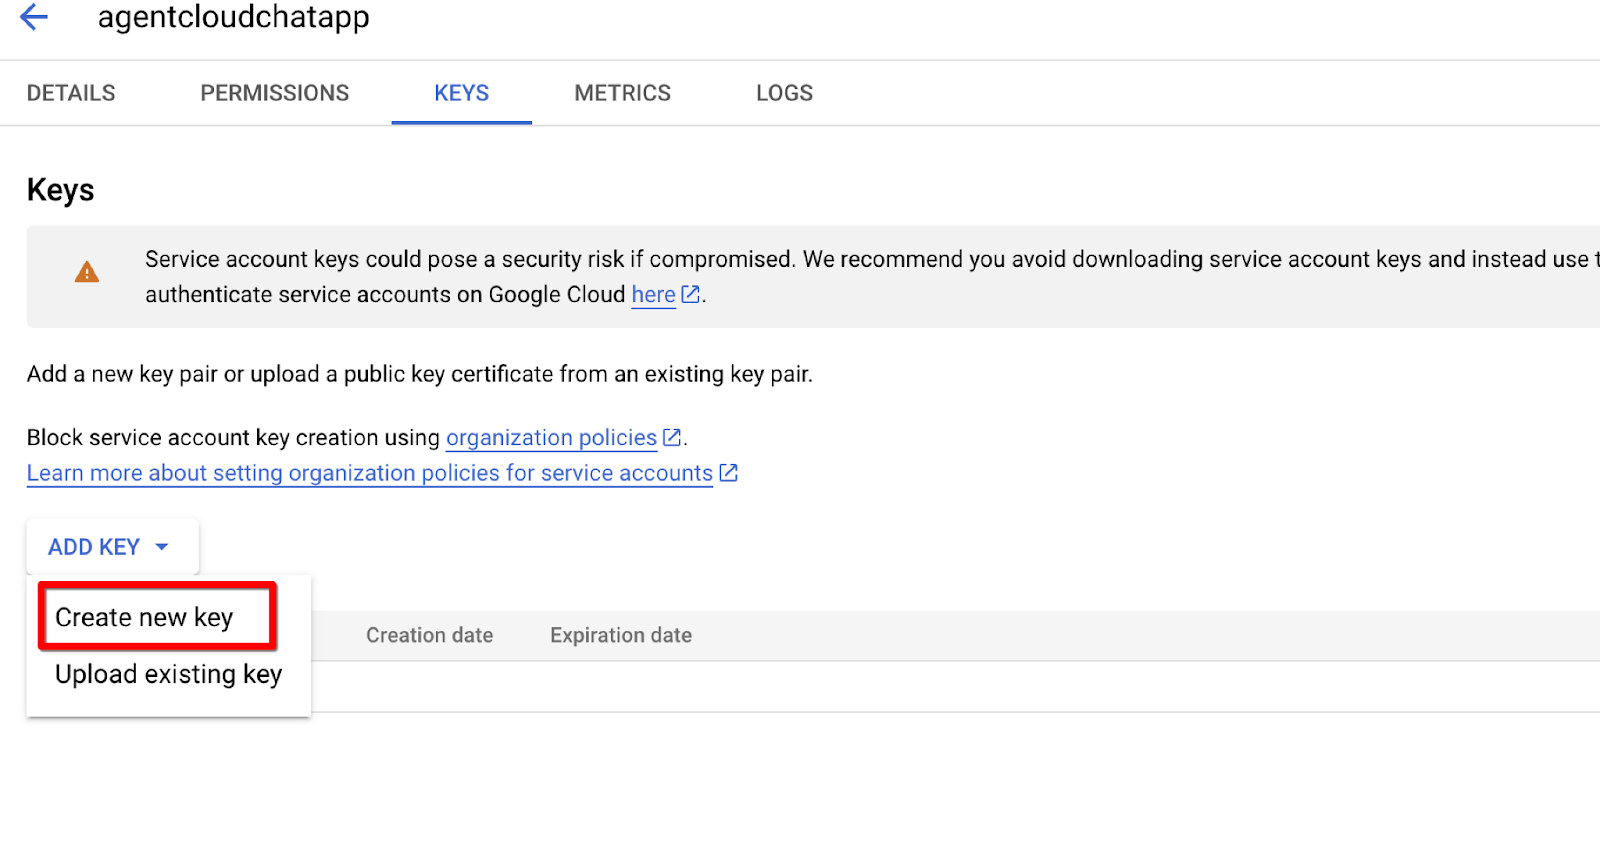
Click the ADD KEY button and select the Create Key option.
Select JSON as the key type, then click on Create New Key.
Select JSON as the key type, then click on Create. Your service account JSON or key JSON will automatically download.
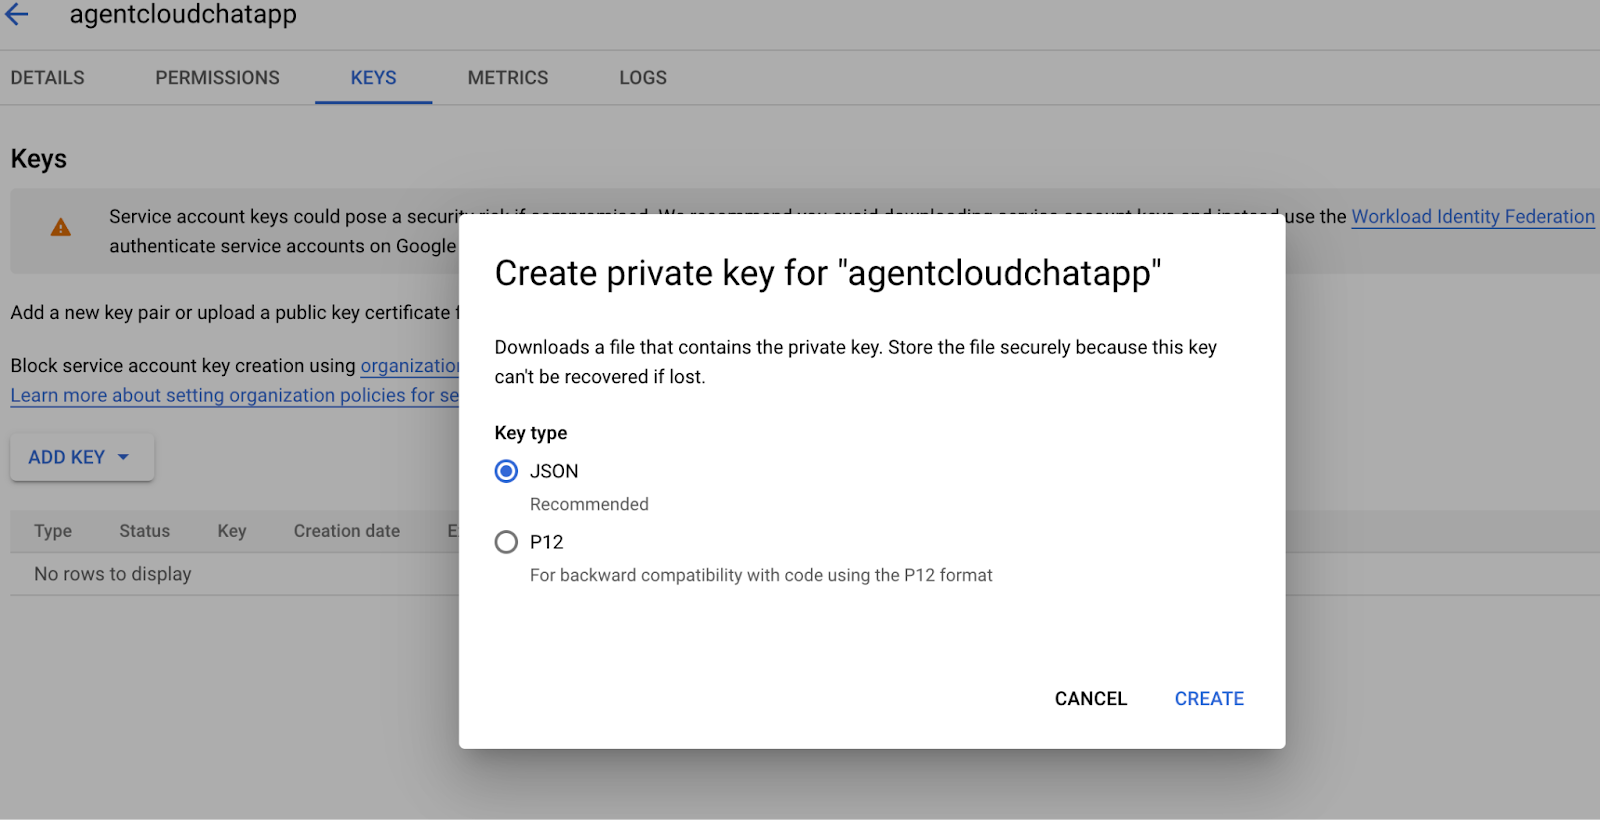
Keep this file safe we will use it later for authentication.
How to Enable Google Sheets API
You'll also need to enable the Google Sheets API in your Google Cloud project.
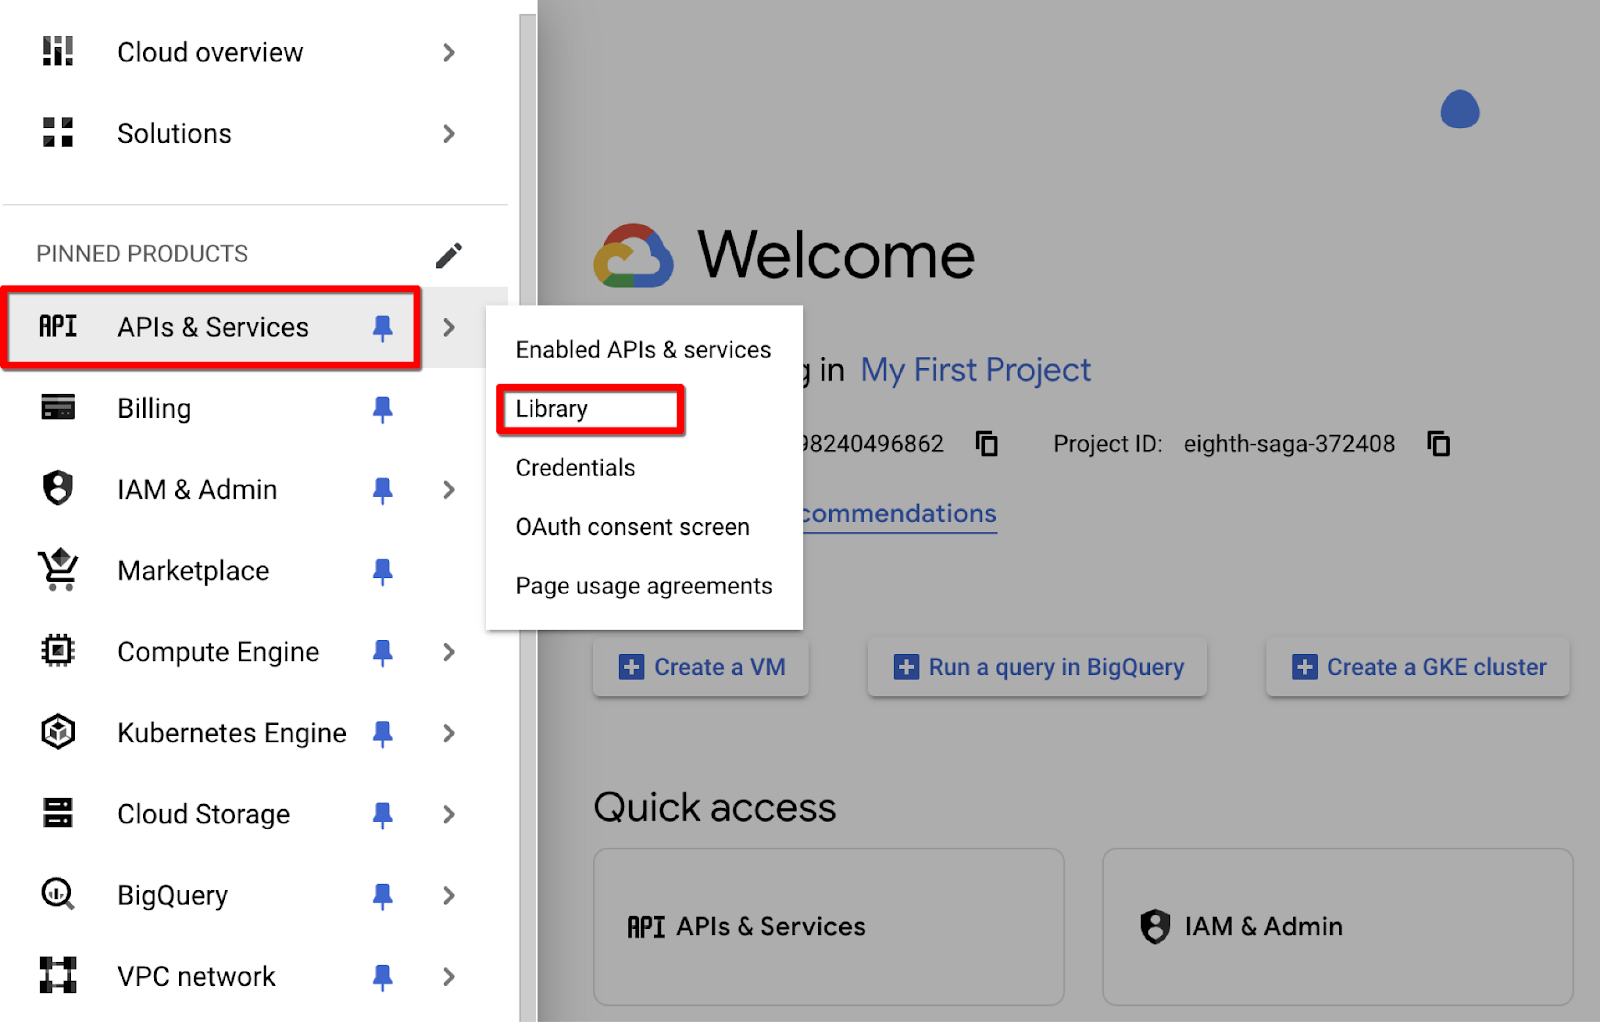
Open the left navigation menu and navigate to "APIs & Services" and then "Library."
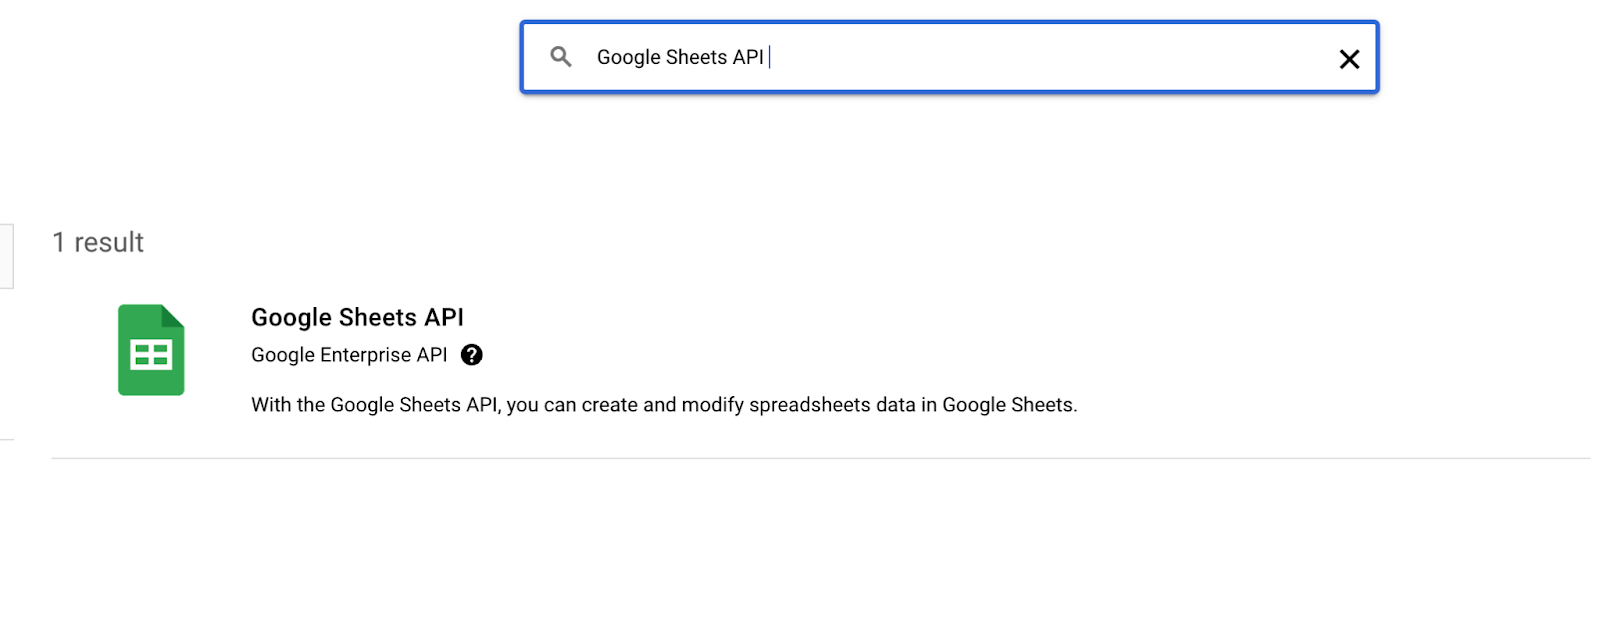
Type "Google Sheets API" in the search bar and press Enter.
The Google Sheets API will appear in the search results. Click on it.
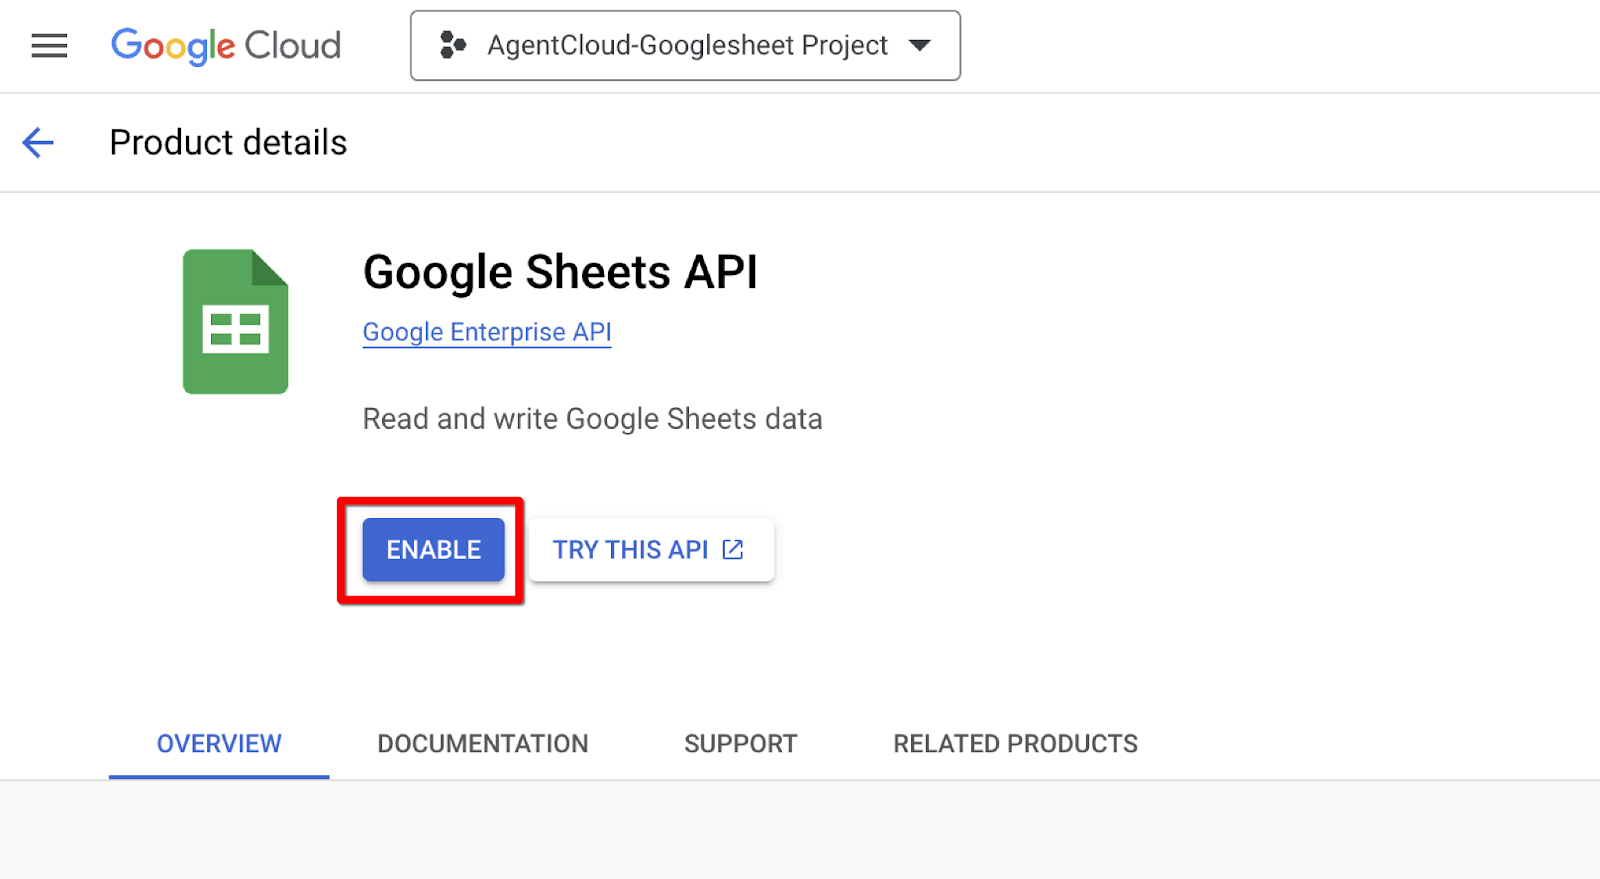
On the API details page, click the "ENABLE" button.
How to Set Up your Data Sources
Agent Cloud empowers you to process data from a wide range of sources.
In this guide, I'll use Google Sheets as the data source. Sheets is a popular web-based spreadsheet application included in Google Workspace. Google Sheets allows you to create, edit, and collaborate on spreadsheets in real-time.
For this example, I'll be working with a financial consumer complaints dataset stored in a Google Sheet.
This dataset contains several columns representing key sales stages and details, potentially including:
- Complaint ID
- Submitted Via
- Date Submitted
- Date Received
- State
- Product
- Sub-product
- Issue
- Sub-issue
- Company
- Public Response
- Company Response to Consumer
- Timely Response?
Here's how to connect your Google Sheets data:
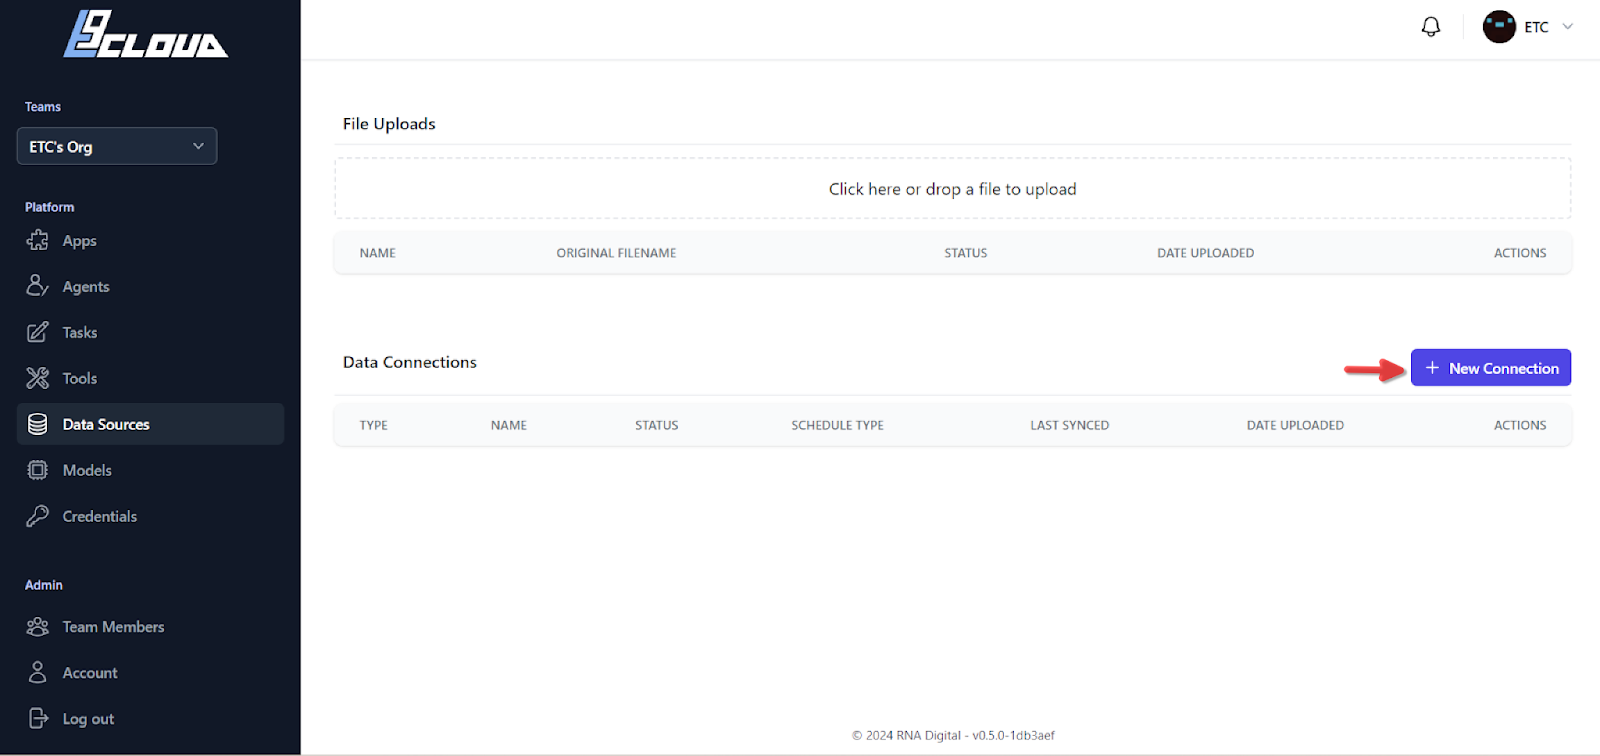
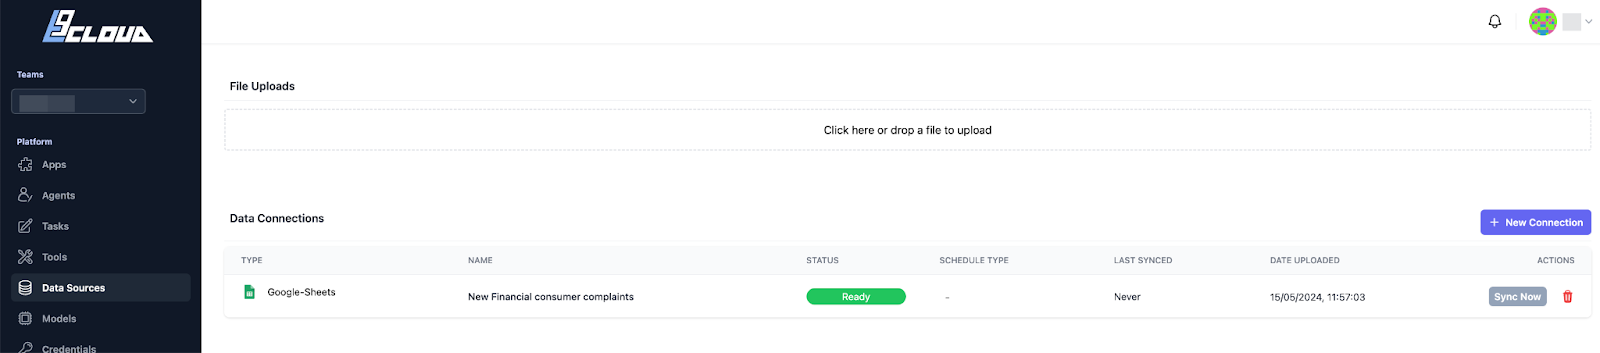
Navigate to the Data Sources tab within the Agent Cloud interface.
Click the button labeled New Connection. This will initiate the process of adding a new data source.
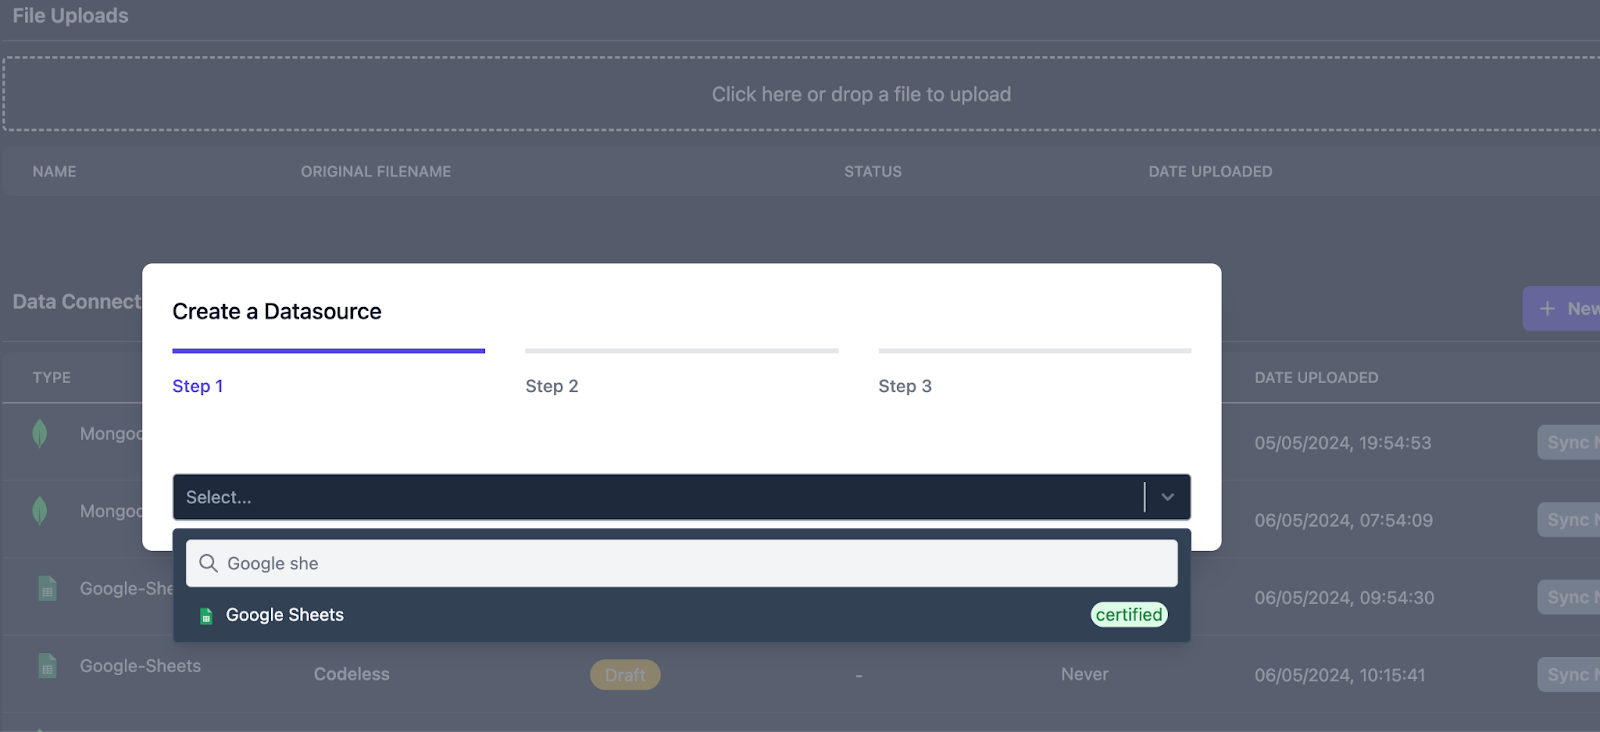
Search and select “Google sheets” as the data source.
I've named our data source Financial Consumer Complaints, which you can name however you want. Add a clear and concise description. The data sync will be manual. This means you'll need to initiate the data refresh process whenever you want the latest information from your Google Sheets to be reflected in Agent Cloud.
Enter the appropriate row batch size. Row batch size means how many rows are processed from the Google sheet. For example, the default value 200 would process rows 1-201, then 201-401, and so on.
Choose the authentication method as “Service Account Key Authentication”.
Enter the JSON key we downloaded earlier above under the Service Account Information field.
Enter the link to the Google spreadsheet you want to sync. To copy the link, click the 'Share' button in the top-right corner of the spreadsheet, then click 'Copy link'.
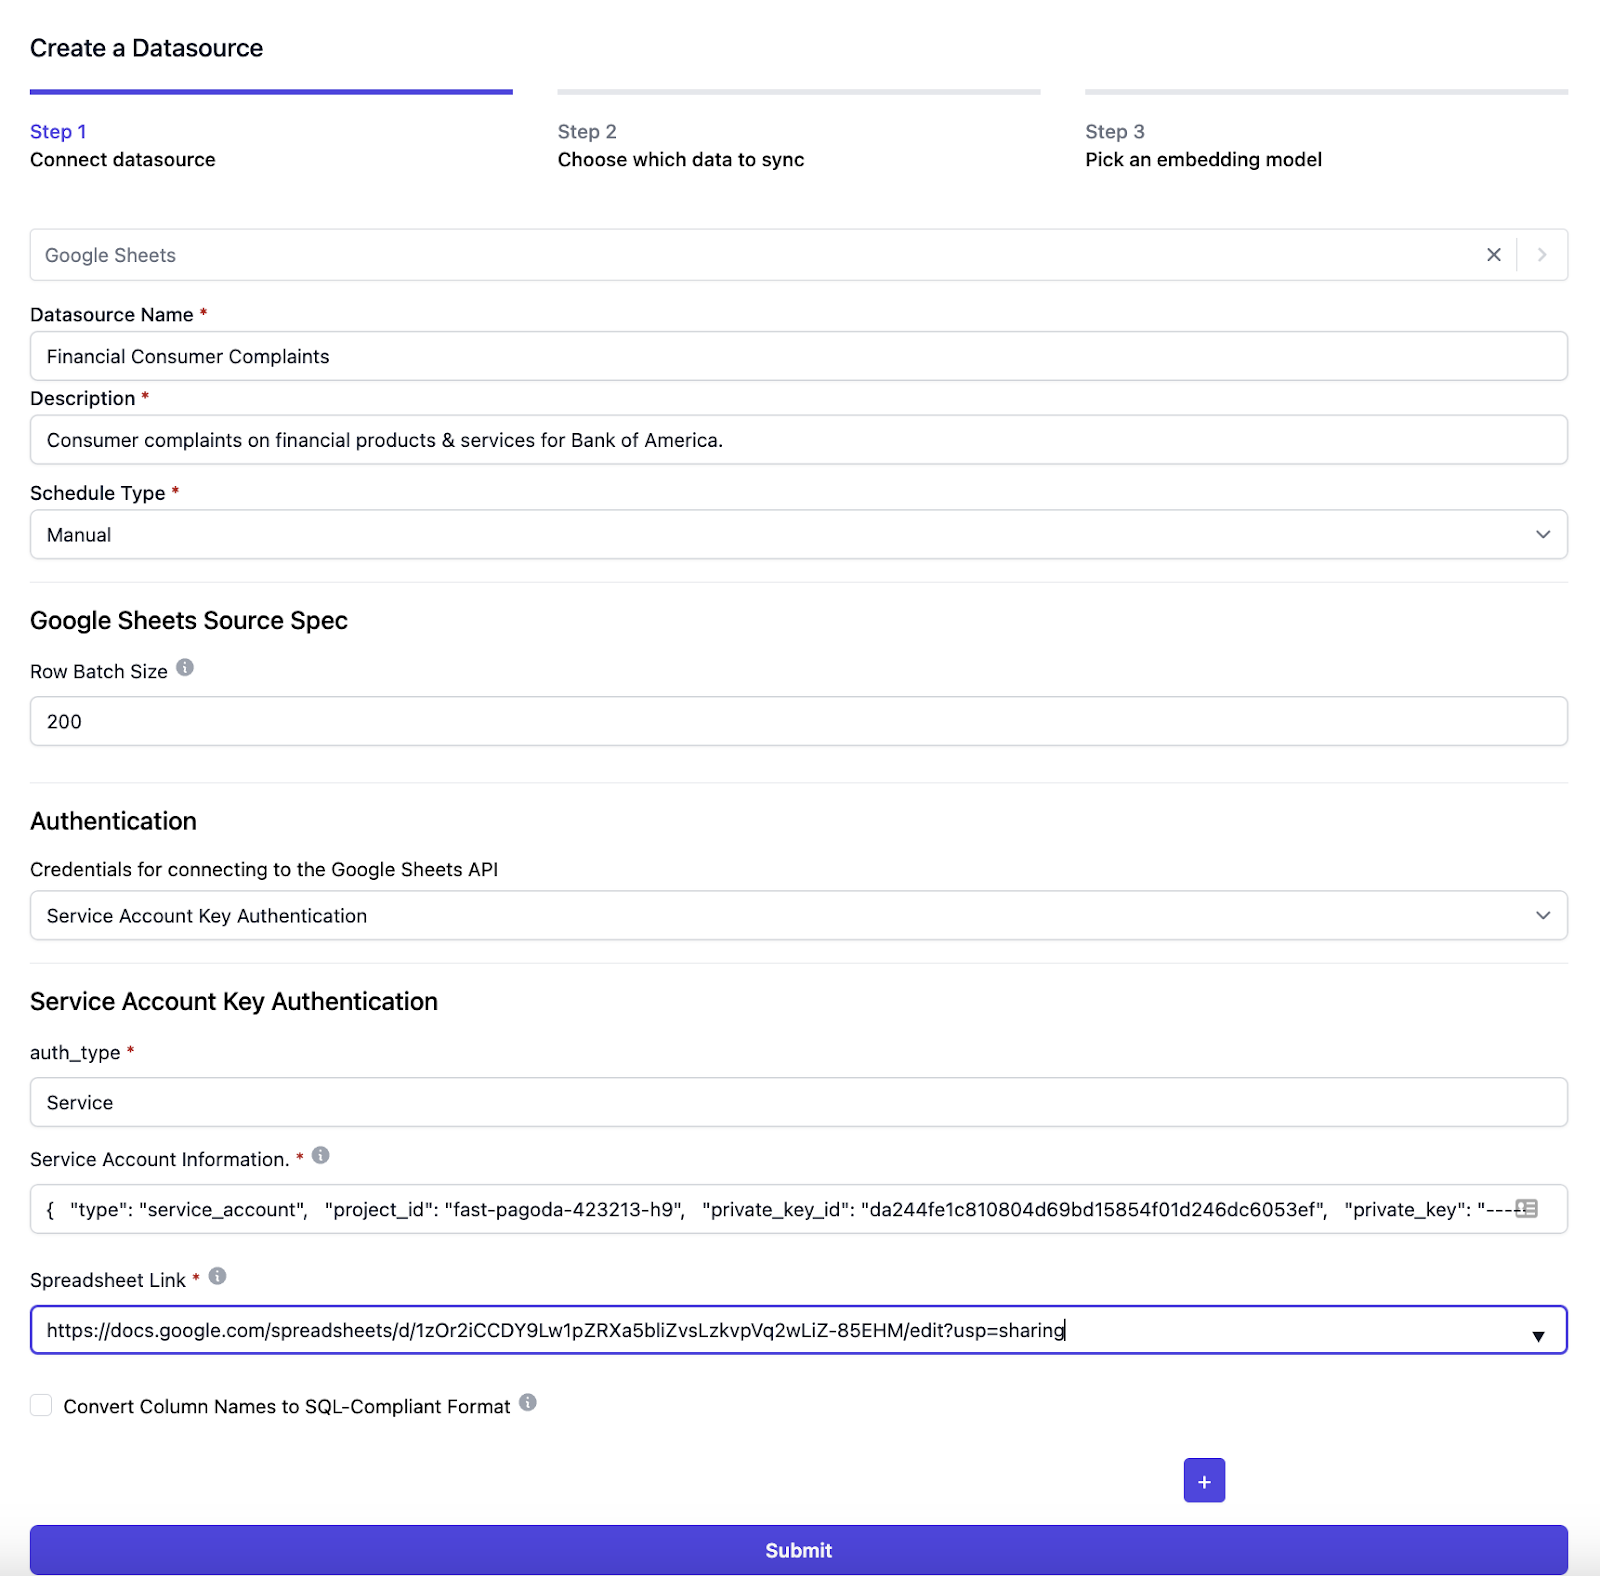
Click the submit button.
Select the collection and fields you want to sync to the vector database and enter their descriptions.
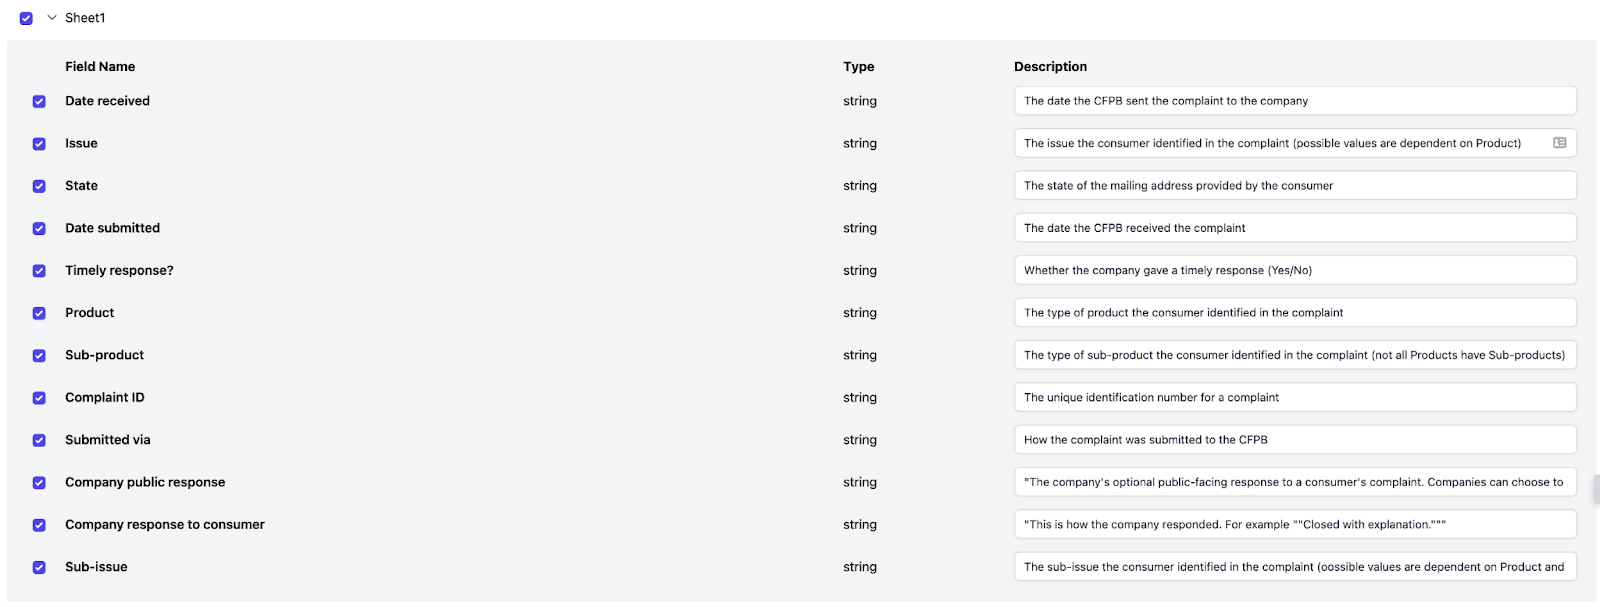
Click continue and Choose the field you want to embed then choose the model.
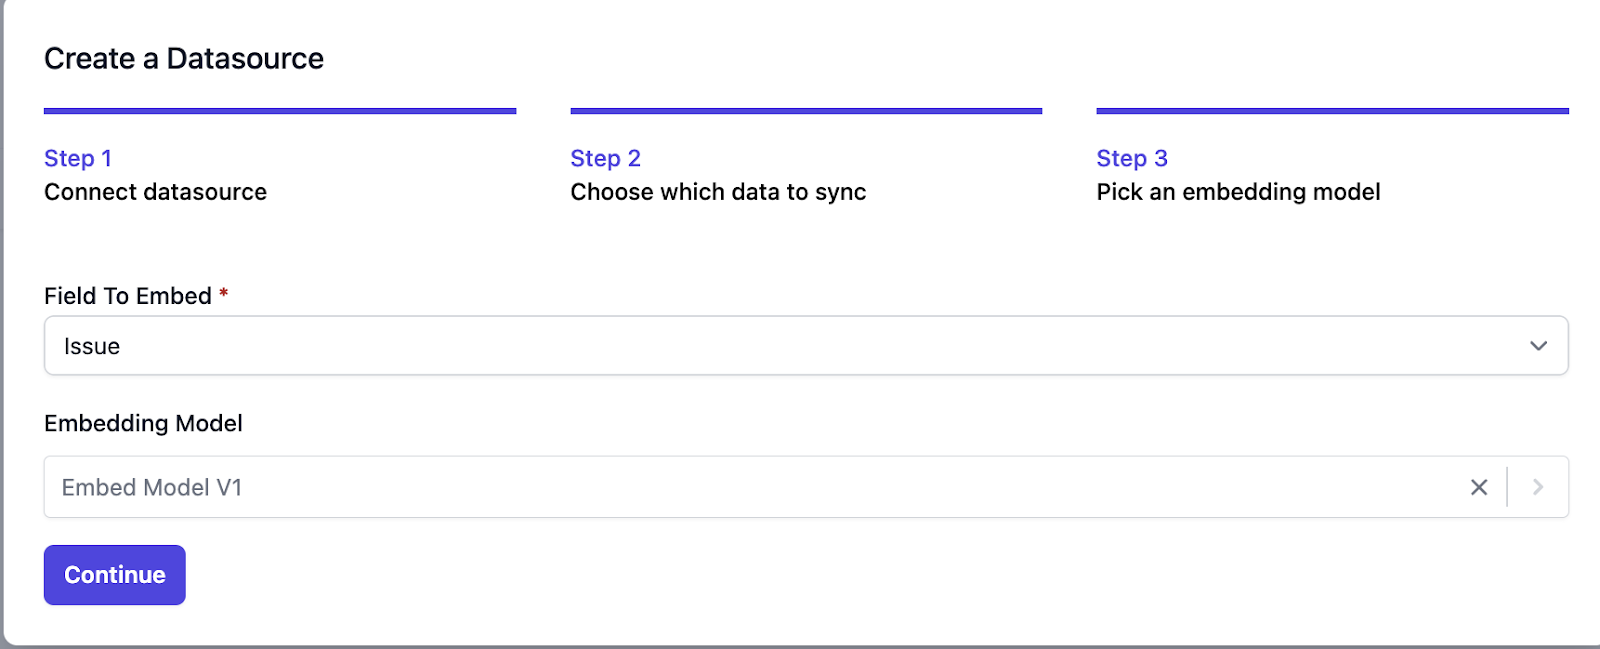
The connection to your Google Sheet is now established.
During the initial run, Agent Cloud will process your spreadsheet data and convert it into a format suitable for efficient retrieval. This processed data will then be stored within Agent Cloud's vector store.
If you're comfortable with technical details, you can verify the data's presence in the Qdrant vector store running locally on port 6333.
This can be accessed through: http://localhost:6333/dashboard#/collections.
Look for a new collection corresponding to your Google Sheet data.
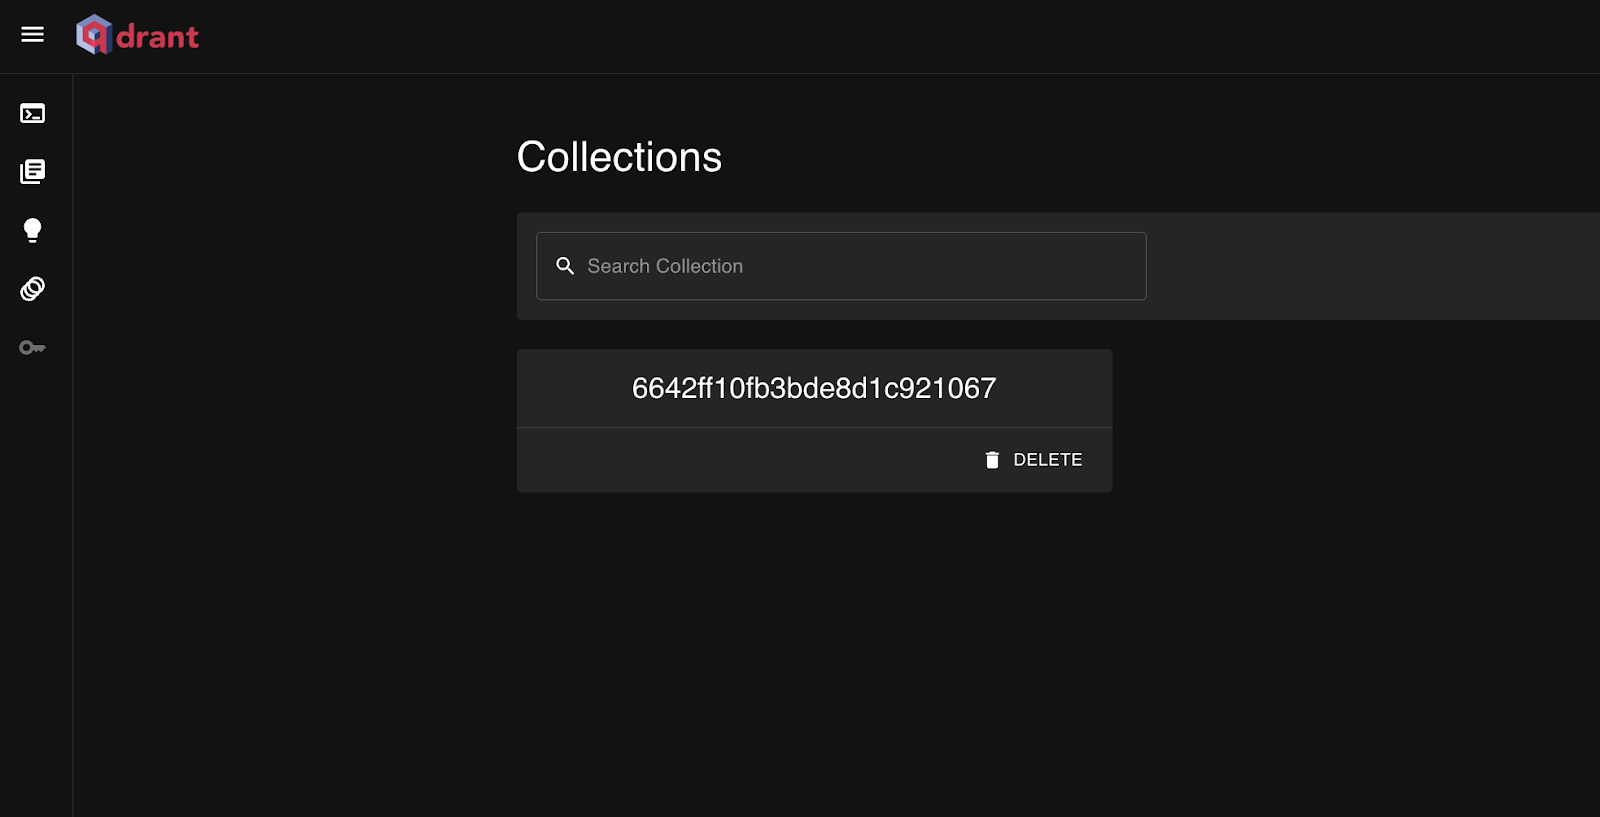
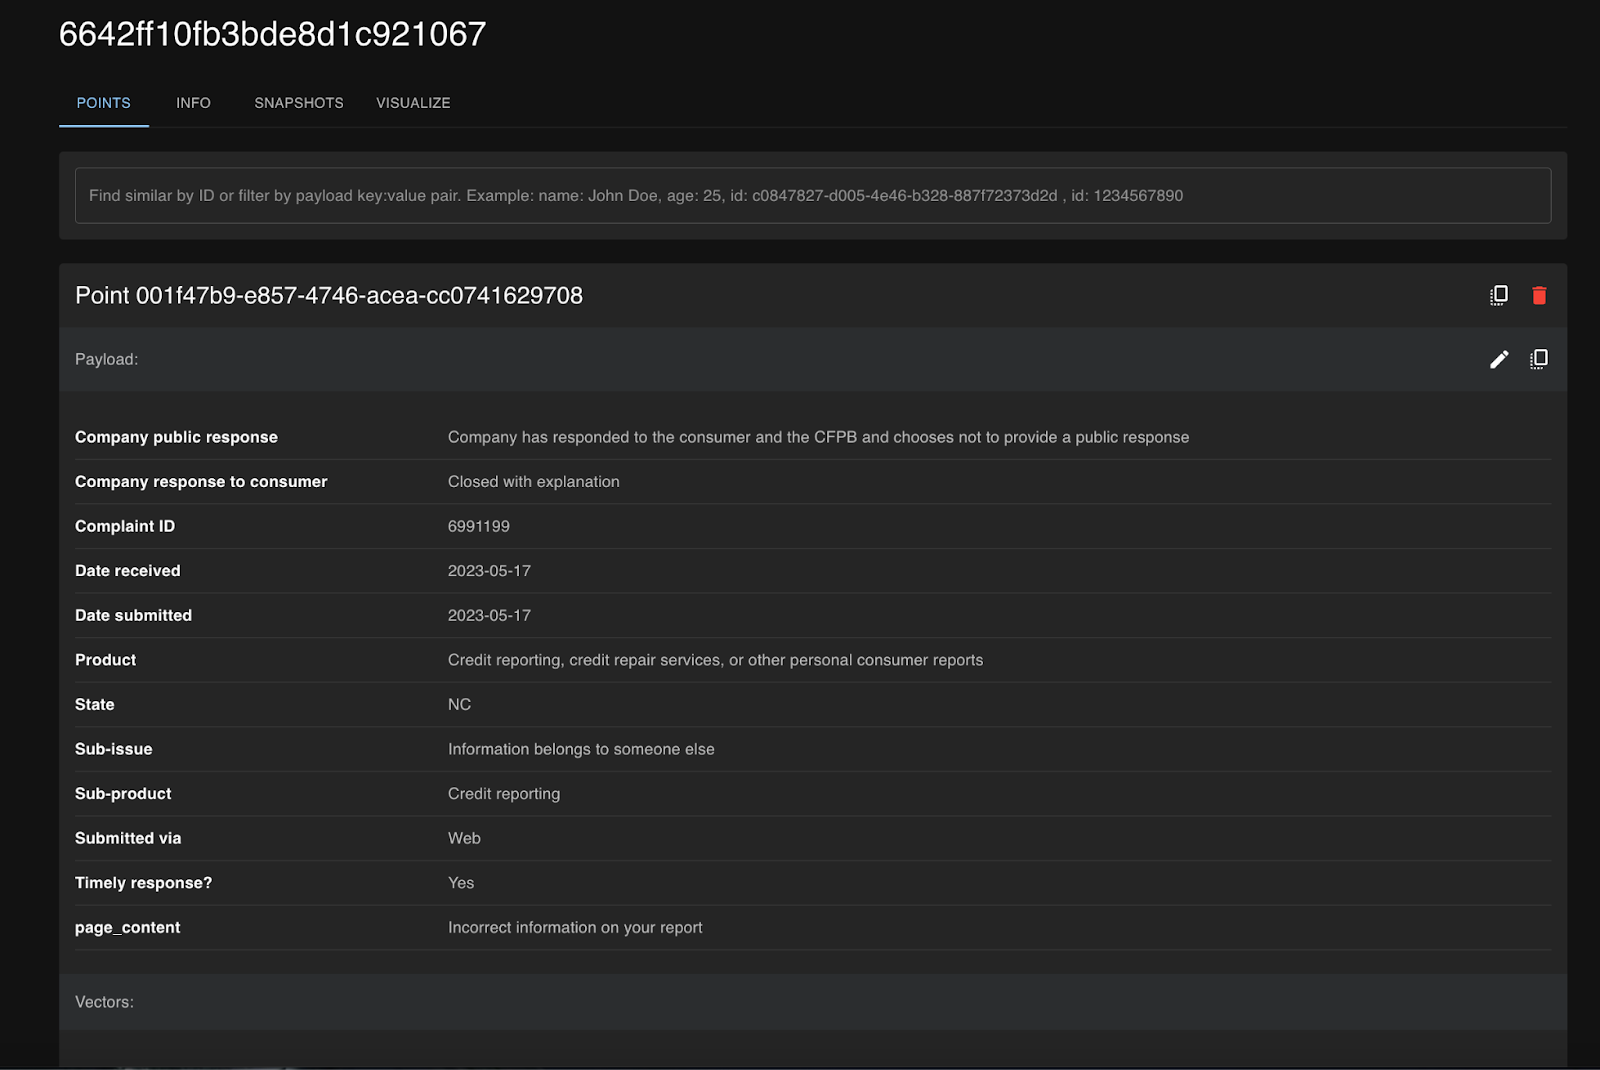
You can click the collection to view the payloads and the fields populated in the collection.
How to Set Up Tools
Tools play a crucial role in facilitating effective interaction between the AI agent and its environment, enabling seamless information processing and action execution aligned with its objectives.
These tools can include functions, APIs, data sources, and resources tailored to empower the agent to autonomously and efficiently undertake diverse tasks. While you have the flexibility to craft your own tools as per their requirements, Agent Cloud also streamlines the process by automatically generating a tool upon the addition of a new data source,
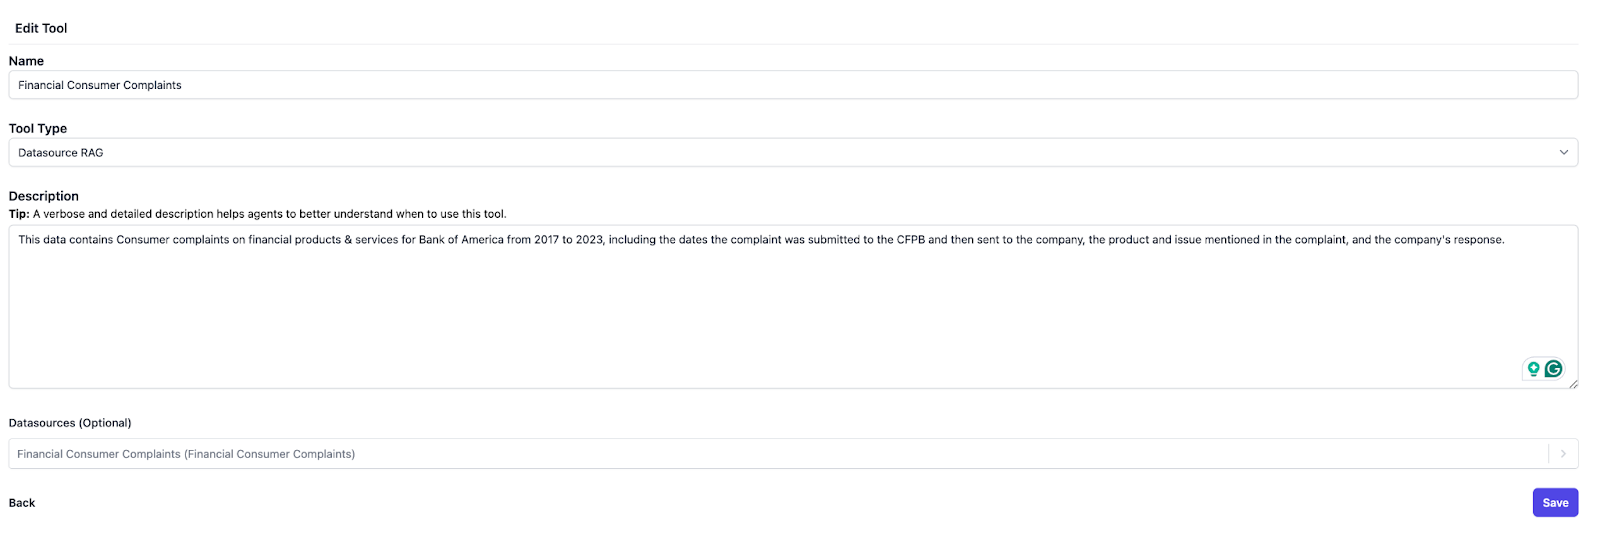
Click the Tools tab tools to switch to the Tools page and click the New button.
Enter the tools' names and add a description. A verbose and detailed description helps agents better understand when to use each tool.
Choose the data source and click the Save button.
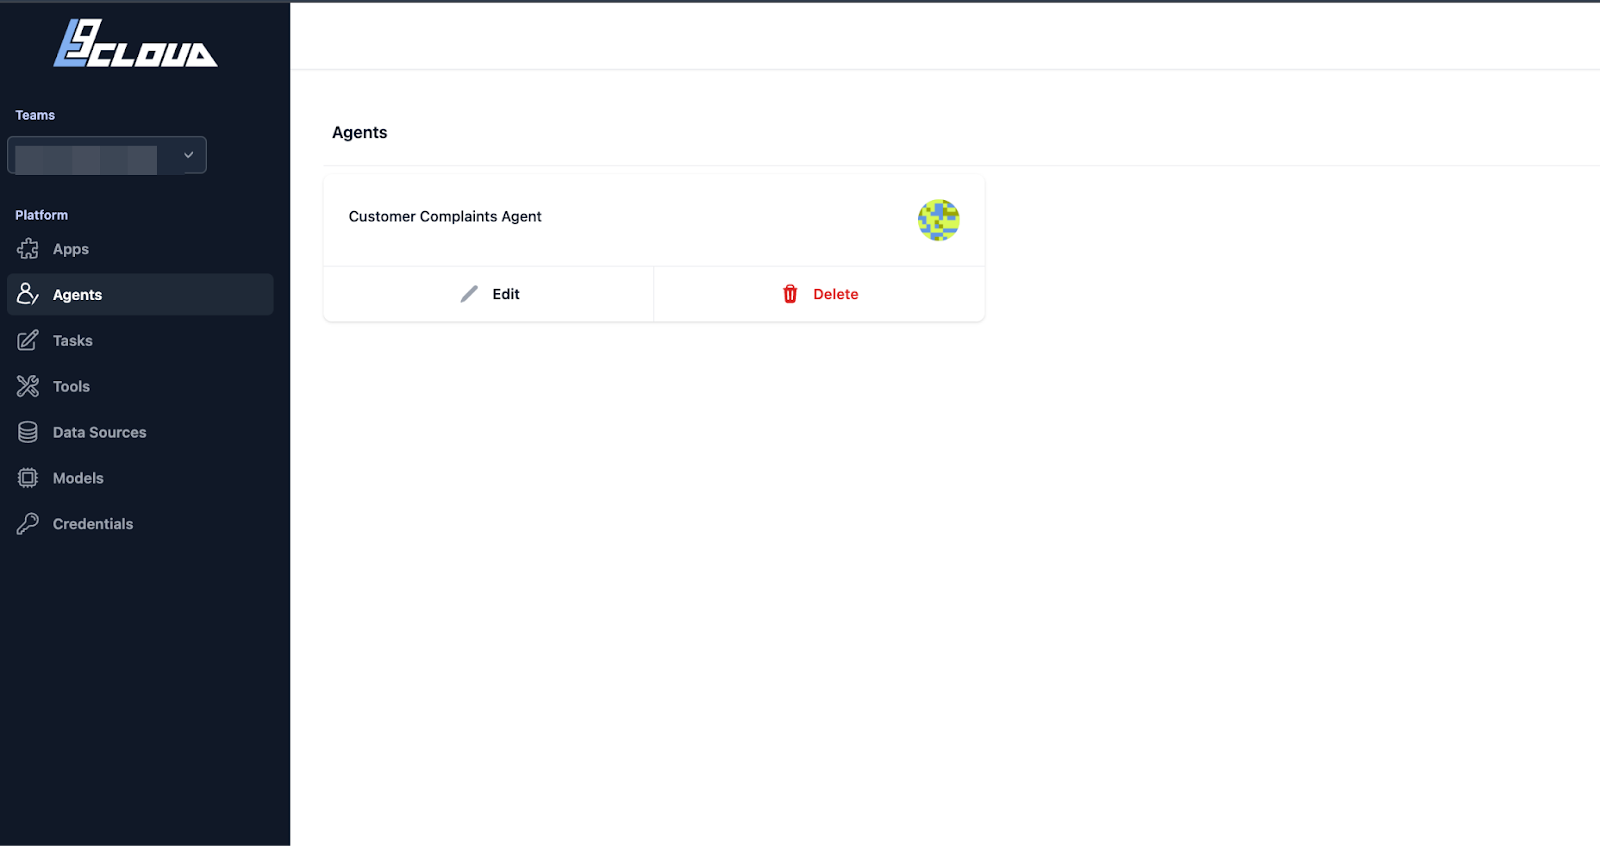
How to Set Up an Agent
AI Agents are intelligent systems that excel at handling routine or repetitive tasks by perceiving their environment, collecting data, and using that data to make decisions.
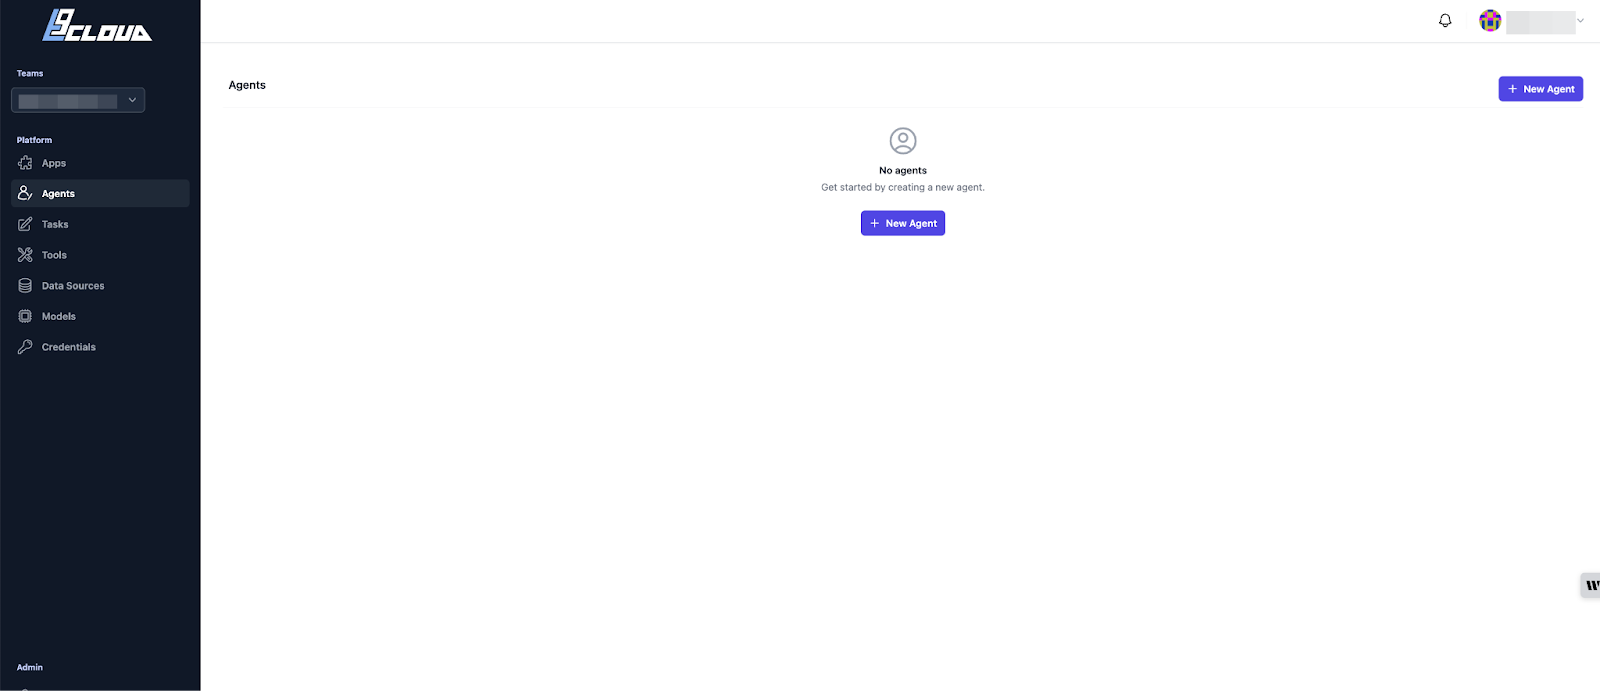
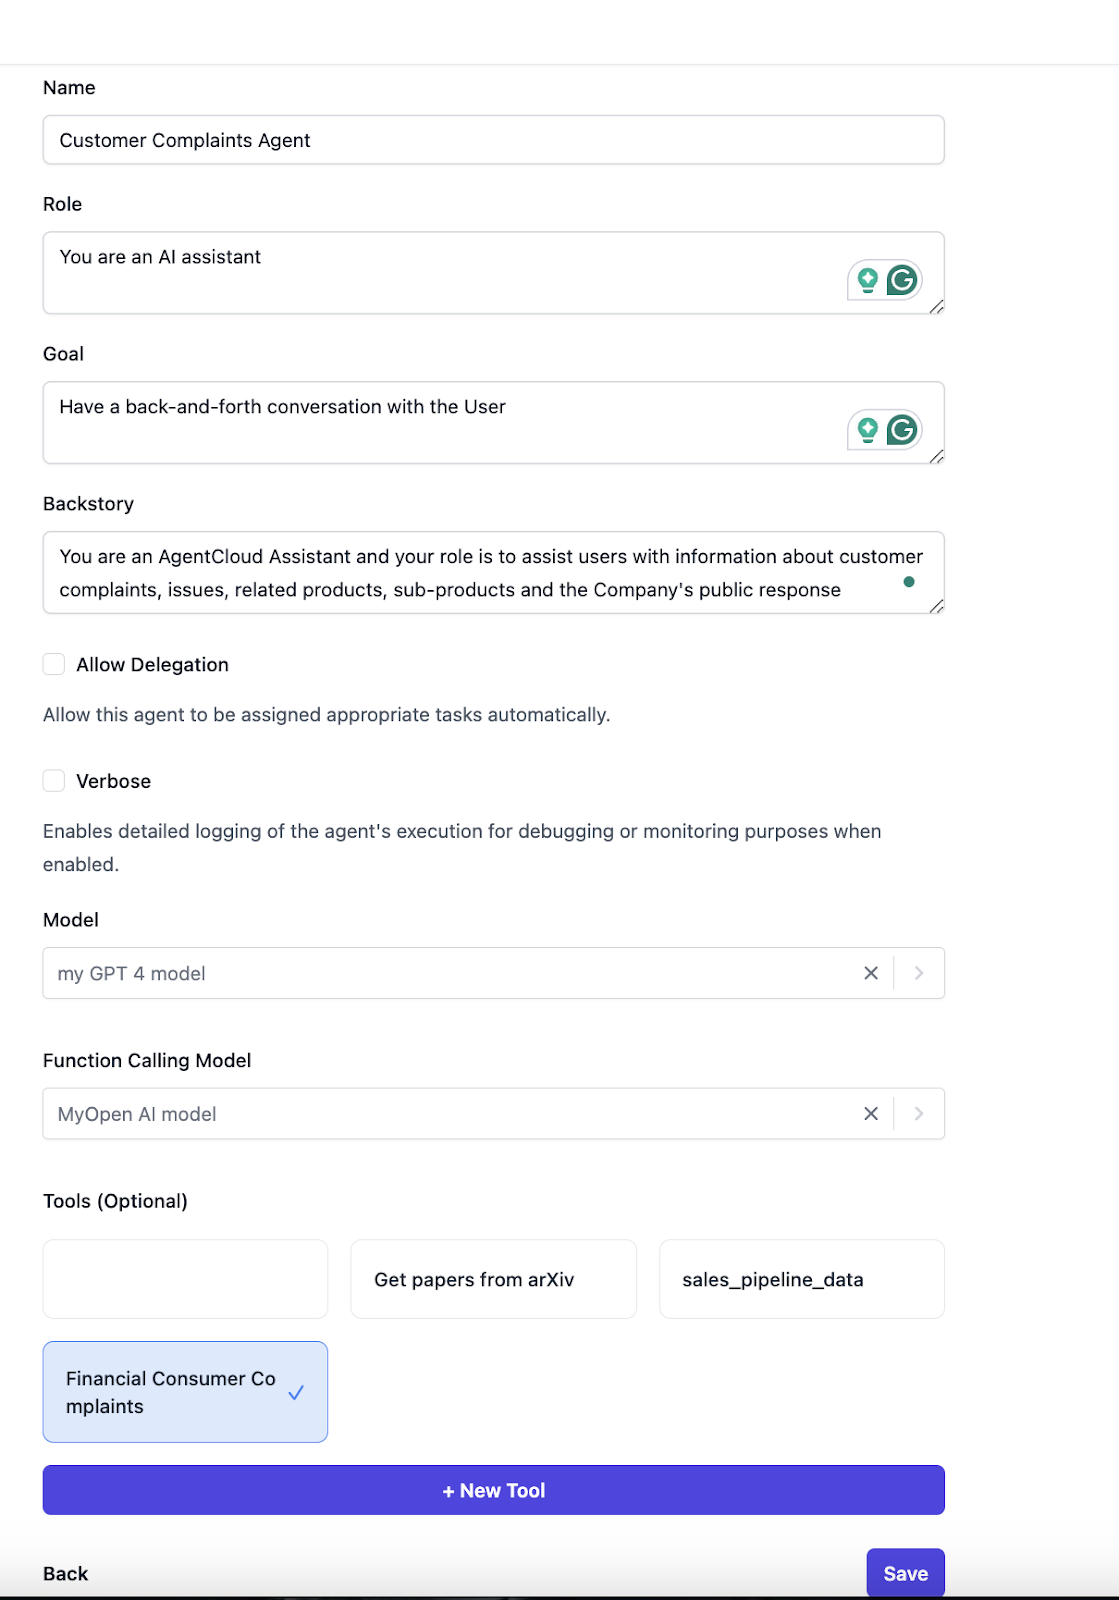
Click the Agents tab and then click on the New Agent button.
Define an Agent's Name, Role, Goal, and Backstory as shown below.
In the "Model" section, choose the AI engine to power your agent's reasoning capabilities. For this example, we've selected "OpenAI GPT-4" as both the Model and Function Calling Model.
Choose the tool we set up earlier under Tools (Optional).
If "OpenAI GPT-4" isn't already configured within Agent Cloud, you can easily add it. Click on the "Model" field and select "Add new model." A new window will appear, allowing you to define the model's name, type, credentials (your OpenAI API key), and the specific LLM model.
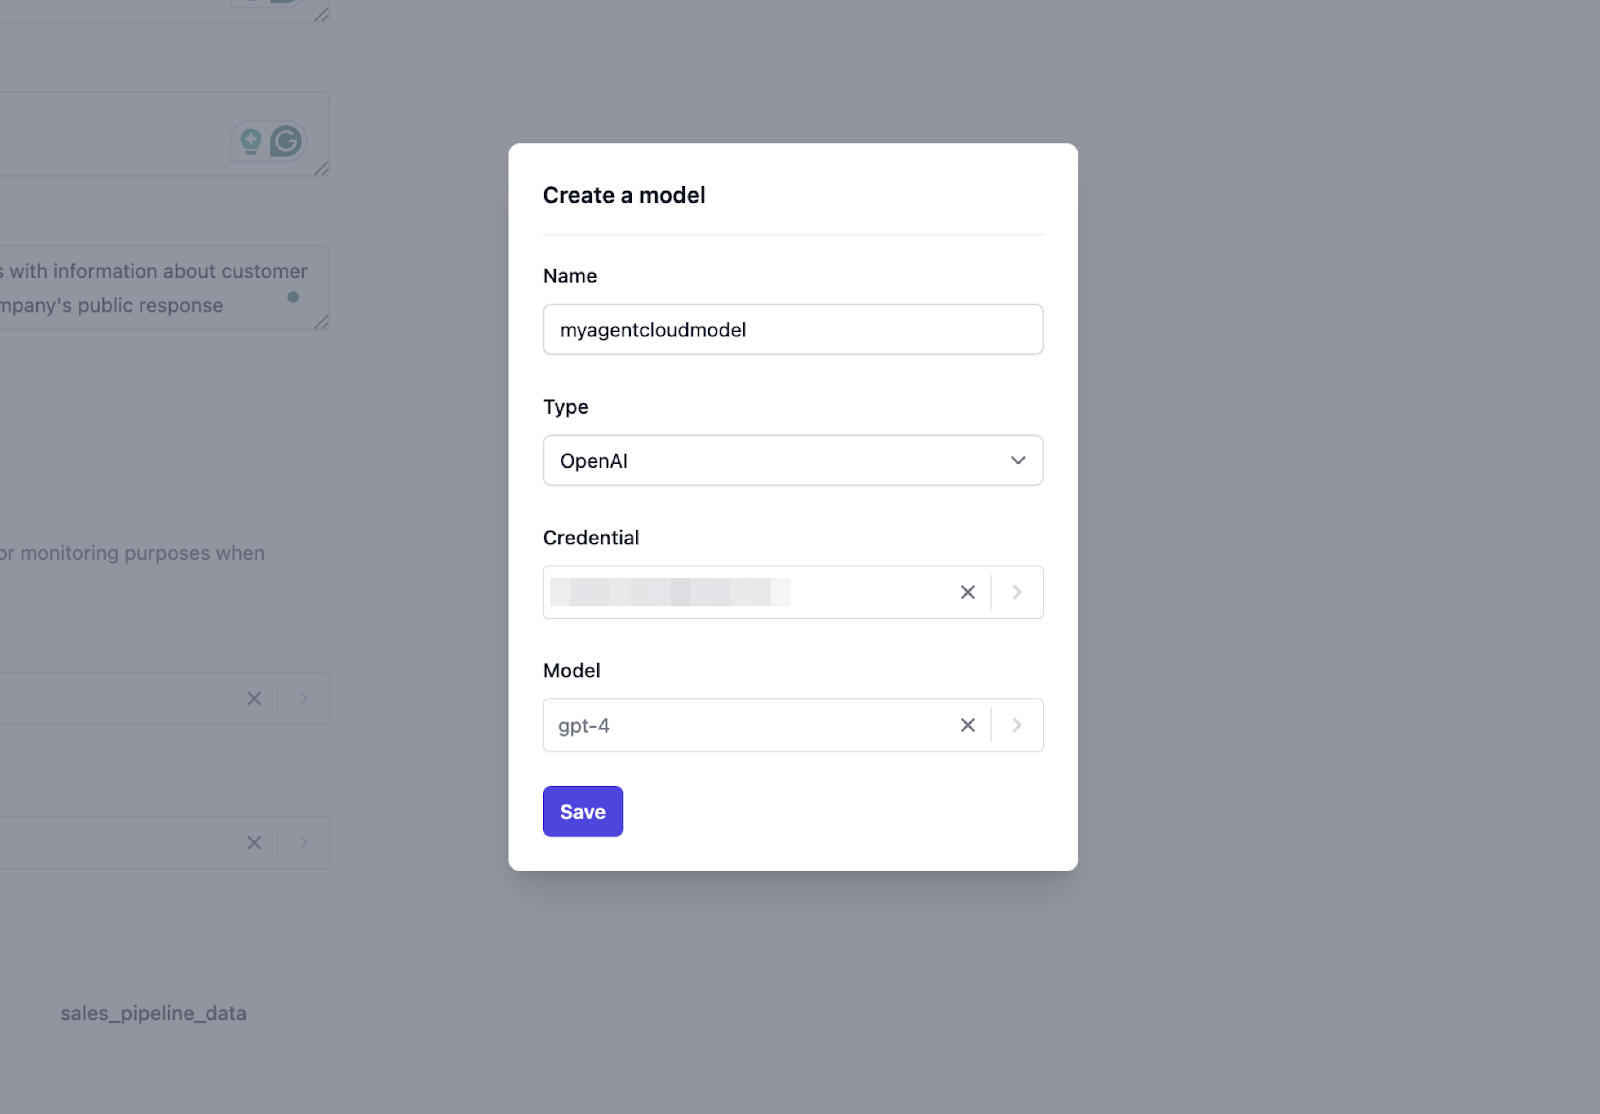
Click the Save button. Once you save this information, "GPT-4" will be available for future agent creation.
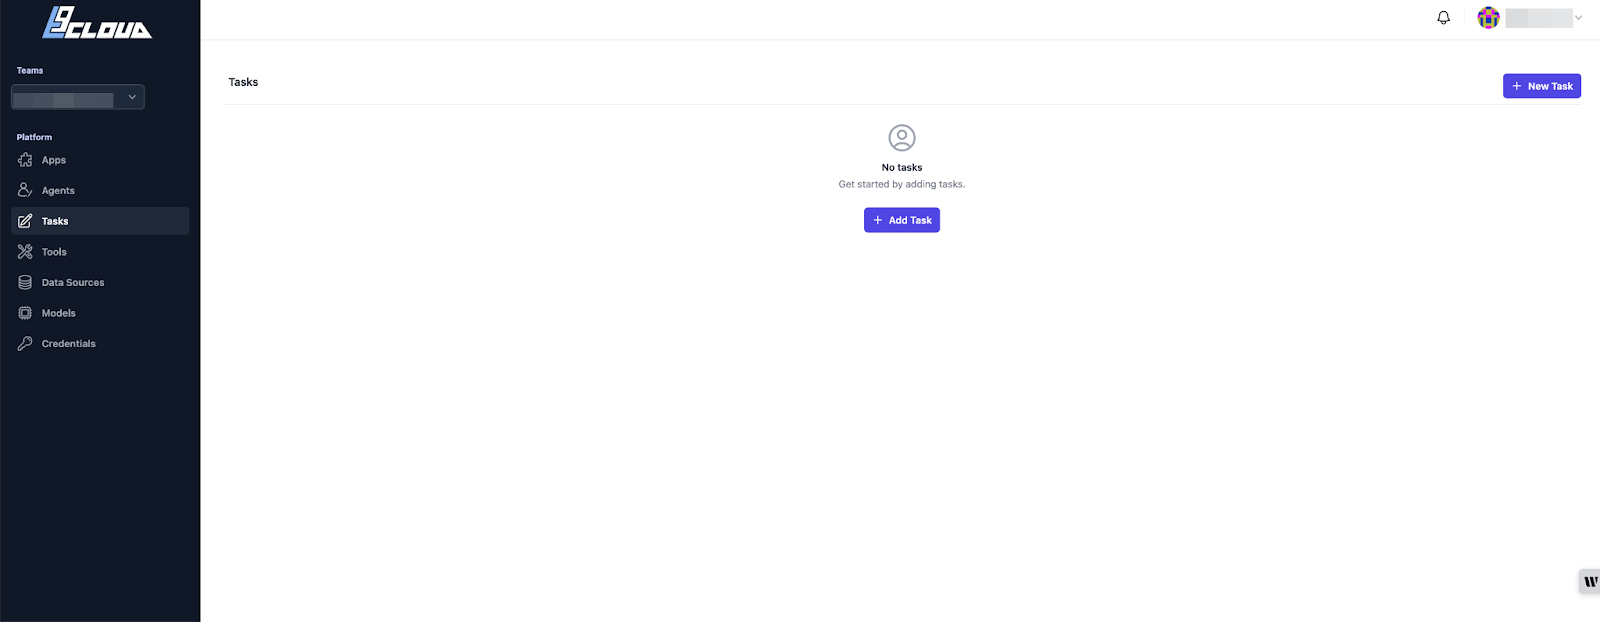
How to Create a Task
Tasks are specific actions assigned to agents for completion. To create a new task, navigate to the Tasks tab and click the "Add Task" button.
Enter the following details in the below pop-up window.
- Task name: Give your task a clear and concise title that reflects its purpose.
- Detailed description of what the task entails.
- Choose the tool we created earlier, which is “Financial Consumer Complaint” in my case.
- Select the preferred Agent we created earlier we named it “Customer Complaints Agent”
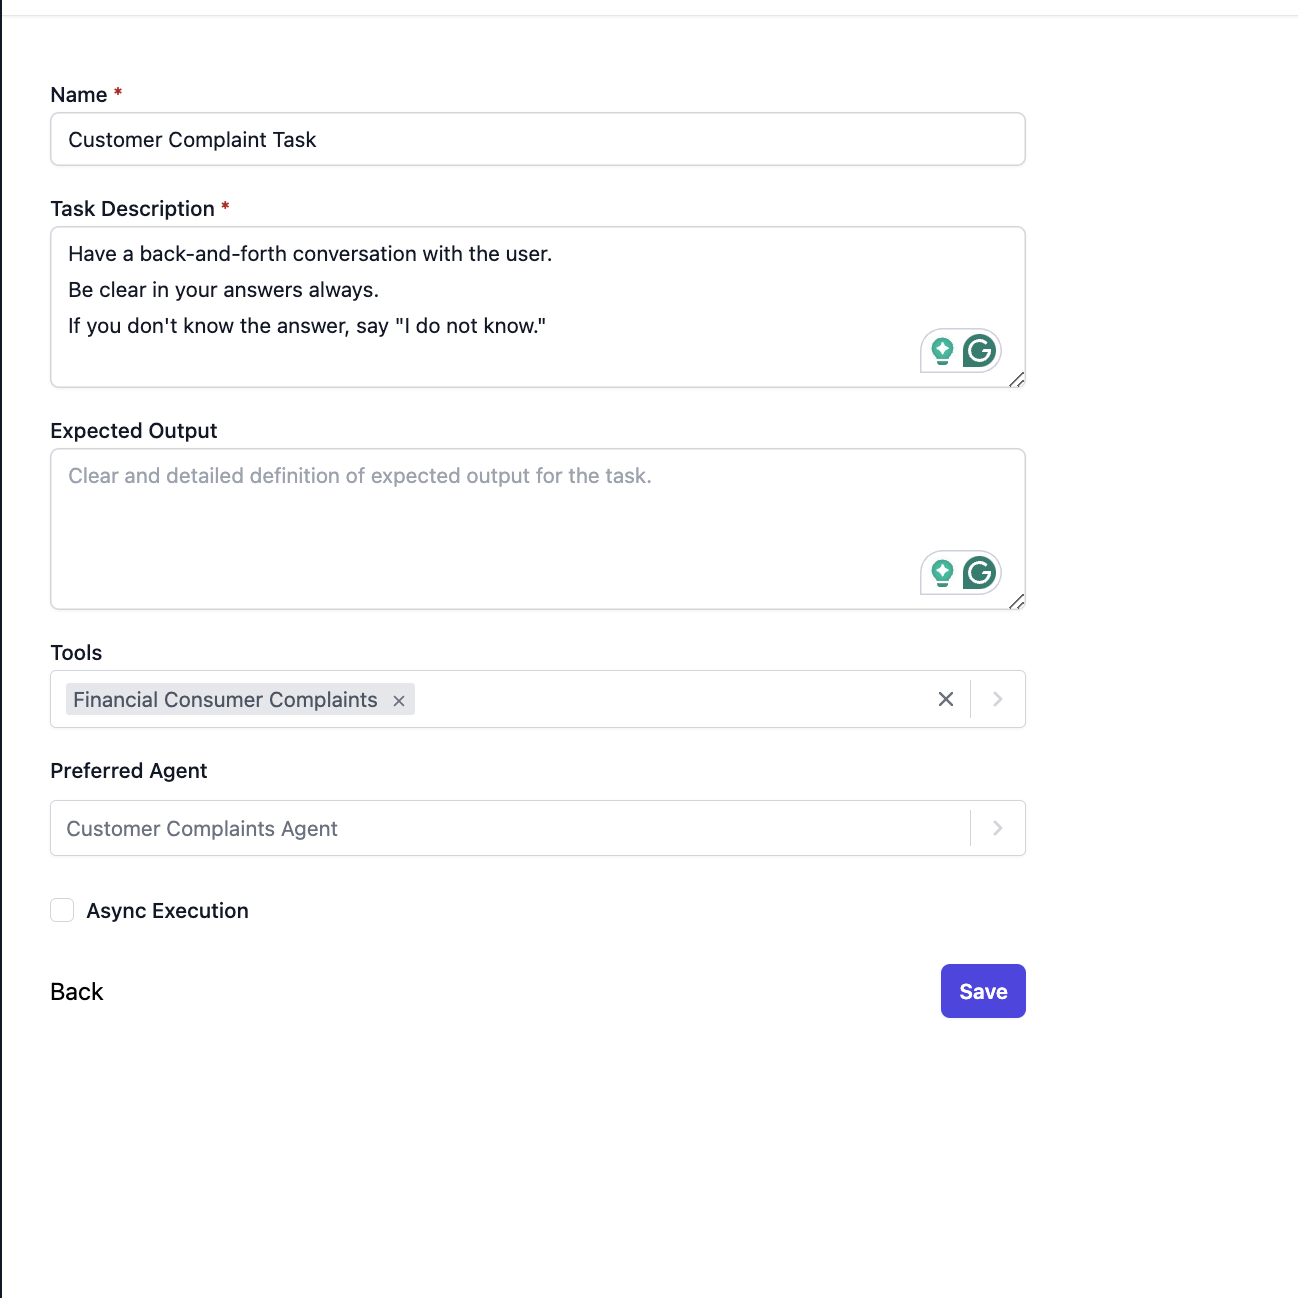
Click the Save button to save the task.
How to Set Up Your App
Now, buckle up because we're about to embark on the exciting part: creating a conversational app. This app will transform our data source into a chat partner, allowing you to have interactive conversations and unlock insights through natural language.
So far, we've laid the foundation for our app. We've created:
- A data source.
- A data retrieval tool.
- An Agent.
- Tasks.
Click the Apps tab and then click the New App Button, and then enter the details below:
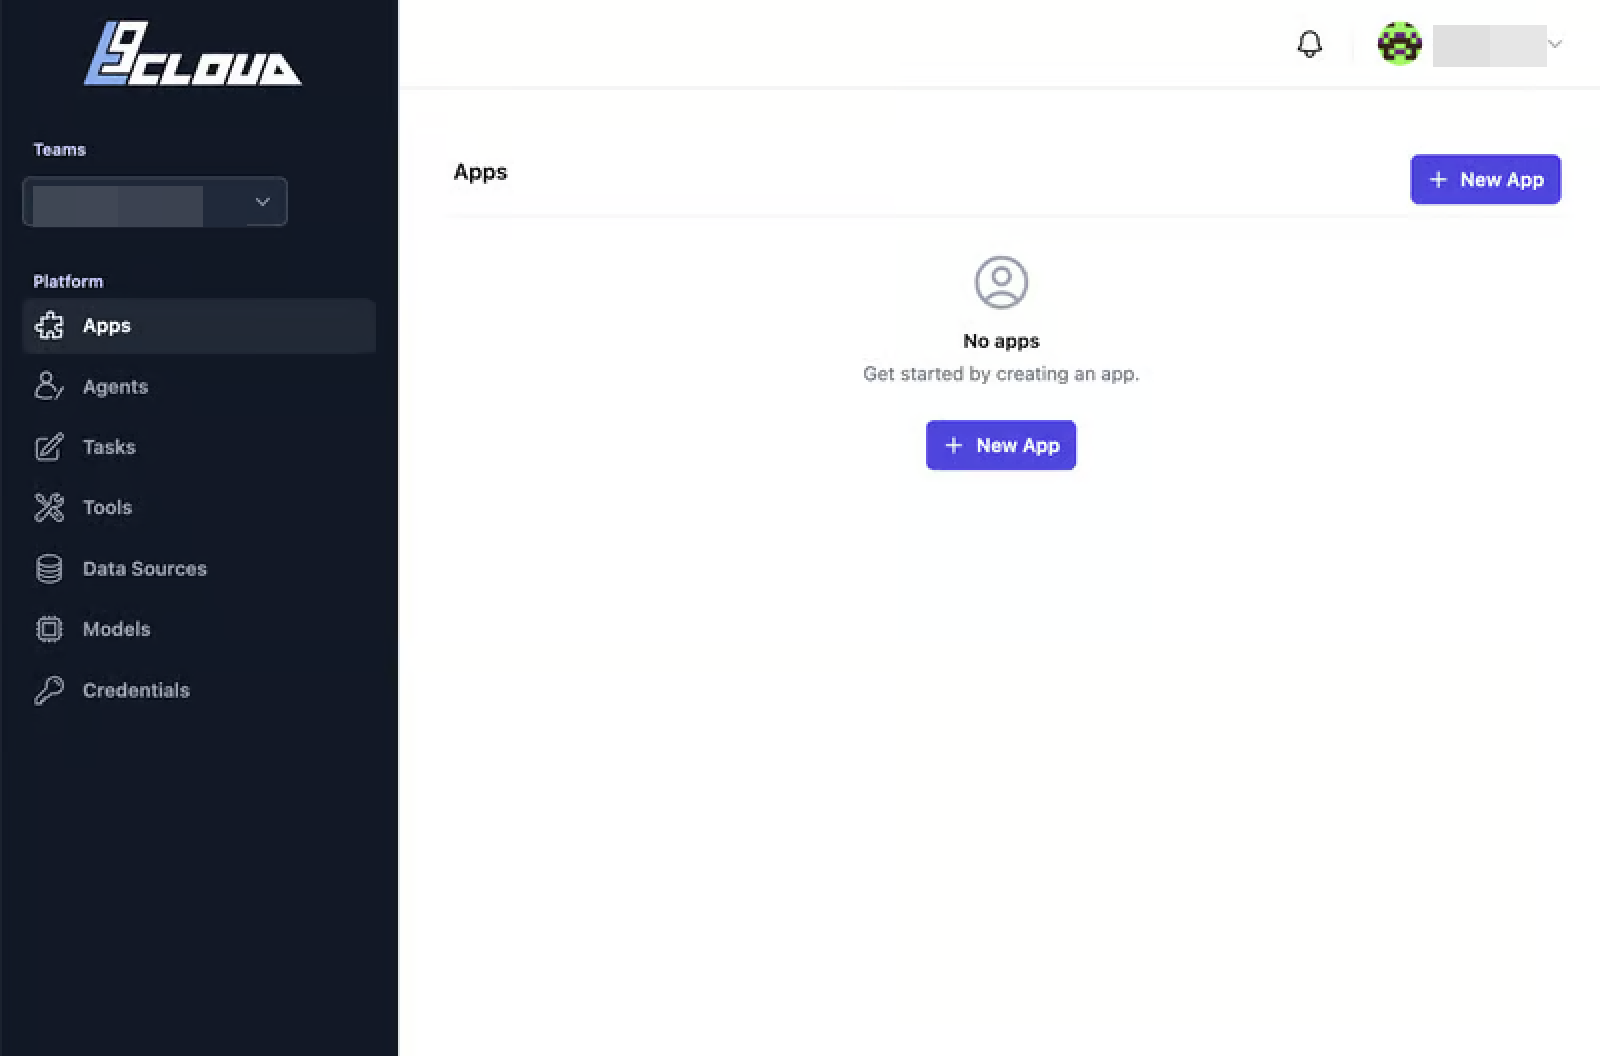
- App name – Enter the name you’d like to give to your app.
- Enter a description of what our App.
- Select a Tasks
- Select an Agent
- Choose a Chat Manager Model – Pick the Open AI model we configured earlier.

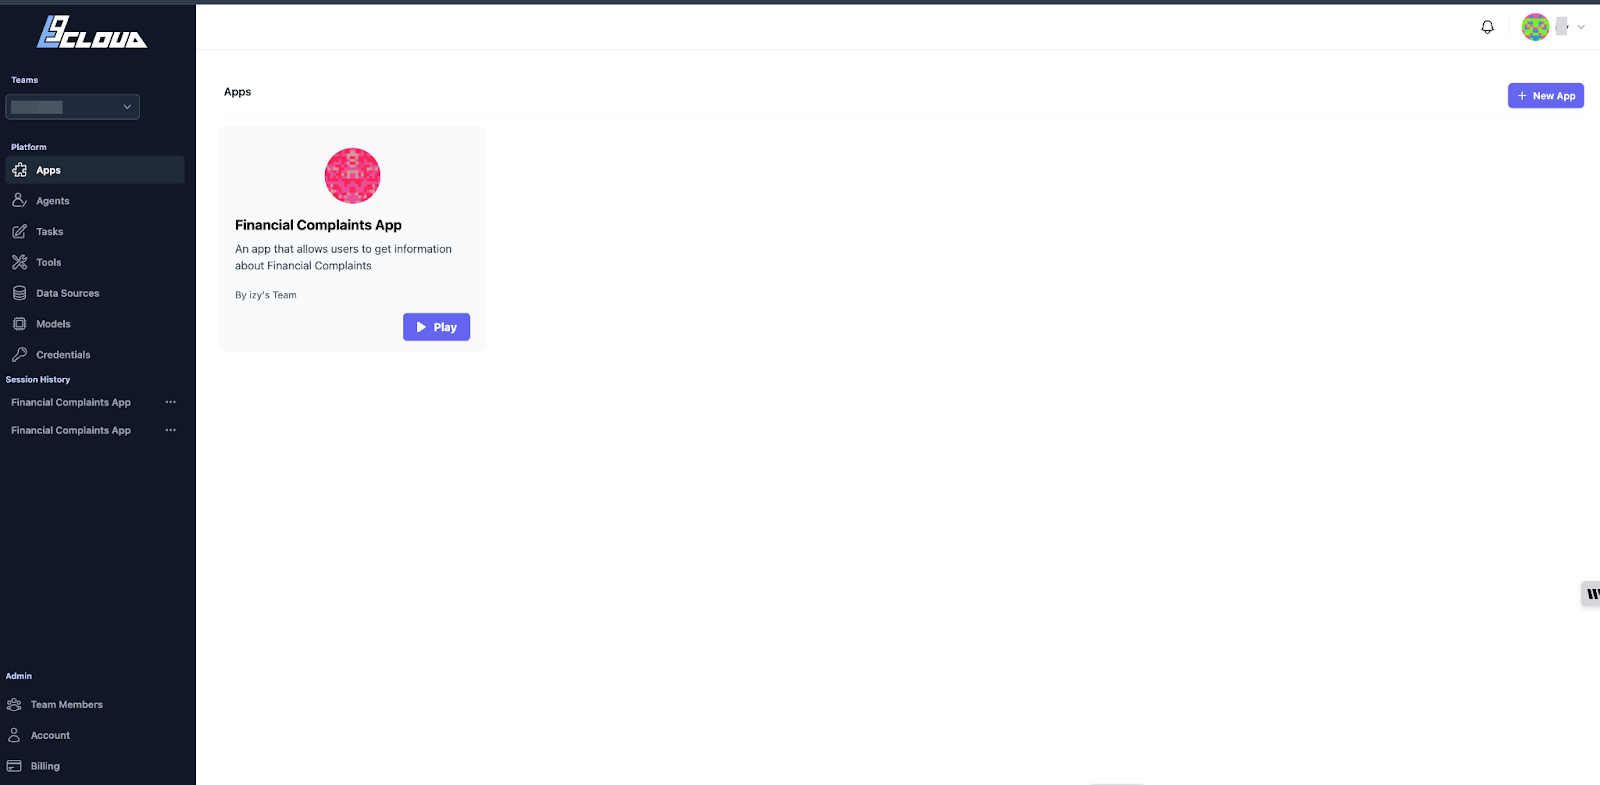
Now, let's test our app.
Clicking the play button will open a chat window for us where we can have a conversation.
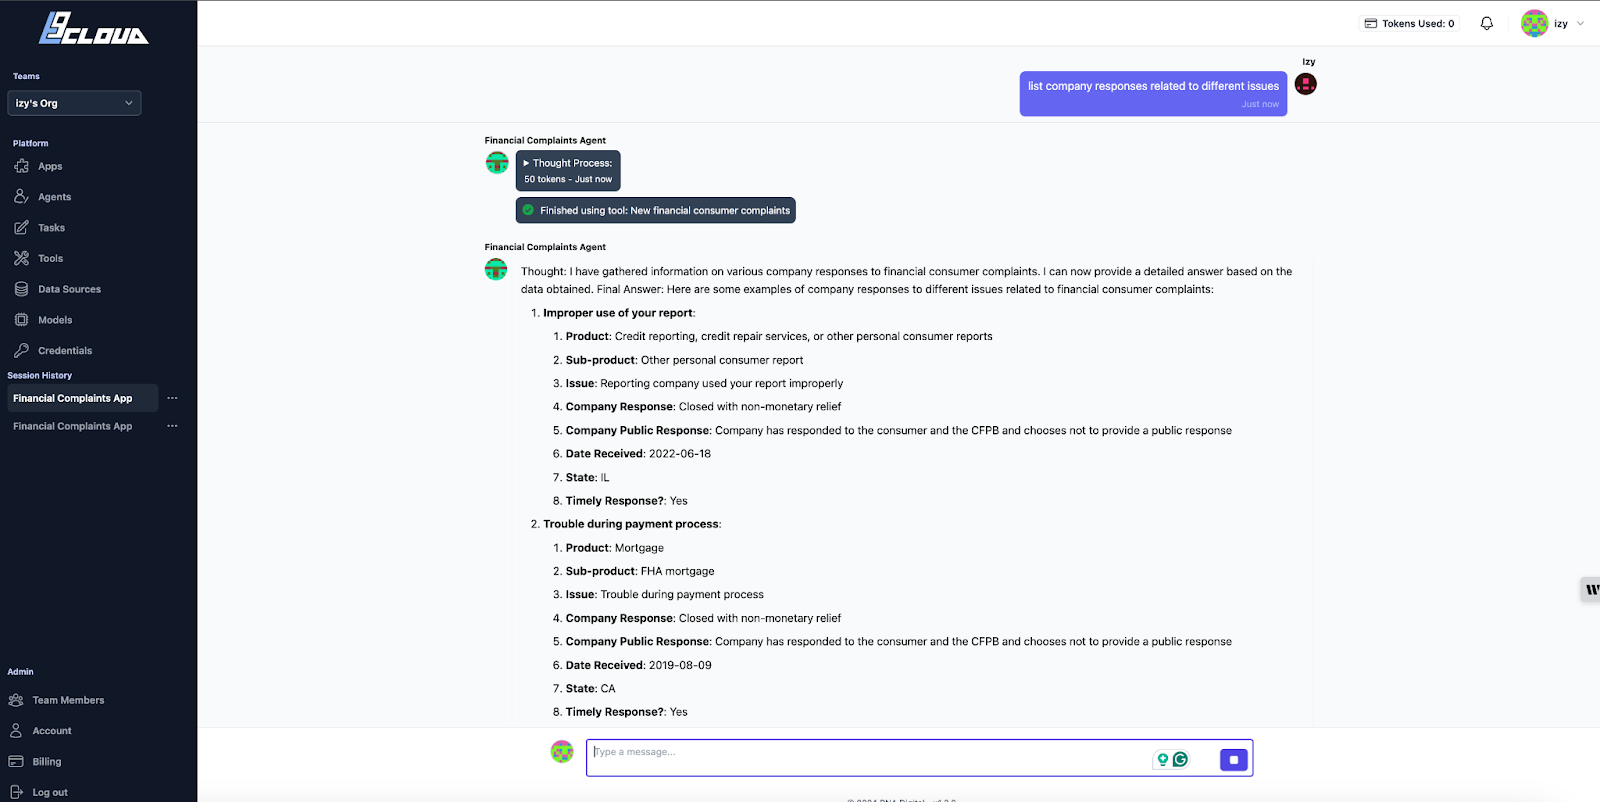
A chat interface window should be opened for us where we can chat with our data. For instance, with the data I have used, I can prompt the app to summarize some of the issues raised by customers related to the Mortgage product.

Or I can have it summarize company responses related to different issues.
Conclusion
In this tutorial, we explored building a RAG chat application using Agent Cloud and Google Sheets.
We covered setting up Google Sheets as a data source, embedding the data for efficient retrieval, and storing it within a vector store like Qdrant. We also learned how to create tools for Agents (chatbot components) and build an app chat interface where users can interact with the data without writing a single line of code.
If you want to read more interesting articles about developer tools, React, Next.js, AI and more, then I'll encourage you to checkout my blog.
Some of the fresh articles I've written this year.
- How I Build a Blog with Next.js and Firebase
- How I Build a Task Management App with React and Appwrite
- How I Build a Notes App Using React and Supabase – The Complete Guide
- How I Build a RAG Chat App With Agent Cloud and BigQuery
You can get in touch if you have any questions or corrections. I’m expecting them.
And if you found this tutorial useful, please share it with your friends and colleagues who might benefit from it as well. Your support enables me to continue producing useful content for the tech community.
Now it’s time to take the next step by subscribing to my newsletter and following me on Twitter.