
By Samuel Omole
React hooks is finally here!!! And I know there has been a whole lot of excitement around the possibilities that this new set of APIs present. If you’re still skeptical about it, then I urge you to check out this medium article so as to understand the problems that the team was trying to solve when they proposed Hooks.
I initially wasn’t as excited as the rest of the community, so I decided to wait until it was officially released in case there were any API changes. So, over the weekend after it was released I decided to read about it and surprisingly (not) there was a lot of articles and posts about hooks and how to get started with them.
I know some might say “Another hooks article, really?”, and to them, I say “Yes…yes and there’s more where that came from”. For this article, we will be building a very simple app using Hooks. In essence, we are not going to be using any class components in this application. And I will be explaining how a few of the APIs work and how they should be used in any application that we might be building.
Below is an image of what the app will look like once we are done:
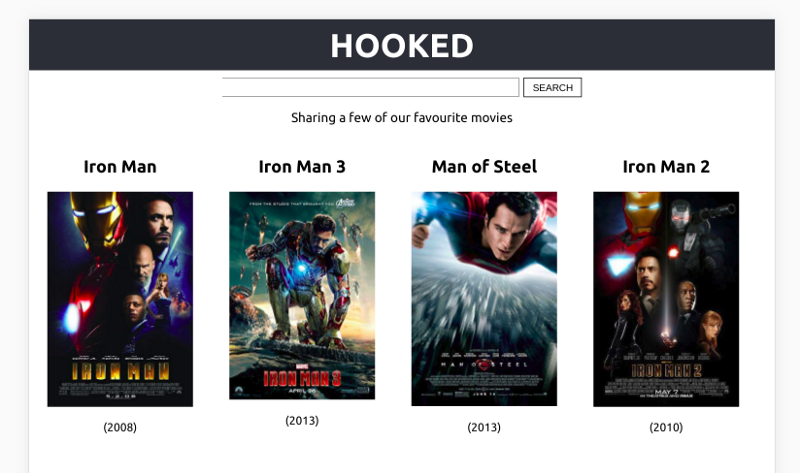
Basically, the app will be able to search for movies via the OMDB API and render the results to the user. The reason for building the app is just so that we can get a better understanding of using hooks in an application, which helps in understanding the role some of the hooks we will use can play in your own real-world apps. Some things are needed before we get into building the app:
- Node (≥ 6)
- A cool text Editor
- An API key from OMDB (You can obtain it here or use mine)
Great, once we have that then the next step is to set up the React app. For this tutorial we will be using create-react-app — it’s a really awesome tool for setting up a React app without having to deal with all the configurations that come with starting from scratch. You can create a new app by typing:

If you prefer to copy and paste then:
create-react-app hooked # "hooked" is the name off our app

# if you haven't installed create-react-app then type the following

npm install -g create-react-app
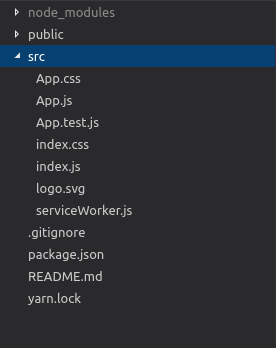
Once that’s done we should have a folder called “Hooked” with a directory structure as shown below:
We will have 4 components in this application, so let’s outline each one and its functionality:
- App.js — It will be the parent component for the other 3. It will also contain the function that handles the API request and it will have a function that calls the API during the component’s initial render.
- Header.js — A simple component that renders the app header and accepts a title prop
- Movie.js — It renders each movie. The movie object is simply passed into it as props.
- Search.js — Contains a form with the input element and the search button, contains functions that handle the input element and resets the field, and also contains a function that calls the search function which is passed as props to it.
Let’s start creating, in the src directory, a new folder and name it components because that’s where all our components will be. We will then move the App.js file into that folder. Then, we will create the Header component. Create a file called Header.js and add the following code to it:
import React from "react";

const Header = (props) => {
  return (
    <header className="App-header">
      <h2>{props.text}</h2>
    </header>
  );
};

export default Header;
This component doesn’t require that much of an explanation — it’s basically a functional component that renders the header tag with the text props.
Let's not forget to update the import in our index.js file:
import React from 'react';
import ReactDOM from 'react-dom';
import './index.css';
import App from './components/App'; // this changed
import * as serviceWorker from './serviceWorker';


ReactDOM.render(<App />, document.getElementById('root'));

// If you want your app to work offline and load faster, you can change
// unregister() to register() below. Note this comes with some pitfalls.
// Learn more about service workers: http://bit.ly/CRA-PWA


serviceWorker.unregister();
And also update our App.css with these styles (not compulsory):
.App {
  text-align: center;
}

.App-header {
  background-color: #282c34;
  height: 70px;
  display: flex;
  flex-direction: column;
  align-items: center;
  justify-content: center;
  font-size: calc(10px + 2vmin);
  color: white;
  padding: 20px;
  cursor: pointer;
}

.spinner {
  height: 80px;
  margin: auto;
}

.App-intro {
  font-size: large;
}

/* new css for movie component */

* {
  box-sizing: border-box;
}

.movies {
  display: flex;
  flex-wrap: wrap;
  flex-direction: row;
}

.App-header h2 {
  margin: 0;
}

.add-movies {
  text-align: center;
}

.add-movies button {
  font-size: 16px;
  padding: 8px;
  margin: 0 10px 30px 10px;
}

.movie {
  padding: 5px 25px 10px 25px;
  max-width: 25%;
}

.errorMessage {
  margin: auto;
  font-weight: bold;
  color: rgb(161, 15, 15);
}


.search {
  display: flex;
  flex-direction: row;
  flex-wrap: wrap;
  justify-content: center;
  margin-top: 10px;
}


input[type="submit"] {
  padding: 5px;
  background-color: transparent;
  color: black;
  border: 1px solid black;
  width: 80px;
  margin-left: 5px;
  cursor: pointer;
}


input[type="submit"]:hover {
  background-color: #282c34;
  color: antiquewhite;
}


.search > input[type="text"]{
  width: 40%;
  min-width: 170px;
}

@media screen and (min-width: 694px) and (max-width: 915px) {
  .movie {
    max-width: 33%;
  }
}

@media screen and (min-width: 652px) and (max-width: 693px) {
  .movie {
    max-width: 50%;
  }
}


@media screen and (max-width: 651px) {
  .movie {
    max-width: 100%;
    margin: auto;
  }
}
Once we have that, the next thing is to create the Movie component. We will do that by creating a file called Movie.js and adding the following code:
import React from "react";

const DEFAULT_PLACEHOLDER_IMAGE =
  "https://m.media-amazon.com/images/M/MV5BMTczNTI2ODUwOF5BMl5BanBnXkFtZTcwMTU0NTIzMw@@._V1_SX300.jpg";


const Movie = ({ movie }) => {
  const poster =
    movie.Poster === "N/A" ? DEFAULT_PLACEHOLDER_IMAGE : movie.Poster;
  return (
    <div className="movie">
      <h2>{movie.Title}</h2>
      <div>
        <img
          width="200"
          alt={`The movie titled: ${movie.Title}`}
          src={poster}
        />
      </div>
      <p>({movie.Year})</p>
    </div>
  );
};


export default Movie;
This requires more of an explanation, but it’s also just a presentational component (it doesn’t have any internal state) that renders the movie title, image, and year. The reason for the DEFAULT_PLACEHOLDER_IMAGE is because some movies retrieved from the API do not have images, so we will render a placeholder image instead of a broken link.
Now we will create the Search component. This part is exciting because in the past, in order to handle internal state, we would have to create a class component…but not anymore! Because with hooks we can have a functional component handle its own internal state. Let’s create a file named Search.js and in that file, we will add the following code:
import React, { useState } from "react";


const Search = (props) => {
  const [searchValue, setSearchValue] = useState("");

  const handleSearchInputChanges = (e) => {
    setSearchValue(e.target.value);
  }

  const resetInputField = () => {
    setSearchValue("")
  }

  const callSearchFunction = (e) => {
    e.preventDefault();
    props.search(searchValue);
    resetInputField();
  }

  return (
      <form className="search">
        <input
          value={searchValue}
          onChange={handleSearchInputChanges}
          type="text"
        />
        <input onClick={callSearchFunction} type="submit" value="SEARCH" />
      </form>
    );
}

export default Search;
This is so exciting!!! I’m sure you’ve just seen the first hooks API that we are going to use, and it’s called useState . As the name implies, it lets us add React state to function components. The useState hook accepts one argument which is the initial state, and then it returns an array containing the current state (equivalent to this.state for class components) and a function to update it (equivalent to this.setState ).
In our case, we are passing our current state as the value for the search input field. When the onChange event is called, the handleSearchInputChanges function is called which calls the state update function with the new value. The resetInputField function basically called the state update function (setSearchValue) with an empty string in order to clear the input field. Check this out to know more about the useState API.
Finally, we will update the App.js file with the following code:
import React, { useState, useEffect } from "react";
import "../App.css";
import Header from "./Header";
import Movie from "./Movie";
import Search from "./Search";


const MOVIE_API_URL = "https://www.omdbapi.com/?s=man&apikey=4a3b711b"; // you should replace this with yours


const App = () => {
  const [loading, setLoading] = useState(true);
  const [movies, setMovies] = useState([]);
  const [errorMessage, setErrorMessage] = useState(null);

    useEffect(() => {
    fetch(MOVIE_API_URL)
      .then(response => response.json())
      .then(jsonResponse => {
        setMovies(jsonResponse.Search);
        setLoading(false);
      });
  }, []);

    const search = searchValue => {
    setLoading(true);
    setErrorMessage(null);

    fetch(`https://www.omdbapi.com/?s=${searchValue}&apikey=4a3b711b`)
      .then(response => response.json())
      .then(jsonResponse => {
        if (jsonResponse.Response === "True") {
          setMovies(jsonResponse.Search);
          setLoading(false);
        } else {
          setErrorMessage(jsonResponse.Error);
          setLoading(false);
        }
      });
      };


    return (
     <div className="App">
      <Header text="HOOKED" />
      <Search search={search} />
      <p className="App-intro">Sharing a few of our favourite movies</p>
      <div className="movies">
        {loading && !errorMessage ? (
         <span>loading...</span>
         ) : errorMessage ? (
          <div className="errorMessage">{errorMessage}</div>
        ) : (
          movies.map((movie, index) => (
            <Movie key={`${index}-${movie.Title}`} movie={movie} />
          ))
        )}
      </div>
    </div>
  );
};


export default App;
Let’s go over the code: we are using 3 useState functions so yes, we can have multiple useState functions in one component. The first is used to handle the loading state (it renders a ‘loading…’ text when loading is set to true). The second is used to handle the movies array that is gotten from the server. And finally the third is used to handle any errors that might occur when making the API request.
And after that, we come across the second hooks API that we are using in the app: the useEffect hook. This hook basically lets you perform side effects in your function components. By side effects we mean things like data fetching, subscriptions, and manual DOM manipulations. The best part about this hook is this quote from the React official docs:
If you’re familiar with React class lifecycle methods, you can think of
useEffectHook ascomponentDidMount,componentDidUpdate, andcomponentWillUnmountcombined.
This is because useEffect gets called after the first render (componentDidMount) and also after every update ( componentDidUpdate ).
I know you might be wondering how this is similar to componentDidMount if it gets called after every update. Well, it’s because of the useEffect function accepts two arguments, the function that you want to run and a second argument which is an array. In that array we just pass in a value that tells React to skip applying an effect if the value passed in hasn’t changed.
According to the docs, it’s similar to when we add a conditional statement in our componentDidUpdate :
// for class components
componentDidUpdate(prevProps, prevState) {
  if (prevState.count !== this.state.count) {
    document.title = `You clicked ${this.state.count} times`;
  }
}


// using hooks it will become
useEffect(() => {
  document.title = `You clicked ${count} times`;
}, [count]); // Only re-run the effect if count changes
In our case, we don’t have any value that changes, so we can pass in an empty array which tells React this effect should be called once.
As you can see, we have 3 useState functions that are somewhat related, and it should be possible for them to be combined in a way. Thankfully, the React team has us covered because they made a hook that helps with this — and that hook is called useReducer . Let’s convert our App component to use our new hook, so our App.js will now look like this:
import React, { useReducer, useEffect } from "react";
import "../App.css";
import Header from "./Header";
import Movie from "./Movie";
import Search from "./Search";


const MOVIE_API_URL = "https://www.omdbapi.com/?s=man&apikey=4a3b711b";


const initialState = {
  loading: true,
  movies: [],
  errorMessage: null
};


const reducer = (state, action) => {
  switch (action.type) {
    case "SEARCH_MOVIES_REQUEST":
      return {
        ...state,
        loading: true,
        errorMessage: null
      };
    case "SEARCH_MOVIES_SUCCESS":
      return {
        ...state,
        loading: false,
        movies: action.payload
      };
    case "SEARCH_MOVIES_FAILURE":
      return {
        ...state,
        loading: false,
        errorMessage: action.error
      };
    default:
      return state;
  }
};


const App = () => {
  const [state, dispatch] = useReducer(reducer, initialState);

    useEffect(() => {

        fetch(MOVIE_API_URL)
            .then(response => response.json())
            .then(jsonResponse => {

            dispatch({
                type: "SEARCH_MOVIES_SUCCESS",
                payload: jsonResponse.Search
            });
          });
      }, []);

    const search = searchValue => {
        dispatch({
          type: "SEARCH_MOVIES_REQUEST"
        });

        fetch(`https://www.omdbapi.com/?s=${searchValue}&apikey=4a3b711b`)
          .then(response => response.json())
          .then(jsonResponse => {
            if (jsonResponse.Response === "True") {
              dispatch({
                type: "SEARCH_MOVIES_SUCCESS",
                payload: jsonResponse.Search
              });
            } else {
              dispatch({
                type: "SEARCH_MOVIES_FAILURE",
                error: jsonResponse.Error
              });
          }
          });
      };

    const { movies, errorMessage, loading } = state;

    return (
    <div className="App">
      <Header text="HOOKED" />
      <Search search={search} />
      <p className="App-intro">Sharing a few of our favourite movies</p>
      <div className="movies">
        {loading && !errorMessage ? (
          <span>loading... </span>
        ) : errorMessage ? (
          <div className="errorMessage">{errorMessage}</div>
        ) : (
          movies.map((movie, index) => (
            <Movie key={`${index}-${movie.Title}`} movie={movie} />
          ))
        )}
      </div>
    </div>
  );
};

export default App;
So, if all went well then we should see no change in the behavior of the app. Now let's go over how the useReducer hook works.
The hook takes 3 arguments, but for our use case we will be using only 2. A typical useReducer hook will look like this:
const [state, dispatch] = useReducer(
    reducer,
    initialState
);
The reducer argument is similar to what we use in Redux, which looks like this:
const reducer = (state, action) => {
  switch (action.type) {
    case "SEARCH_MOVIES_REQUEST":
      return {
        ...state,
        loading: true,
        errorMessage: null
      };
    case "SEARCH_MOVIES_SUCCESS":
      return {
        ...state,
        loading: false,
        movies: action.payload
      };
    case "SEARCH_MOVIES_FAILURE":
      return {
        ...state,
        loading: false,
        errorMessage: action.error
      };
    default:
      return state;
  }
};
The reducer takes in the initialState and the action, so based on the action type, the reducer returns a new state object. For example, if the type of action that is dispatched is SEARCH_MOVIES_REQUEST , the state is updated with the new object where the value for loading is true and errorMessage is null.
Another thing to note is that in our useEffect , we are now dispatching an action with the payload as the movies array we are getting from the server. Also, in our search function, we are dispatching three different actions actually.
- One action is the
SEARCH_MOVIES_REQUESTaction which updates our state object, makingloading=true and errorMessage = null. - If the request is successful then we dispatch another action with the type
SEARCH_MOVIES_SUCCESSthat updates our state object makingloading=false and movies = action.payloadwhere the payload is the movies array gotten from OMDB. - If there is an error, we will instead dispatch a different action with the type
SEARCH_MOVIES_FAILUREthat updates our state object makingloading=false and errorMessage = action.errorwhere theaction.erroris the error message gotten from the server.
To know more about the useReducer hook you can check out the official documentation.
Wrapping up
Wow!!! We’ve come a long way and I’m sure you are as excited as I am about the possibilities of hooks. For me personally, it is so much easier to introduce beginners to React, because I don’t need to explain how classes work or how this works, or how bind works in JS, which is awesome IMO.
We’ve only touched a few hooks in this tutorial, and we didn’t even cover features like creating our own custom hooks. If you have some other use cases for hooks or you’ve implemented your own custom hook, please do drop a comment and join in on the excitement.
NOTE: This article is not related to the previous one about Webpack, a subsequent article for that is already under construction ?.
This is the link to the GitHub repo for this article.