

I tried out Open Claw two weeks ago. I loved the potential, but did not enjoy the tool itself.
I, like many others, struggled with the installation process. And working from Linux, the Mac specific orientation added extra pitfalls. It wasn't always clear whether configuration and management should be done in the docs, the CLI, or the interface.
I found the UI unintuitive and it left me wondering if it wasn't just a dev placeholder. The color choice in particular was especially harsh. All the red tricked the eye and made white text appear green. It also made everything seem like an error message.
I couldn't make heads or tails of the organization and structure. Workspaces, agents, and sessions are all terms I'm familiar with and understand. But the way Open Claw implements them made no sense to me.
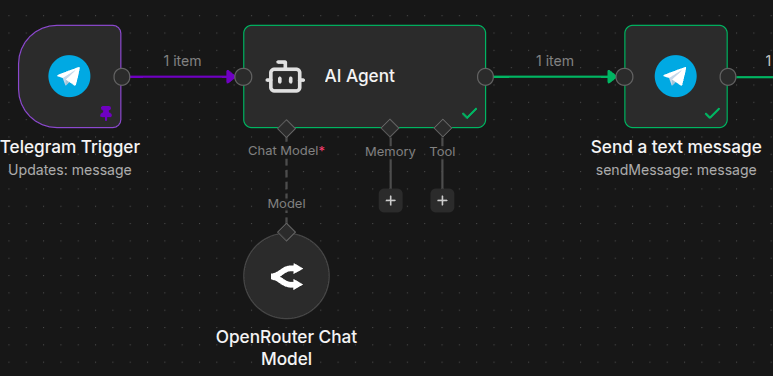
Open Claw started as a way to connect a chat tool to an AI. I did that eight months ago with n8n. It's literally only a few nodes. It was so easy that I didn't think anything of it. In my opinion, Open Claw isn’t actually all that special. There’s no part of it that stands out as unique, except for the approach. It’s the Flappy Bird of the agentic AI world.
So I set out to make my own. And within a few hours, I'd whipped up a simple working prototype vibe-coded with Python and connected to Open WebUI (OWUI).
But I wanted to see what prompt OWUI was sending the agent, exactly. Now, if I was actually a Python guy, I would have done some console output. But instead, I went for my favorite tool: n8n (a powerful low-code automation system). And that's where things got interesting.
About This Handbook
This handbook will introduce you to agentic AI creation using a hands-on approach and a starter project I created called Decapod.
Decapod is not a self-contained SaaS offering. There is no part of it that is black boxed and unavailable to hack on. Decapod is a collection of docker-compose.yml containers, scripts, AI agent prompts, and n8n workflows that work together to help give you a leg up on your path to building your own agentic AI empire.
Concepts and technologies you'll be introduced to and using:
Agentic AI with tools and skills
Docker containers with Docker Compose
Open WebUI
n8n
S3 and MinIO
Caddy
Postgres
For a list of required skills, services, and tools, please check out the "Requirements and Processes" section.
Table of Contents
Decapod – The DIYer's Dream Agent
I'll be honest. I'd never even considered the security issues with Open Claw at first. But they're enormous! Let's open a giant hole in our server and give a fledgling alien intelligence root access and all of our API keys. What could possibly go wrong?
Decapod isn't a monolithic app. It's a collection of tools and n8n workflows that give you complete control over your agent and its tools. It's a framework to give citizen developers a leg up.
By switching to n8n, I accidentally solved a ton of issues and made a far superior (in my opinion) project:
Double (or triple if you choose to host in a VPS) sandboxed security. My agent lives inside of n8n inside of a Docker container inside of a VPS.
The agent never sees a single API key or even ever needs to know exactly how you're connecting services. Credentials are handled by n8n.
Universal access – I prefer OWUI. But literally anything that can connect to a standard OpenAI API endpoint can connect to Decapod.
Over 1,000 integrations – What n8n does best is connecting any API to any other API via drag-and-drop nodes. And there are more than 1,000 of them.
No more sketchy skills – Decapod uses skills, but they have to actually be connected to n8n workflows and nodes to work.
More problems Decapod solves:
Fewer tokens burned – Decapod maintains a clean boundary between what's best handled with code/logic and what's best handled by AI.
No endless loops and hung jobs – Decapod uses a jobs and tasks system that the AI can manage. So if it sees that a task has failed, it can change tasks or suspend the job.
HITL (Human In The Loop) – You can add a HITL sub-workflow before any AI skill to give them permission to proceed or not.
An MVP you can trust – The core Decapod system is just an MVP. But it's built on exclusively mature, open source, enterprise ready solutions: n8n, Open WebUI, Docker, Caddy, Postgres, and MinIO.
How Decapod Works
Decapod is middleware that acts like an OpenAI API. But it intercepts the API call and does agent work with the real API.
The OpenAI API standard is the most widely used in the industry. Almost every tool, like Open WebUI, Zed, and Obsidian have ways to connect to the OpenAI standard. So those tools can also connect to Decapod.
Decapod itself can connect to any API and pass available models through to other tools. I strongly prefer and recommend OpenRouter. OpenRouter also uses the OpenAI standard, but lets you connect to hundreds of mainstream and indie models under the same pricing system. Decapod is configured to work with OR out of the box.
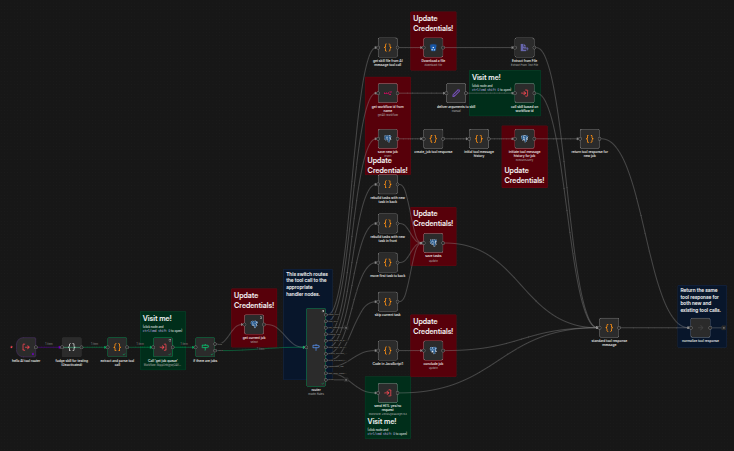
This is an image of the Decapod agent tool router – one of the key n8n workflows in Decapod.
Core Engine
Decapod consists of an agent with tools and skills. By tools, I mean the agentic tools that an AI can access to perform tasks as part of the API. And by skills, I'm referring to Anthropic's Agent Skills standard. It's the same skills standard used by Open Claw.
The Decapod agent has a limited, immutable set of tools for managing Decapod's state and job queue. One tool is used to call skills. Skills are dynamic and you can add as many as you like mid-flight.
Each skill consists of core instructions, followed by JSON specs. The agent builds a skill request based on the JSON and calls the use_skill tool to have it executed. Then Decapod calls a sub-workflow with a name that matches the skill and sends it the JSON.
One skill = one sub-workflow. JSON specs = sub-workflow's expected input.
When Decapod receives a user message, it passes it to the agent. If it's just a message, the agent responds. If it's a call to action, the agent picks a tool and gets to work.
Decapod loops through each job in the queue, handling the agent's tool calls and passing it back the results. When the agent is done, it concludes the job and stops sending tool calls. The final message is passed back to the user.
Supakitchen – Supabase on a Budget
I'm a huge fan of Supabase. It's all the fun of Firebase, except with data normalization. But I'm self-hosting Decapod because paying $20 per month for each of five or more services doesn't sit right with me.
As a mad scientist, I like to be able to try different tools without dealing with the freemium hoops. So I'm running Decapod on a Hetzner VPS with 8 gigs of RAM for about $18 per month. Those 8 gigs go really far in the self-hosted world, but Supabase is heavy.
What I really wanted was to give my agent file access and a database. I accomplished that with MinIO and Postgres. No real-time data, but my agent is async anyway. And agent authentication is done through n8n. So it's good enough.
But you do you! Decapod can work with any S3 compatible file store and any Postgres database. So if you want to use Supabase instead, go for it!
Open WebUI – AI Chat With All the Bells and Whistles
You can use chat tools, like Discord, Telegram, Slack, and others, to chat with your AI easily enough. But if you want multiple sessions or to use different models, it can be tricky.
The easiest tool to set up and work with, by far, is Telegram. You get chat, UI elements, and even embedded apps without having to host your own server, like you do with Discord. I once used it to create a HITL lead qualification tool in a few hours.
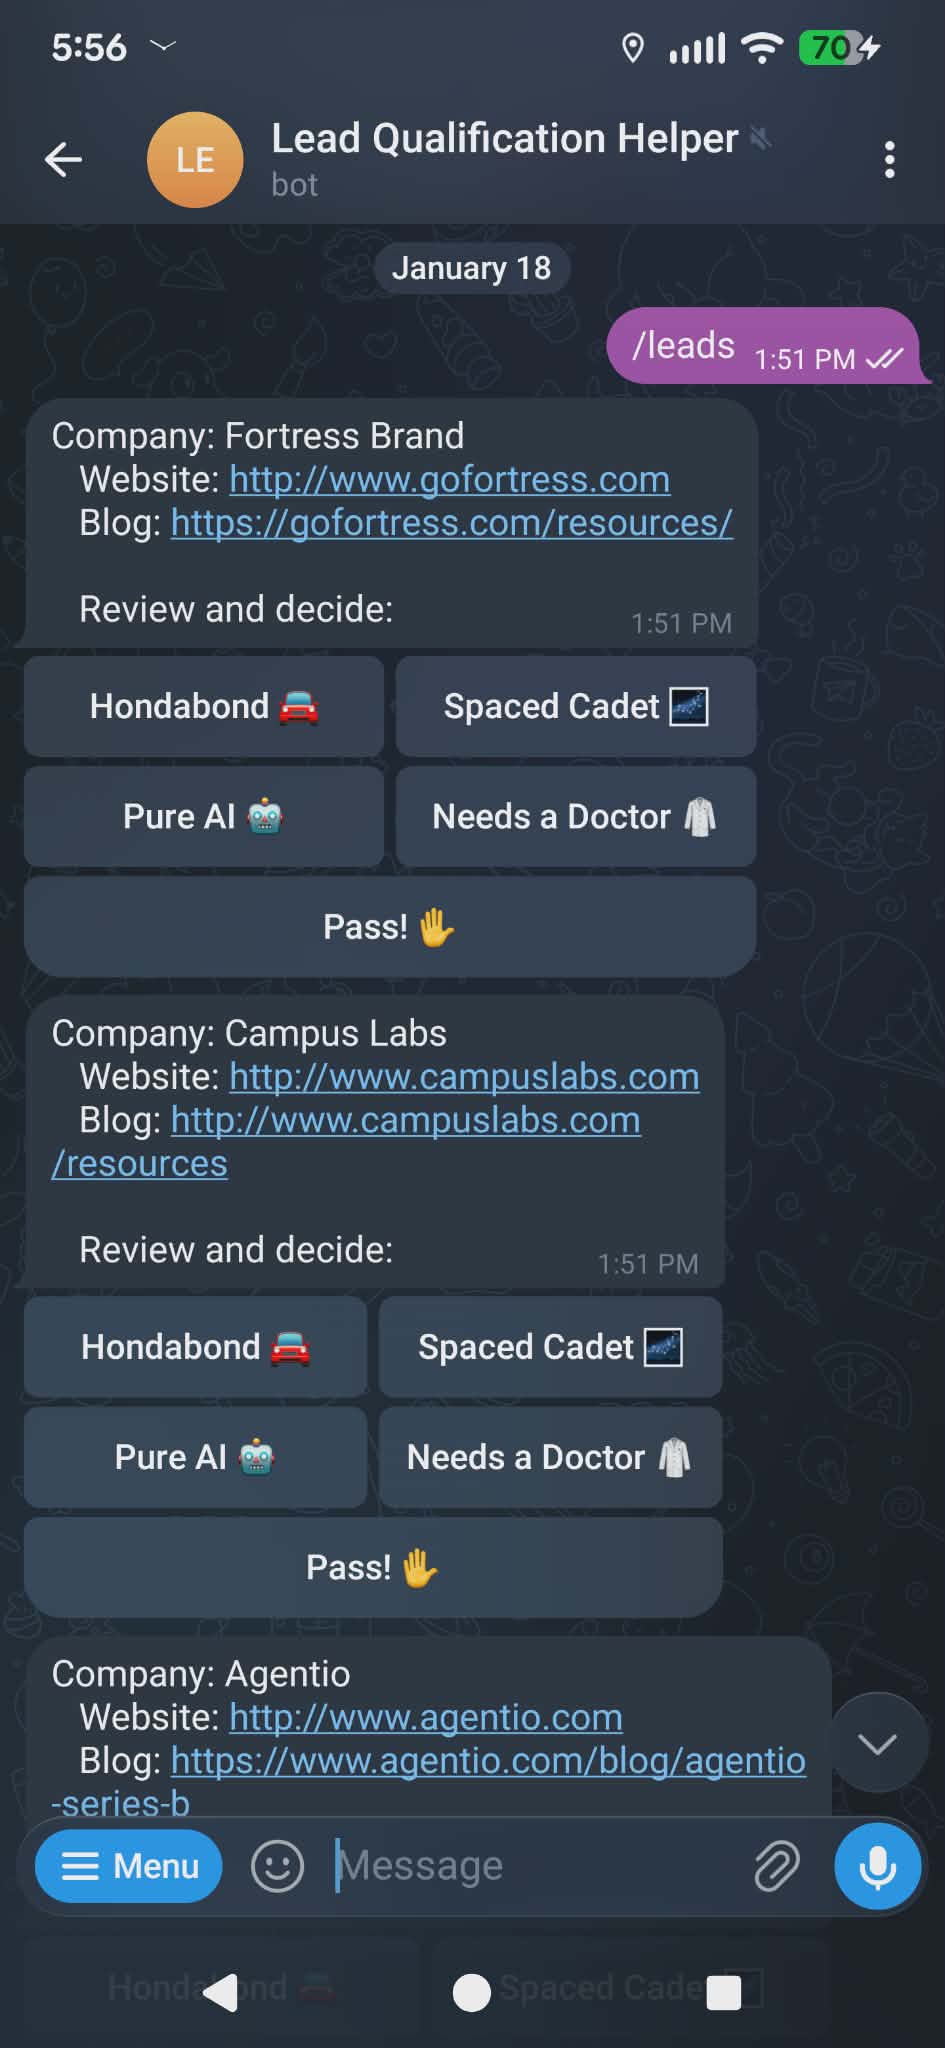
BUT! While Telegram and friends do get the job done, if you want a new session you have to create a new bot for each and every one. If you want to switch models, you need to add /slash commands. If you want context management, you have to handle that server side.
That's why I prefer Open WebUI. OWUI gives you everything you expect from all of the best mainstream AI offerings, but with a direct tap to the API.
It works great on browser and mobile as a progressive web app (PWA).
You can mod it with Python.
It has many ways to manage and supply context, including nested projects/folders and RAG support.
You can collaboratively work on notes with AI.
Those are a few of my favorite features, but there are so many more. Why reinvent the wheel when the absolute best solution already exists?
Requirements and Processes – Tools I Use and Recommend
Welcome to my lab-or-a-tory. We're out there on the fringes of agentic AI now. Doing weird experiments by stitching together pieces and parts. Let me show you how I work and tell you where you can and can't stray from my process.
Decapod is a finished MVP and should work right out of the box with minimal headache. But it doesn't have more than a few skills yet. So you'll need to build your own until it takes off. Fortunately, your Decapod agent can help.
The Checklist
Skills:
✅ A generalist's mindset, problem-solving skills, and a sense of adventure.
You don't have to be an expert at anything to install Decapod. I'm not, and I built it.
But you do have to be comfortable with many different technologies.
✅ The command line, Docker, and probably Node. Decapod is self hosted. So you'll need to get your hands a bit dirty.
✅ The ability to read and write a little JavaScript. This helps a lot with n8n code nodes to give it more utility.
✅ Familiarity with JSON and APIs. Everything in n8n is about passing JSON from node to node. And n8n is nothing if not a universal API connector.
Services:
✅ A domain name with DNS access.
This is critical for n8n to work properly due to CORS and security issues.
Also, the OWUI PWA doesn't work when hosted through an IP. It's just a web page at that point.
Plus, it's just better for security overall with https support.
If cost is an issue, you can get an all-digit domain name from gen.xyz for $0.99. Seems legit, but I haven't tried it myself.
✅ A dedicated VPS with SSH access. (SSH access should be standard for any VPS.)
You can technically host this on your own PC if you know it will be running 24/7. But using a VPS will give you peace of mind and avoid complicating your PC.
Big-name solutions like AWS and Google Cloud can wind up going off the rails and costing you big bucks if you don't know exactly what you're doing. Better to stick with less enterprise-oriented offerings. I've used the following:
Hetzner – My current personal favorite. Germany based. High quality and affordable pricing with a few American servers. Even more affordable with European servers.
Digital Ocean – US based. Can't go wrong. Decent prices. Many offerings. Almost exclusively American servers.
Webdock – Denmark based. The most affordable of the bunch.
✅ An OpenRouter account. OR provides a universal interface for hundreds of AI models. There's no freemium upsell, like with Hugging Face, but there is a percentage add on when you buy credits/tokens. I feel like it's worth the extra fee to be able to easily swap from Claude to Kimi to GPT to DeepSeek as I please without more keys, more accounts, and more wiring. But this is optional. You can plug Decapod right into Kimi or Gemini and just leave it there if you like.
Tools:
✅ Cursor, or similar. I love Cursor. It matches my hands-on style. If you're freestyling and dreaming something into creation as you build it, AI will always take the wrong path if you take your hands off the wheel. Cursor lets me be in charge and play director while the AI does the heavy lifting and saves me from hours of Googling and digging through 10-year-old questions on Stack Overflow. Especially with the command line stuff. I could not have knocked out Decapod in two weeks without it. But it couldn't have built Decapod at all without me.
✅ Another AI bestie to help you dream, plot, and plan. Cursor is great, but very utilitarian. I always have a session open with a running commentary about my work. I'm constantly feeding it context and leaning on it to get a fresh perspective and solve more esoteric issues, like debugging n8n flow problems, for example. I use Claude for absolutely everything. It has the most natural conversational flow, it's good at taking meta instructions regarding its behavior, and it always has an eye on accuracy – very reliable.
Assembling the Dream Team – Ikea Style
Here are the pieces and parts you'll find in your Dekkaplonkën Ikea flat pack (the GitHub repo).
- Four Docker containers containing five services with docker-compose files. Just heat and serve.
Infrastructure: Caddy for routing and SSL certificates for https security.
Infrastructure: Postgres for all your data needs.
MinIO: An S3 compatible file storage system.
n8n: The ultimate automation tool.
Open WebUI: The ultimate AI chat interface.
SQL tables
A table for the decapod state.
A table for jobs, tasks, and tool chat history.
S3 Files and Folders – Agent Templates
Four starter skills (two actually implemented in n8n).
Two instructional files, including the persona and skill definitions.
n8n Workflows (6,889 lines of pure JSON)
API Middleware: The entry and exit point that manages the session and loops.
AI Tool Router: Executes your agent's tool requests.
Construct Message History: Injects instructions into your agent's chat history.
Get Job Queue: A one-off database call that gets active jobs ordered by priority and creation date (First In First Out).
Utility Workbench: A place for testing and managing your flows. Currently contains a Skill assembly jig.
Worker: Loops over job queues, talking to the agent and calling the tool router with its responses.
A write-file skill and a research-recipes skill.
A couple more placeholders. (Decapod is an MVP)
Also
A Docker cheatsheet.
A script to generate agents from the template.
A destructive script to upload local agent files to your S3 account by overwriting existing files. Good for dev. Bad if you let your agent start modding their own instructions.
Scripts to start and stop all Docker containers at once.
Accessing Your VPS With Cursor and SSH
SSH is the standard way to access any server and has been forever. But working through a terminal can be slow and plodding. Fortunately, there's a better way.
Connect to the server with Cursor, VS Code, Antigravity, or whatever you use. This gives you:
Multiple terminals to access the remote server.
The ability to view localhost servers as if they were on your own machine via port forwarding.
Drag and drop folder and file management.
No more Nano, Vim, or Emacs (unless you want to).
And the best part! Cursor can do all the remote file system work for you, including troubleshooting servers and containers, writing scripts for automating common tasks, and helping you hash out actionable plans.
(Cursor can also connect to your Decapod!)
Every VPS provider will have their own way of managing SSH access. They usually make adding them part of the sign up process.
Generating and managing keys is a pretty well-paved path and I won't go over it. It's a good job for Cursor, if you need help.
However! I use Bitwarden for SSH key generation and management. They still need to be stored locally for tools on your computer to access. But it's nice to have them in a single secure location.
VS Code requires an extra plugin to access a remote server. Cursor comes with it preinstalled. Just click Connect via SSH, set up your connection, and you're good to go.
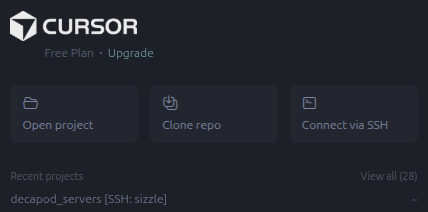
📝 Side note: I was on the paid plan when I started, I swear. I tend to switch services a lot as new models are released and I discover different tools and options. But I only ever pay for 2 or 3 at a time.
I got about halfway through this article when Cursor expired. But I'm trying the new Gemini 3 models and switched to Antigravity mid-flight rather than re-up cursor.
Installing and Configuring the Docker Containers
Finally! After a novella's worth of lead-up, we, at long last, get to the actual installation. That will be shared in the next article – have a good night! Just kidding, please put down the brick.
Once you've SSHed in to a VPS, a Raspberry Pi with Ubuntu, or a Virtual Machine, you're ready to get started. I'm going to assume you know how to install tools like Docker and Node on your system and not go into a lot of detail. Ask your friendly neighborhood AI for help if you get stuck.
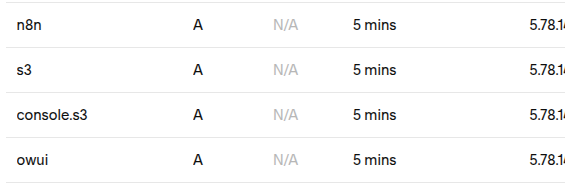
💡 Important! If you haven't already, get your domain name and open up the DNS page. You'll want to redirect "A" records to your IP for each relevant service.
Start by cloning the Decapod repo.
git clone https://github.com/leetheguy/decapod.git
cd decapod and create your Docker network.
docker network create web
Now we're going to go into each of the four Docker folders, configure them, and fire them up, starting with infrastructure.
cd infrastructure cp .env.example .env
Alternatively, you can move the files to rename them or just click on the file in the UI and F2 to rename it. Whatever floats your goat 🐐.
Now edit the new .env file. You can get the data folder path by clicking on the infrastructure folder and Ctrl/Cmd+Alt+C. The rest is up to you. I used Bitwarden to generate a password here.
Next, copy the Caddyfile template into its own file.
cp caddy_config/Caddyfile.template caddy_config/Caddyfile
And start the Docker container with docker compose up -d.
Back out of infrastructure and into minio. Same again with the .env – copy and configure. Make sure the URLs match your domain.
Once more for n8n and then again for openwebui.
OWUI config comes from the infrastructure and minio .env files:
S3_ACCESS_KEY_ID=minio_admin
S3_SECRET_ACCESS_KEY=minio_password
S3_BUCKET_NAME=decapod
MINIO_ROOT_USER=minio_admin
MINIO_ROOT_PASSWORD=minio_password
POSTGRES_DB=postgres
POSTGRES_USER=postgres
POSTGRES_PASSWORD=postgres_password
📝 Note! OWUI may take a moment or two to start. Go grab some water and it should be up by the time you get back.
Configuration and Wiring
Roll up your sleeves! This is where we get up to our elbows in pieces and parts.
If everything went to plan, you should now have all five services up and running. You can confirm the containers are live with docker ps. You can check that they're actually properly connected by visiting s3, OWUI, and n8n.your-domain.com.
Create accounts for all three and sign in to each.
⚡️ Important! Get your n8n license key! It's free and gives you access to all community features. You'll be severely limited without it. Activate it under Usage and plan in the settings.
Initiate the Database
Decapod only needs two data tables. You can add them from the command line. But I like pgAdmin.
Connect to your Postgres database in the usual way. But you'll need your server's IP for the host name instead of postgres (which you use to connect services inside of the Docker network) since pgAdmin isn't in your Docker network.
You'll find your SQL files in components/pgsql_tables. Create a decapod database and add both of the SQL files to it. A default decapod_state table record will be automatically generated when running the SQL.
In pgAdmin:
Open the decapod server.
Create a decapod database by right-clicking on databases.
Select the new database.
Click the query tool button at the top of the explorer.
Copy and paste the decapod_state table into the query and run it with F5.
Clear the query, paste in job_queue, run it.
Or ask Cursor or an AI bestie for help if you want to go pure command line.
A Little MinIO
Next up, you'll be adding your agent's instructions and persona files to your private S3 service. Start by visiting your MinIO server and adding a decapod bucket.
In components/S3_structure/agents/, you'll find a template for your agents. (I have the intention of making Decapod a multi-agent tool in a future release.) The template is meant to be copied to a new agent of your choice. But if you choose something other than Decapod, you'll need to update the state table.
You can do it manually if you wish. Copy the folder to match the new agent's name and update the definitions/skills.yaml file to include all the skills you want your agent to have. The name and description should exactly match what's found at the top of each skill file.
Alternatively, I vibe coded a script to make it a little easier. It's in the scripts folder and you'll need to install the inquirer Node module to use it. Run cd scripts and create-agent.mjs to use it.
You also need to make sure that the files and folder structure in your MinIO match those in S3_structure. Start by creating a bucket called decapod in your drive. Then upload the files from S3_structure into your bucket.
But that's easier said than done because they're on a remote server. And if you used the visual interface, you'd have to download them to your local machine first. So I made another script – upload_S3_structure.sh.
That script is strictly meant for dev purposes. It's absolute and destructive. Just a heavy mallet. So if you want to surgically alter your MinIO, do not use it! Remember kids: mallets and brain surgery don't mix.
Once your agent files are in place, you can let your agents edit them, Open Claw style, or you can edit them yourself. But MinIO doesn't give you much of anything in the way of features for their UI.
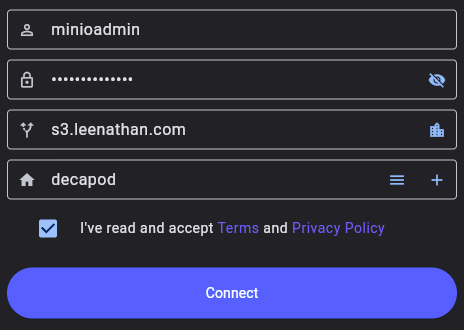
For a better experience, I'd recommend S3Drive. When you go to sign up, look for the connect button towards the bottom to connect to your own MinIO endpoint.
S3Drive will let you edit your files in place after you've uploaded them. This is good for quick fixes or copying and pasting sections without a complete wipe.
Adding the Workflows
You'll find most of what makes Decapod Decapod in the components folder. And the heart of that is in n8n_workflows.
You can manually import those workflows one at a time and go over each one to make sure they're safe and sound. Or you can use the n8n CLI inside of the Docker container and save yourself some tedium.
These commands move the workflows to the Docker container, import them with the n8n CLI, and then remove them from the tmp directory.
docker cp ./components/n8n_workflows n8n:/tmp/workflows

docker exec -u node n8n n8n import:workflow --input=/tmp/workflows --separate
docker exec -u node n8n n8n import:workflow --input=/tmp/workflows/skills --separate

docker exec -u root n8n rm -rf /tmp/workflows
Now, you should see the 10 workflows in n8n. I'd recommend drag-and-dropping the main workflows to a dedicated decapod folder and the two skills to decapod/skills, just to keep things tidy. But they reference each other by id, so do what you want.
Getting Started With n8n
Now would be a good time to start exploring the workflows in your n8n UI Personal tab. If you sort them by name, the main file will be on top. Crack it open and see it's not too intense, and it's self-documented. Blue for notes, Green for sub-workflows, and Red for nodes that require your credentials.
I'd recommend reading the notes and thoroughly exploring the sub-workflows to help you understand Decapod. It's your tool now! Create credentials as you go.
Because we're using a Docker network, creating credentials and connecting your services to each other couldn't be easier.
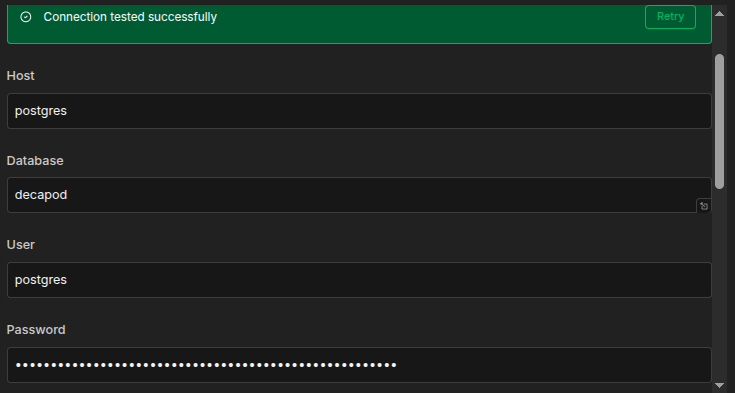
The standard to connect all of your services is to reference them by name:port. Because the Postgres credential has its own port field, you can just set it to Postgres. Port should be 5432.
📝 Note! All credential details, like your container names, ports, and passwords, can be found in your docker-compose and .env files.
For MinIO:
Endpoint:
http://minio:9000Force Path Style: Enabled! Important for MinIO.
API Connections to OpenRouter:
choose: Authentication -> Predefined Credential Type
then: Credential Type -> OpenRouter
Now just paste your API key from OpenRouter.
n8n – (meta access to your workflow):
In a new tab, go to n8n Settings -> n8n API.
Turn off expiration if you like.
Copy your key.
Paste it in the field.
Base URL:
http://n8n:5678/api/v1
Once you've created credentials, you can reuse them for every relevant node that uses the same credential. Just select it from the dropdown.
💡 Tip! It may help to remove the red sticky notes as you add credentials. And don't forget the skills! I didn't sticky note them at all.
As a final step, make sure your n8n workflows are published in the following order:
construct message history
get job queue
hitl yes/no
tool router
worker
middleware
and the two skills
💡 Tip! Always make sure your n8n workflows are in a published state with a green dot before calling them. Otherwise, you'll be calling an outdated version.
Now, Get OWUI to Talk to Decapod
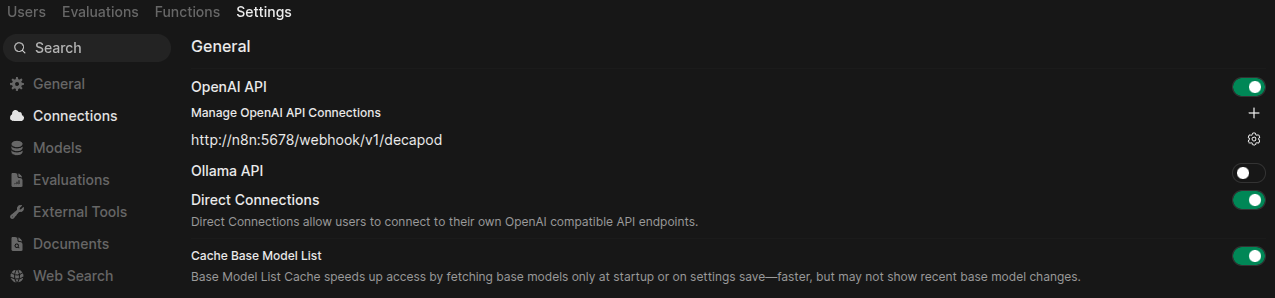
OWUI is built for teams, so you have admin settings and personal settings. You'll want to edit the admin settings by clicking on the profile circle in the lower-left-hand corner, then Admin Panel -> Settings -> Connections.
From there:
Ollama API Disabled: Just keeping things tidy.
Configure the OpenAI link by clicking on the gear and delete that too.
Direct Connections: Enabled
Cache Base Model List: Enabled Now add your Decapod connector with the plus button.
URL: http://n8n:5678/webhook/v1/decapod (Click the cycle icon to confirm your connection.)
Auth: none (it's all in the same Docker network, so it's fine for now. You can add a password for production.)
Prefix ID: decapod (If you do decide to use OpenAI, Hugging Face, or whatever else, this will help distinguish the model hosts.)
That's it. Save and go to the Models tab. Decapod passes OpenRouter models straight through. So if you see hundreds of models, take a victory lap! That means that Decapod is working, live, accepting requests, and you've even properly done your certifications (at least for OpenRouter).
Now create a new chat session and pick a model. I like Claude Haiku 4.5. Fast, cheap, and good. Pick three. I did all of my Decapod dev with it in the saddle, so I know it works. And 3.5 million tokens towards testing iterations cost me \(4, so I know it's reasonable. Alternatively, Kimi K2.5 will likely work and would be even a little bit cheaper. I burned through 4.7 million tokens installing a Docker container in Open Claw with Kimi for about \)3.
Time to say hello to your little friend! Haiku is fast. So if it takes more than a few seconds to respond, something could be borked in your n8n flow. It happened to me as I was writing this article. I had some issues with both Postgres and MinIO.
💡 Tip: If the agent does get hung, it's easier to resend the message than stop and try again.
There Was Supposed to Be an Earth Shattering Kaboom
So, your agent really wants to talk to you, but all you have is a pulsating dot. It's likely that something got misconfigured in n8n.
You can debug n8n by going to the middleware workflow and selecting executions from the top tab bar. If there's an error on the left list, look for a message in the lower right.
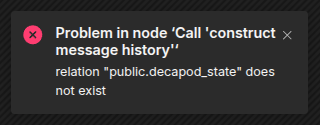
This was when I had some database config issues and it couldn't find the state table.
Some sub-workflows may fail quietly. You can trace flow from the webhook entry point to the error. All successful nodes will light up green. The bad node will be red. Drill down, check executions, and repeat for each sub-workflow.
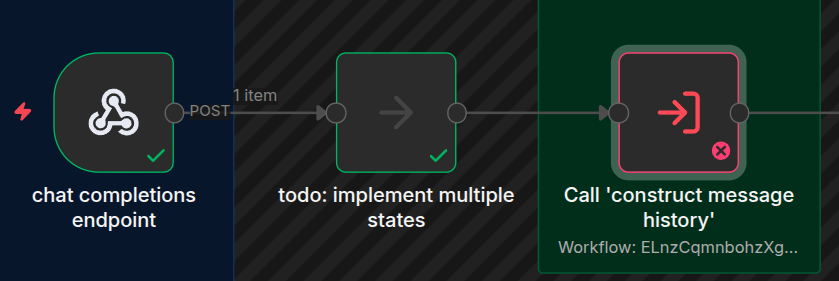
When you find the culprit – the actual bad node in the bad execution – select "copy to editor" in the upper-right-hand corner. That will freeze the workflow to that state. Open the node, fix the credential or whatever, and click Execute Step to see if it's fixed.
Remember: after every change, always always always publish your update. Otherwise, n8n won't actually use the latest fixed version of your workflow.
Once you've successfully debugged your Decapod, make sure that you clean out the loose unfinished jobs in the job_queue table with pgAdmin or whatever. Otherwise, your agent will try to complete each of them before finishing the next job.
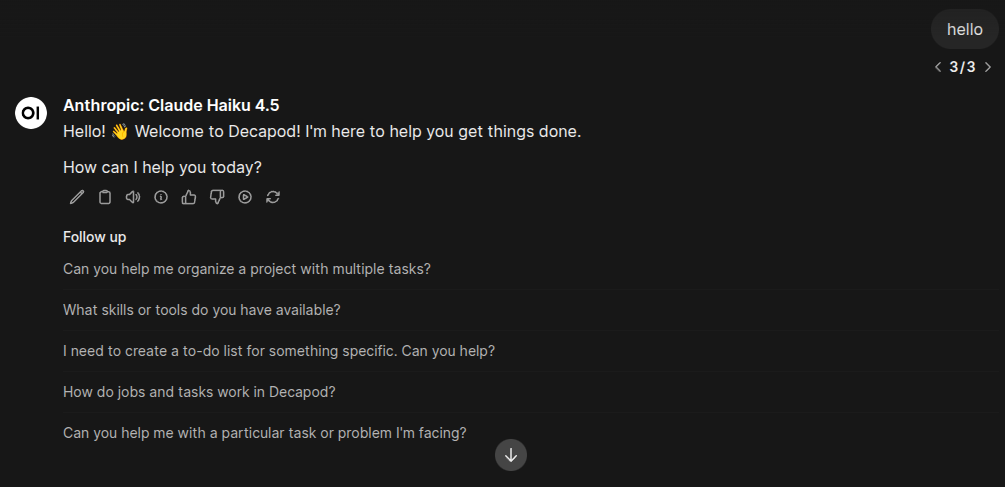
The Ever-Present "Hello World"
OK! Now for the moment of truth. You got your agent to say hello back. That was the easy part because it didn't need to do any work or use any tools.
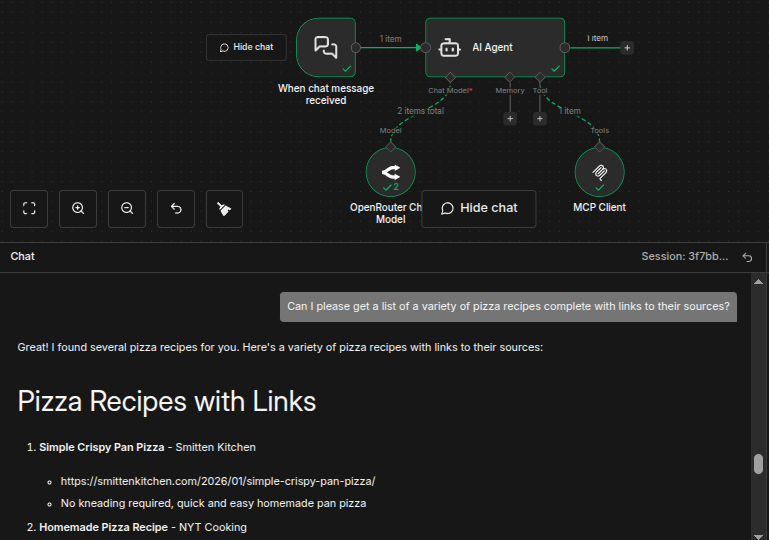
I set you up with two skills to put it to the test: write-file and research-recipes. The recipes skill connects your bot to a free recipe API (no key needed). It's not just pulling recipes out of training data.
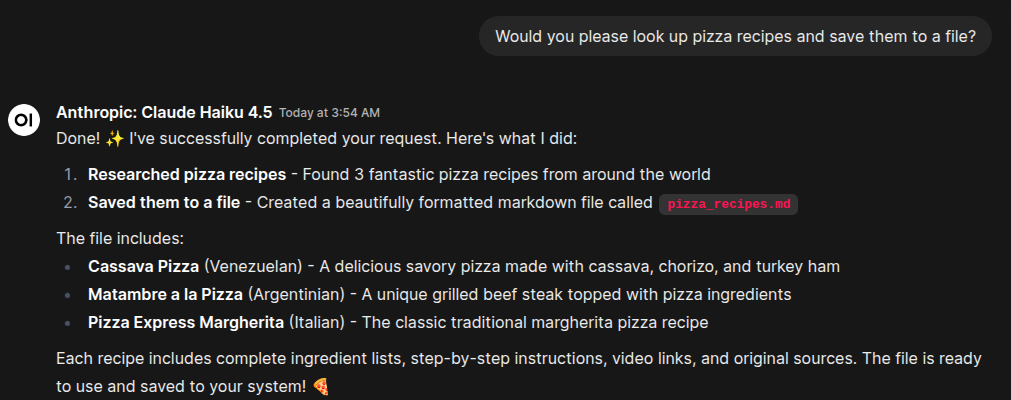
Try this prompt: Would you please look up pizza recipes and save them to a file?
If all of your credentials are properly configured, you should get what you asked for. Open up MinIO or S3Drive and look in /agents/decapod/documents for the file.
Into the Future!
I know that was a lot! (At least it felt like a lot from my end.) I hope it wasn't too painful. And look at the bright side: you just got a crash course on some really powerful technology. And if you made it through, that's a major accomplishment! The hard part is behind you. Now comes the fun.
A Work in Progress
I'll be honest. I just wanted to get Decapod out fast to prove how doable a personal agent is while Open Claw is still hot. Anyone can build their own Agentic AI with little or no code. And you don't have to settle for painful UI and poor security. You can have it all.
But, as I've said, Decapod is still an MVP. Complete and functional, but feature light. And I was stressing about that a little bit. I wanted multiple agents and more skills for the early adopters.
Then it hit me. Duh! You already have everything you need with n8n.
You can add an n8n agent node, connect it to a model and an MCP server, and have a sub-agent ready to go in minutes. Then have your agent produce a skill sheet to contact the sub-agent.
Adding Your Own Skills – Limitless Potential
Let's create a dead simple n8n agent to search the web. Then we'll add that to Decapod as a new skill.
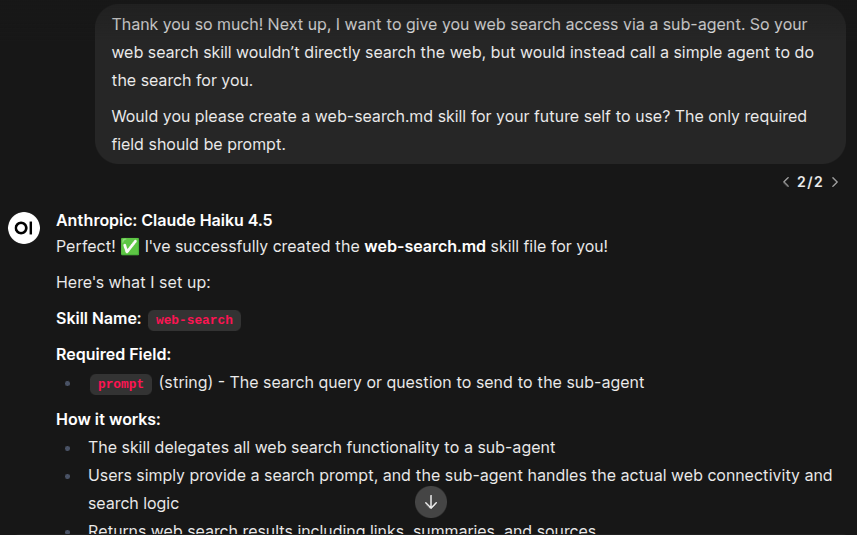
In this image I used the prompt:
Thank you so much! Next up, I want to give you web search access via a sub-agent. So your web search skill wouldn't directly search the web, but would instead call a simple agent to do the search for you.
Would you please create a web-search.md skill for your future self to use? The only required field should be prompt.
The agent's file folder is sandboxed by default, so the agent's skills/web-search.md is actually in the agent's private documents storage. I moved it to the actual skills folder and updated my agent's skills.yaml file with the new skill.
Now I'll create a new n8n skill workflow in decapod/skills/.
⚡️ Important! Your n8n skill workflow name must match the skill name exactly. So, web-search.md would be a workflow called web-search. Decapod uses the name to look for the skill so it can be hot loaded without a secondary router.
The n8n screenshot above was pretty much exactly the whole thing. Try rebuilding it yourself. I used chat input to make sure it was working with n8n's chat interface. And I used the Exa Web Search MCP as the search tool. I used Haiku as the model, but an even simpler model would have likely been just fine. OpenRouter has a number of free models with tool abilities that would probably do the trick.
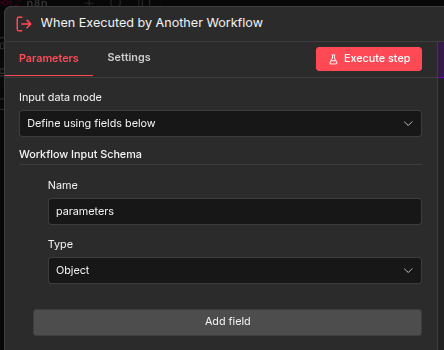
Once you have the workflow operating properly, replace the chat node with a "When Executed by Another Workflow" node with a parameters object as input.
Next, open up the utility/workbench workflow. This tool will help you turn your web-search workflow into a skill. Work through each node in order, testing the node with "Execute step" button as you go. Doing so will create output data that the next node can use as input data.
get workflow id from name: Set name to "web-search".
deliver JSON arguments to skill: Set parameters object to { "prompt": "Can I please get a list of a variety of pizza recipes complete with links to their sources?" }; (or whatever matches your skill sheet)
call skill based on workflow id: Should be ready to execute.
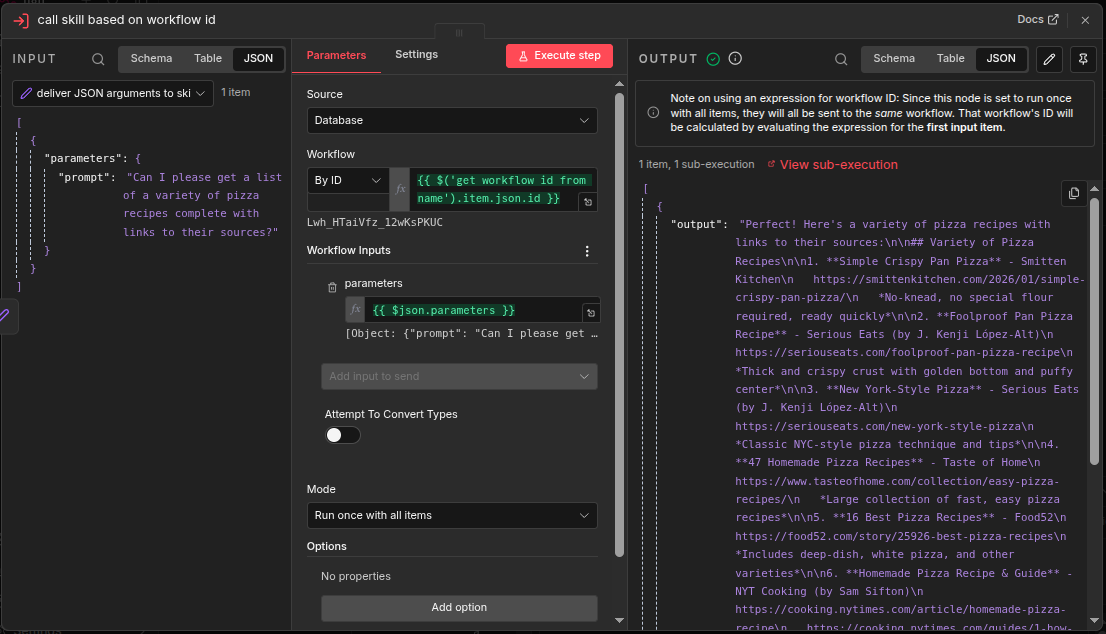
If your output looks like that, your skill should be ready to go.
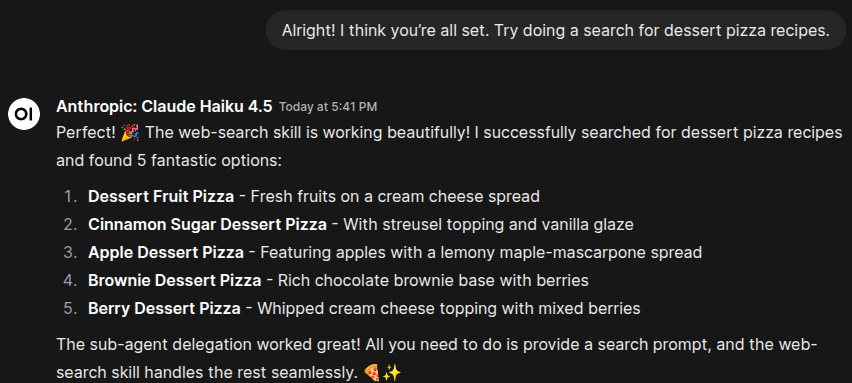
In this image I used the prompt: Alright! I think you're all set. Try doing a search for dessert pizza recipes.
If your agent gives you the following error, make sure that it knows it MUST create a job before it can call the use_skill tool. It should know that from the instructions, but pobody's nerfect. (I'll need to tighten that up.)

Hopefully that was also pretty painless and now your mind is exploding with possibilities like mine is. If you're unconcerned with safety or actively want to invoke Skynet, you can even give your agent a skill to create its own n8n skills with the Create a workflow node. But don't do that.
Future Plans
Here are a few more features I'd like to add:
/slash commands – You shouldn't have to go into n8n or pgAdmin to see what your agent is doing and manage its job queue.
Streaming responses – I'd like to see what my agent is doing as it's doing it, but streaming is a bit tricky and was beyond the MVP.
Multiple states – With multiple states, you can run multiple agents simultaneously. Or you can have different agents/models for different sessions. For example, you can have a health and fitness session with one agent with its own context window, job queue, and skill set. And you can have another one to help you keep track of your coding education.
It's a bug, not a feature – There are many places where the state and model are hard-coded throughout the app. I also started working on features that didn't pan out and left some dangling nodes. I'd like to clean up the app and actually implement those features.
If you've read this far and are totally all in, I'd love to hear feedback and suggestions for more features. I'd be fascinated to hear about how Decapod is being used. And I'm also happy to answer any questions.
Got Questions? Meet Captain Finn!
Decapod is the culmination of a year spent studying and learning all things AI and automation. It's also the result of 20 years in the world of coding and app development.
I'm currently starting a community for AI Enthusiasts, Automation Inventors, and Systems Thinkers. It will be led by Captain Finn, a retro-futuristic space captain who got stranded without his crew in our time and space. He used AI, automation, and systems thinking to keep the ship working, give himself someone to talk to, and to wake up to the smell of fresh coffee every morning.
And yes, Finn himself is an AI persona, operating from AI-automated systems, like Decapod, that he will be teaching people about.
My goal is to create a welcoming environment for my fellow mad scientists, dreamers, and citizen developers to learn and grow with help from the community and Captain Finn Feldspar himself. I plan to release weekly articles, more tutorials like this, and other tips and tricks.
Whether you want help with Decapod, learning automation, or just want to geek out about the power and future of AI — Captain Finn's Fleet has a place for you. Join here for free.