

In this in-depth guide, I’ll be showing how to secure a Next.js AI app deployed on Vercel. We’ll be taking a hands-on approach by starting with a simple AI app riddled with vulnerabilities. This article will guide you through how you can detect vulnerabilities and apply fixes in an existing Next.js AI app.
This tutorial covers different areas of software development like full-stack, cloud development, and third-party integration. You’ll learn how to use tools like Git/GitHub, Next.js, and Vercel to improve the security of an AI app.
Also, if you prefer watching actual implementations, there are YouTube videos at the end of most sections to show you how it's done.
Table of Contents
Prerequisites
Before you begin this tutorial, here are some of the things you need to have:
A basic knowledge of writing Next.js code
A code editor (like VSCode) for writing and editing the project’s source code.
Git and GitHub account for version control, continuous integration, and authentication.
A Vercel account to host the project.
An OpenAI Developer account to get your API key.
Getting Started
First, you need to clone this GitHub repository.
I created the repo specifically for this tutorial to show you some of the vulnerabilities that you might overlook when building a Next.js AI app.
To clone the project, open your command line interface and navigate to the folder you want the repo to be in.
Next, use the git clone command to clone the project.
git clone https://github.com/Gidthecoder/nextjs-ai.git
Remember that you must have already set up Git in your system or the command won’t work.
Once that's done, navigate to the folder using the command below:
cd nextjs-ai
Next, type the command below to install the project dependencies:
npm install
Once this is done, you can open the folder in your text editor and explore the files.
The code is well-commented, so you shouldn't have much problem understanding it.
To run the project, first make sure you’re in the project directory in your CLI. Then run the command below:
npm run dev
If everything works well, open your browser and type http://localhost:3000/ in the search bar.
The result from the browser should look this:
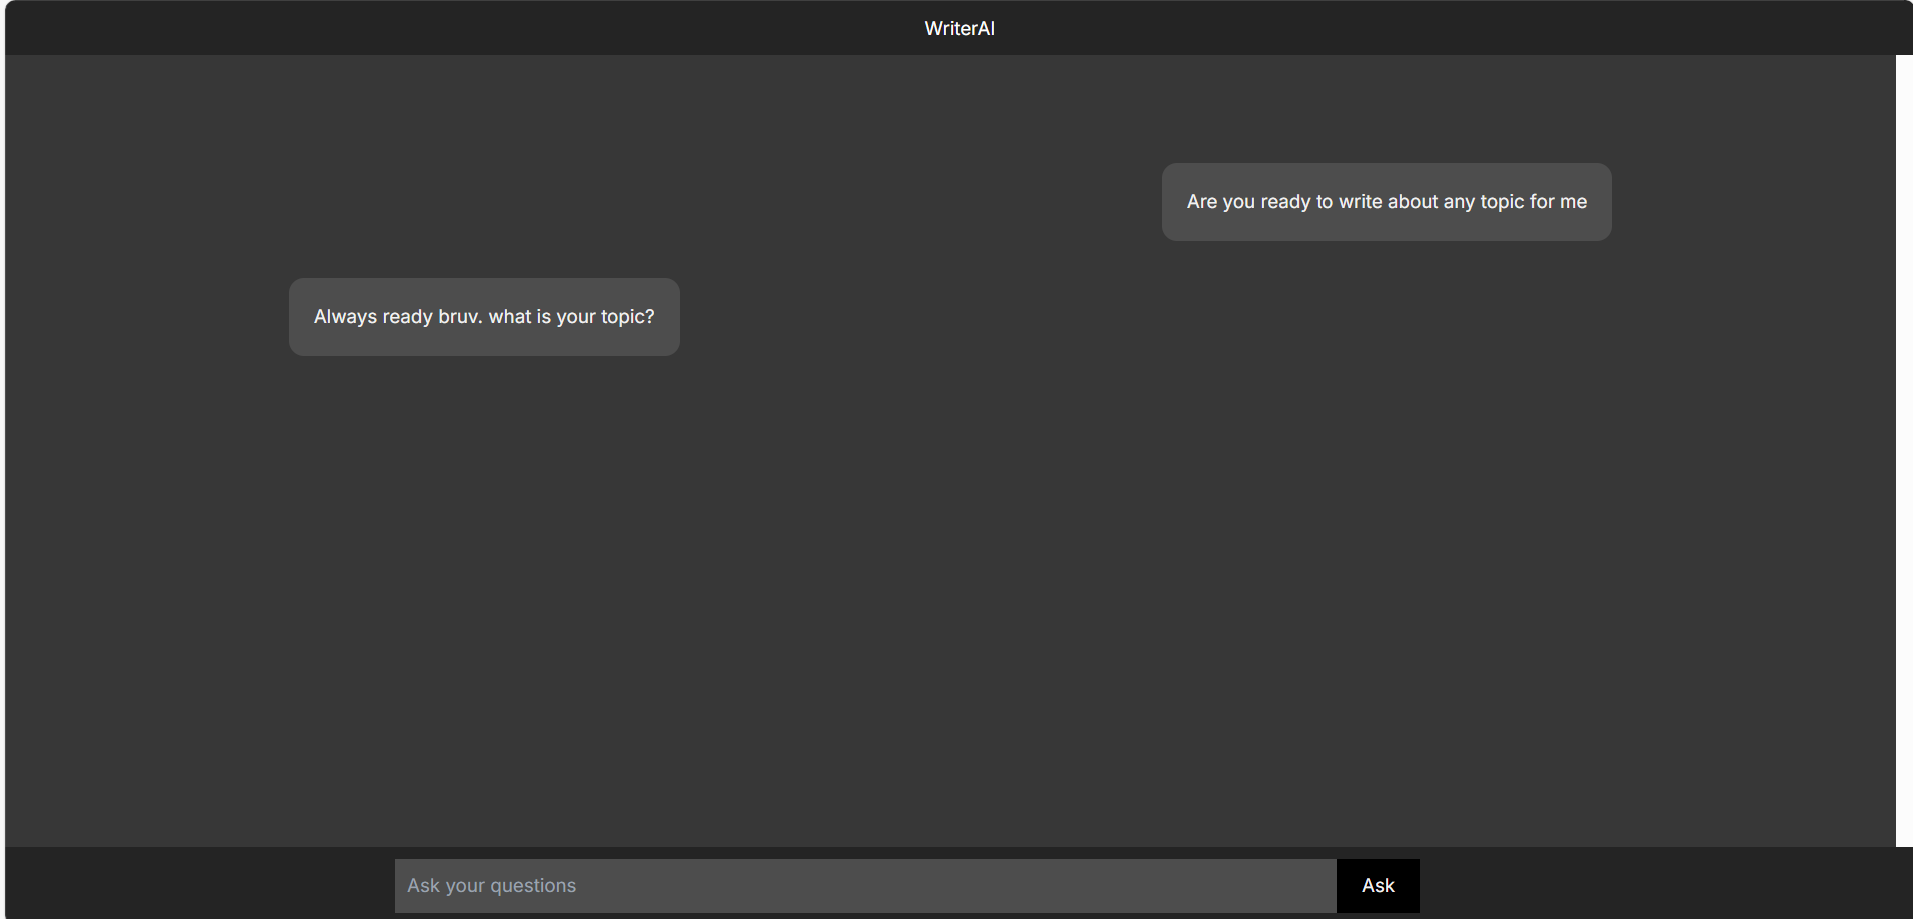
If you got the same result, give yourself a round of applause. Great job.
If you try sending a message from the form, you’ll notice that an error message is displayed. This is because you haven’t added an OpenAI API key to the project.
But don’t worry about that for now. Let’s have a look at the project files.
Here is the video for this section:
Exploring the Project Files
The project we cloned is basically a ChatGPT wrapper. You ask it a question and it gives you a response.
Under the hood, the project uses Next.js to send an API request to the OpenAI server and displays the response to the user.
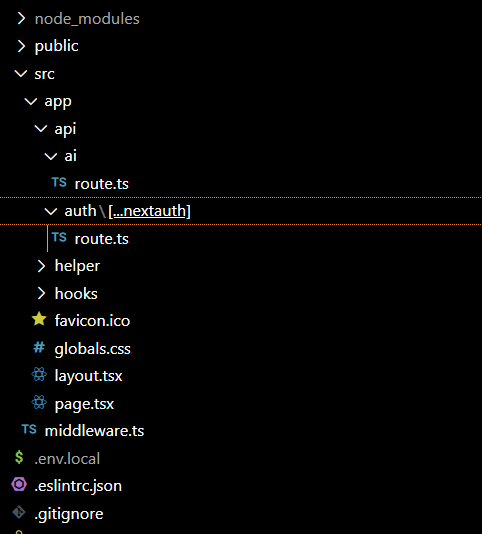
If you opened the folder through VSCode, the project structure should look like this:

The project has 4 top-level folders: .next, node_modules, public, and src.
The files in the root folder include .gitignore, package.json, tailwind.config.js, tsconfig.json, and others.
Most of your work will be within the src/app folder because it contains all the code you need for the project.
The app folder represents the app router. It contains layout.tsx, page.tsx, global.css, hooks folder, and so on.
The layout.tsx file
layout.tsx is a TypeScript file that contains the code for root layout.
From lines 1 to 3, you'll import the Metadata type, Inter font, and a globals.css file that allows you to use TailwindCSS utility classes.
import type { Metadata } from "next";

import { Inter } from "next/font/google";

import "./globals.css";
From line 5 to 10, 2 you'll create the variables inter and metadata. inter initializes the Inter font, and metadata stores an object that contains the title and description of the site, similar to the HTML title and meta elements.
const inter = Inter({ subsets: ["latin"] });

export const metadata: Metadata = {
  title: "WriterAI",
  description: "A ChatGPT wrapper that answers your questions",
};
Next, you'll create the RootLayout component that'll wrap all the pages of the project.
export default function RootLayout({
  children,
}: Readonly<{
  children: React.ReactNode;
}>) {
  return (
    <html lang="en">
      <body className={inter.className}>
        {children}
      </body>
    </html>
);
}
The page.tsx file
app/page.tsx is a TypeScript file that represents the code that’ll be rendered in the browser when the root URL (/) is called.
Line 1 has a use client directive which declares the file as a client component. This way we are able to fully use React.js features in the component.
"use client";
From line 3 to 6, you'll import a custom useOpenAI hook and the React built-in hooks (useState, useRef, useEffect, … ).
//import the custom hook for getting the response from the OpenAI API
import useOpenAI from './hooks/useOpenAI';

import {useState, useRef, useEffect, FormEvent} from 'react';
Then you'll create a custom Message type that’ll be used with the state that stores the messages between the user and the OpenAI API.
type Message = {
  role: string;
  content: string;
};
Lines 13 to 120 contain the code for the Home component that’ll be rendered in the browser when the root URL is called.
Within the Home component, line 15 initializes the useOpenAI hook.
//initialize the custom hook
const getCompletion = useOpenAI();
Line 17 initializes a useRef hook that’ll be used to reference the DOM container element that wraps the messages between the user and the server.
const chatContainerRef = useRef<HTMLDivElement>(null);
From lines 19 to 23, you're creating a content variable that represents an array that’ll be used as the initial values for the state that stores the chat/messages.
//initial chats for the site
 let content: Message[]  = [
   {role: "user", content: "Are you ready to write about any topic for me"},
   {role: "assistant", content: "Always ready bruv. what is your topic?"}
]
Lines 25 to 30 represent the state variables of the component. Input keeps track of the text entered in the input element by the user. chats store the messages from the user and OpenAI API. It is initialized with the content variable. isTyping keeps track of when the user is typing. Its initial value is false.
 //this state stores the input value
 let [input, setInput] = useState<string>('');
 //this state stores the chats
 let [chats, setChats] = useState<Message[]>(content);
 //this state keeps track of when the AI is typing
 let [isTyping, setIsTyping] = useState<boolean>(false);
The code in lines 31 to 72 represents the handlerChat function which is the event handler that is called any time a user hits the enter key or ask button in the form.
In summary, its job is to receive the prompt from the form, update the input, isTyping, and chats states, pass the prompt to the getCompletion function of the useOpenAI hook, wait for the response, and display it to the user.
//handleChat event handler for the submit event
let handleChat = async (prompt: string, e: FormEvent) => {
  //prevent the form from reloading the entire page when submitting
  e.preventDefault();

  //if there is no value in the input or it is clicked when the isTyping is true, do nothing
  if (!prompt || isTyping) return;

  //set isTyping state to true. 'true' adds an element displaying 'AI typing'
  setIsTyping(true);

  //clear the content of the input state. This also clears the input element which displays the value.
  setInput('');

  //updates the chats state with the prompt sent from the input
  setChats(prevChats => {
    const updatedChats = [...prevChats, { role: 'user', content: prompt}];
    return updatedChats;
  });

  try {
    //send the prompt through the openai api and wait for the response
    const result = await getCompletion(prompt);

    //update the chat prompt with response gotten from the openai api
    setChats(prevChats => {
      const updatedChats = [...prevChats, Object(result)];
      return updatedChats;
     });

     //set isTyping state to false. 'false' removes the element displaying 'AI typing'
     setIsTyping(false)

  } catch (error) {
    //catch any possible error from the request
    console.error("Error fetching completion:", error);

    //set isTyping state to false. 'false' removes the element displaying 'AI typing'
    setIsTyping(false)
  }
}
Lines 73 to 78 contain the code in the useEffect hook. Any time the chats state is updated, the document will be scrolled to the bottom so that the most recent messages are displayed.
useEffect(() => {
  if (chatContainerRef.current) {
    //whenever the chats state is updated, scroll to the bottom of the container element to display the recent messages
    chatContainerRef.current.scrollTo({ top: chatContainerRef.current.scrollHeight, behavior: 'smooth' });
  }
}, [chats]);
The code from lines 81 to 120 contains the markup that’ll be rendered in the browser.
From lines 91 to 99, the content of the chats state is added to the markup using the map function. Messages from the AI are aligned to the left while those of the user are aligned to the right
{
  //the content of chats state is looped to display the content. if the content is from the user, it will be aligned to the right. if it's from the AI, it'll be aligned to the left
  chats.map((data, index) =>
    <div key={index} className={`${data.role == 'user'? 'text-right': 'text-left'} my-[30px]`}>
      <p className="text-[15px] bg-[#4d4d4dff] max-w-[60%] p-[10px] lg:p-[20px] rounded-xl text-left text-[#f2f2f2ff] inline-block">
        {data.content}
      </p>
    </div>
  ))
}
From lines 101 to 107, there is a code block that is always rendered anytime the isTyping state (which is triggered anytime a user sends a message and is expecting a response) is true.
{/*if the isTyping state is true, display the element. if not, hide it.*/}
<div className={isTyping? 'block': 'hidden'}>
  <div className='text-left my-[30px]'>
    <p className="text-[15px] bg-[#4d4d4dff] max-w-[60%] p-[10px] lg:p-[20px]  rounded-xl text-center text-[#f2f2f2ff] inline-block">
      AI Typing...
    </p>
  </div>
</div>
Lines 113 to 116 contain the code that represents the form. Whenever the input element is changed, the input state will be updated. And any time the form is submitted (when the button is clicked or input is entered), the handleChat function is called, sending the value of input state and the form event as the arguments.
{/*when the form is submitted, activate a submit event that sends the value of the input and the event to the handleChat function */}
<form action='' onSubmit={(e) => handleChat(input, e)}>
  <input className=" lg:w-[50%] w-[70%] ml-[5%] lg:ml-[20%] p-[10px] outline-none bg-[#4d4d4dff] text-[15px] text-[#f2f2f2ff]" type='text' value={input} placeholder='Ask your questions' onChange={ (e) => setInput(e.target.value)}/>
  <button className='py-[10px] px-[20px] bg-black text-[15px] text-[#f2f2f2ff]'>Ask</button>
</form>
The hooks/useOpenAI.ts file
In the hooks/useOpenAi.ts file, you'll import the OpenAI library and store the API key in a variable.
import OpenAI from 'openai';

const API_KEY = 'YOUR-API-KEY';
A useOpenAI function representing the hook was created.
Within the function, an instance of the OpenAI object was created. Also, there’s a getCompletion async function that receives the prompt from the argument and sends the request to the OpenAI API. If there is an error along the way, an error message is returned.
function useOpenAI() {
  const client = new OpenAI({ apiKey: API_KEY, dangerouslyAllowBrowser: true });

  const getCompletion = async (prompt: string) => {
    try {
      let completion = await client.chat.completions.create({
        messages: [
            { "role": "system", "content": "Your job is to write about any topic asked by the user" },
            { "role": "user", "content": prompt }
        ],
        model: "gpt-3.5-turbo",
        });

      return completion.choices[0].message;

    } catch(e){
      return {"role": "assistant", "content": "Something went wrong"}
    }
  };

  return getCompletion;

}
Remember that you get an error message any time you send a message from the site.
This is because you haven’t added the OpenAI API keys to the project. We'll address that part later.
The package.json file
Package.json file contains information about the libraries and scripts needed to run your project
The file must look like this:
{
  "name": "nextjs-ai",
  "version": "0.1.0",
  "private": true,
  "scripts": {
    "dev": "next dev",
    "build": "next build",
    "start": "next start",
    "lint": "next lint"
  },
  "dependencies": {
    "@upstash/ratelimit": "^2.0.1",
    "@vercel/kv": "^2.0.0",
    "next": "14.2.5",
    "next-auth": "^4.24.7",
    "openai": "^4.52.7",
    "react": "^18",
    "react-dom": "^18"
  },
  "devDependencies": {
    "@types/node": "^20",
    "@types/react": "18",
    "@types/react-dom": "^18",
    "eslint": "^8",
    "eslint-config-next": "14.2.5",
    "postcss": "^8",
    "tailwindcss": "^3.4.1",
    "typescript": "^5"
  }
}
From the code above, the ‘dev’ script will be used to run the project in development mode. That’s why you use npm run dev in the CLI.
The next 2 scripts, build and start, will be used to optimize the files and start the project in a production environment. You don't need to worry about these since Vercel will sort everything out.
next, react, and react-dom are the core libraries for the project.
The openai library will be used to communicate the OpenAI API.
@upstash/ratelimit, @vercel/kv, and next-auth will be used to implement some security features in the next sections.
The development dependencies will only be used while developing the project. They include typescript, tailwindcss, and so on.
How to Get Your OpenAI API Keys
To make the project work as intended, you need to add the OpenAI secret key to the project. This key will allow the app to successfully integrate with the OpenAI API, allowing users to send prompt requests from the client side and receive AI responses.
To get your OpenAI secret keys, you first need to sign up (or sign in) on the platforms.openai.com site. Next, you must set up your payment card details if you haven’t. Without them, the API won’t work.
After that, go to the API keys section to create your API key. Make sure you copy it immediately.
Next, you need to store the API key as an environment variable by creating a .env.local file in the root of your project and pasting the value there.
NEXT_PUBLIC_API_KEY='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'
The property name starts with NEXT_PUBLIC so it can be used in the client side.
Next, in line 4 of the useOpenAI.ts file, change the code to this:
const API_KEY = process.env.NEXT_PUBLIC_API_KEY;
Once that is done, you can save the files, wait for the Next.js server to recompile, and test the site.
If you’ve turned off the server, navigate to your project’s directory in your CLI and enter npm run dev. Once the server has compiled, open your browser and type http://localhost:3000/ in the search bar. Also, make sure you have your wifi connected so your request can be sent to the OpenAI API.
Once the site loads, try interacting with it, ask some questions, and wait for your reply from the OpenAI servers.
If you followed everything correctly, this is what your interaction should be like:
The styling might not look good but it works. You can work on the styling later.
This is the video for this section:
How to Deploy the Project on Vercel
Now it's time to deploy the project on Vercel. We'll use Vercel for deployment in this tutorial, because Vercel creatored Next.js – so the deployment won’t be stressful.
But before that, you'll need to push your changes to GitHub so that you can easily deploy the project to Vercel.
To do that, you need to type the commands below:
git init

git add .

git commit –m "first commit"

git branch -m master main
Once you've done this, you should go to your GitHub account to create a new repository. Make sure you don’t add any files including a README or License to avoid running into Git errors when deploying.
After creating the repo, copy the link of the repository and paste it into the command below:
git remote add origin <link-of-your-repo>
Now push the code to the main branch:
git push -u origin main
Once you've done this, check out the repo in your GitHub account to ensure it was committed in the main branch.
Once that's done, you need to sign up for Vercel with your GitHub account.
Next, import the nextjs-ai repository from GitHub and deploy it.
Before deploying it, paste the content of your .env.local file to the environment variables section. After that, click Deploy and wait for the project to be deployed.
After a few seconds, your app will be deployed, and you’ll be shown the public URL of your project.
When you visit the deployed link, the site should behave like this:
Although the app does what it should, it’s filled with security vulnerabilities that can cost you a lot of money due to cyberattacks. So we'll pause before getting a domain name so we can fix these issues.
Vulnerability One: Exposure of Sensitive Data in the Frontend
Exposing sensitive data like API keys in the frontend is dangerous because the data can be stolen and maliciously used by an attacker.
Although you stored the API key as an environment variable, it can still be viewed in the browser. This is because you used the environment variable in a React hook that’ll be executed on the client side.
This means that anyone with enough skills can check your API keys in the browser.
Although the OpenAI API strictly enforces the use of its API on the server side, providing a dangerouslyAllowBrowser prop to remind users of the dangers of using it on the client side, Most APIs don’t have this type of enforcement.
If I was an attacker, here is how I could get your OpenAI API keys:
First, I’d open the browser’s developer tools and click on the network tab. Then, I’d enter a prompt in the input and click enter. As the request was sent, the network tab would capture the outgoing requests and display all the information.
Then when I clicked on the headers tab and navigated to the request headers, I would be able to see the authorization header and the API key.
The video below shows a demonstration:
How to fix vulnerability 1:
So how do you fix this? Don't worry – it’s simple.
To prevent exposing data in the client side, you must move the sensitive code to the backend and access your environment variables from the server side. This way, any request from the browser is abstracted and the server as a proxy for communicating with the OpenAI API.
In Next.js, you can do this by using route handlers. We’ll use route handlers to receive incoming requests to the api/ai route, send the prompt to the OpenAI API, and return the responses to the client side.
Route handlers are server-side functions so their code won’t be visible in the browser and your environment variable will be secured.
Now that you know what to do, let’s update the code.
First, remove the NEXT_PUBLIC prefix from NEXT_PUBLIC_API_KEY so it becomes API_KEY. This is to ensure that the key won’t be available on the client side.
API_KEY='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'
Next, create an api folder within app. This folder will store all the route handlers for your project.
Next, create an ai folder and a route.ts file within it. The ai folder must be within app/api.
The api/ai/route.ts file will handle requests to the api/ai route.
Next, add this code to your api/ai/route.ts file:
import {NextRequest, NextResponse} from 'next/server';

import OpenAI from 'openai';

const API_KEY = process.env.API_KEY;

const client = new OpenAI({ apiKey: API_KEY });

export async function POST (req: NextRequest) {
  let {prompt} = await req.json();

  if (!prompt) {
    return NextResponse.json({ content: 'Prompt is required' }, {status: 400});
  }

  try {
    let completion = await client.chat.completions.create({
      messages: [
          { role: 'system', content: 'Your job is to write about any topic asked by the user' },
          { role: 'user', content: prompt }
      ],
        model: 'gpt-3.5-turbo',
    });

    return NextResponse.json(completion.choices[0].message, {status: 200});

  } catch (error) {
    console.error(error)
    return NextResponse.json({ content: 'Internal Server Error' }, {status: 500});
  }
};
From the code above, you imported the NextRequest and NextResponse functions representing extensions of the Web Request API and Web Response API. You also imported the OpenAI function from openai library.
Next, you created a variable (API_KEY) that stores the API_KEY environment variable. You also created another variable that stores a new instance of OpenAI object.
Finally, you created a POST function to handle POST requests to the api/ai route. The function receives the prompt and passes it to the OpenAI API, waits for a response, and returns it to the user. If the request doesn’t have a prompt property in the body or there is an error along the way, an error message will be returned to the user.
Next, go to your hooks/useOpenAI.ts file and replace it with these:
const useOpenAI = () => {
  const getCompletion = async (prompt: string) => {
    try {
      const response = await fetch('/api/ai', {
        method: 'POST',
        body: JSON.stringify({ prompt }),
        headers: {
          'Content-Type': 'application/json',
        }
      });

      const result = await response.json()

      if (!response.ok) {
        return { role: 'assistant', content: result.content};
      }

      return result;

    } catch (error) {
      return { role: 'assistant', content: 'Something went wrong' };
    }

  };

  return getCompletion;
};

export default useOpenAI;
From the code above, you modified the useOpenAI hook so that if getCompletion is called, it will send a fetch request to the api/ai route and return the response to the user. If the request is not successful, an error message will be returned to the user.
If you’ve done that, it’s time to test your endpoint.
In your system, navigate to the project CLI and run the command below:
npm run dev
If you test the site and everything goes well, it means it’s ok.
Now let’s check if you can get the API keys in the Developer tools:
From the video above, you can see that no API keys were exposed in the request headers.
Now that this is resolved, you should push the changes to your GitHub repo.
Any changes made in the main branch of your GitHub repo will be automatically deployed to Vercel.
Run these commands to update your GitHub repo:
git add .

git commit –m "moved sensitive code to backend"

git push –u origin main
After updating the changes, go to your project deployment page on Vercel to confirm that the deployment was successful.
Unfortunately, the deployment is expected to fail because you haven’t updated the environment variables you added to Vercel (from NEXT_PUBLIC_API_KEY to API_KEY).
So you must go to setting > environment variables, and import the .env.local file of your project.
Once you've done this, go to the deployment page and redeploy the latest change.
After the successful deployment, visit the site and check the network tab to confirm that the API keys are not exposed when you send messages from the prompt.
If no API keys are visible in the request header, that means your sensitive code has been successfully moved to the backend and your latest changes have been deployed.
Congratulations! Now, on to the next part...
But first, here is the video for this section:
Vulnerability Two: DOS and DDOS Attacks
Although our API key is secured in the backend, the app is still vulnerable to denial of service (DOS) and distributed denial of service attacks (DDOS).
A DOS attack is when your site is flooded with excessive requests from a single device that overwhelm your server and prevent your actual users from enjoying the services of your app.
A more advanced one is a distributed denial of service (DDOS) attack which involves sending an overwhelming amount of requests from multiple devices simultaneously to your site.
Different areas of a site can be vulnerable to DOS or DDOS attacks. The attack can target your DNS infrastructure, database, API endpoints, and even your static files.
Without effective mitigation strategies, DoS or DDoS attacks can result in significant financial losses due to skyrocketing cloud service costs and the expenses involved in restoring and securing your site.
To understand how this attack works, let’s try to simulate a simple DOS attack on our AI app.
If you were an attacker, you could execute the script below in your browser’s console to send 50 requests to your api/ai route.
//function to send the request
const getCompletion = async (prompt) => {
  try {
    const response = await fetch('/api/ai', {
      method: 'POST',
      body: JSON.stringify({ prompt }),
      headers: {
        'Content-Type': 'application/json',
      },
   });

   const result = await response.json();
   if (!response.ok) {
      return { role: 'assistant', content: result.content};
   }

   return result;

  } catch (error) {
    return { role: 'assistant', content: 'Something went wrong' };
  }
};

//function for sending the request 50 times
const attackServer = async () => {
  const prompt = ['Write about a lion', 'write about a tiger', 'write about america', 'write about ice cream', 'write about pizza'];

  const numRequests = 50;

  const results = [];

  for (let i = 0; i < numRequests; i++) {
    const startTime = performance.now();
    const result = await getCompletion( prompt[Math.floor(Math.random()*4)] );
    const endTime = performance.now();
    const responseTime = endTime - startTime;

    results.push({
      index: i,
      result,
      responseTime,
    });

    console.log(`Request ${i + 1}: Response time = ${responseTime}ms`);
  }

  return results;

};

// command to activate the attack and display the result
attackServer().then((results) => {
  console.log('All requests completed');
  console.table(results);
});
From the code above, you pasted two async functions (getCompletion and attackServer) in the console.
getCompletion contains the fetch request that’ll be sent to the api/ai route. attackServer contains the code that’ll be used to call the getCompletion function 50 times.
After that, you pasted the last commands that’ll run the attackServer function and display the result containing the information about all the requests sent, including the data received from the server and the response time.
Here is how mine went:
Although this simple attack involved sending 50 requests to the third-party API route, it actually cost me nearly $0.02 in my OpenAI API usage. If the attack involved 50,000 requests, it’d have cost me $20 dollars. If the attack involved 50,000,000 requests, it’d have cost me nearly $20,000.
Different strategies can be implemented in Next.js and Vercel to protect your site against these attacks. They include rate limiting, firewalls, Vercel/Cloudflare DDOS protection, attack challenge mode, spend management, and website monitoring.
Rate limiting
Rate limiting is a method used for blocking repetitive requests from a device that exceeds a number within a timeframe. If the requests exceed a threshold, the user can be temporarily restricted from accessing a service.
There are different rate-limiting algorithms, but we’ll be using a simple one that restricts access to the api/ai endpoint whenever a user sends too many requests.
We’ll be using Vercel KV database and @upstash/ratelimit library to implement this rate limiting algorithm.
@upstash/ratelimit is a powerful rate limiting library designed for use in a serverless environment like Next.js functions. Vercel KV is a Redis database service that we'll use to keep track of the user’s requests.
First, we need to set up Vercel KV. To do that, create a KV database by clicking on the Storage \> Create Vercel KV Database. Once a dialog box shows up, fill in the necessary information. Give the name field any value, select a region, select your environment (either development, preview, or production), and finally click on connect. Then connect to the project.
Next, check your environment variables in the settings tab to confirm that your KV keys and tokens have been added.
Then create a middleware.ts file in the src folder and add this code to it:
import { NextRequest, NextResponse } from 'next/server';

import { Ratelimit } from '@upstash/ratelimit';

import { kv } from '@vercel/kv';

const ratelimit = new Ratelimit({
  redis: kv,
  // 1 requests from the same IP for every 30 seconds
  limiter: Ratelimit.slidingWindow(1, '30 s'),
});

export const config = {
  matcher: '/api/ai'
}

export default async function middleware(request: NextRequest) {
  const ip = request.ip || '127.0.0.1';
  const { success, pending, limit, reset, remaining } = await ratelimit.limit(
    ip
  );
  console.log(success)
  return success
    ? NextResponse.next()
    : NextResponse.json({ role: 'assistant', content: 'too many requests' }, {status: 429});
}
From the code above, you imported NextRequest and NextResponse from next/server, Ratelimit from @upstash/ratelimit, and kv from @Vercel/kv. Next, you set up the Ratelimit function to use KV database and allow only 1 request for every 30 seconds.
Then you created a config variable to ensure that only requests to the api/ai route are rate limited. Finally, you created a middleware function that examines requests to api/ai. If the ip address of the request hasn’t exceeded the rate-limit threshold, it’ll be forwarded to the api/ai. If it has exceeded the threshold, an error message will be returned to the user.
To confirm that the rate-limiting algorithm has been successfully implemented, you'll need to update the GitHub repo and test the latest Vercel deployment.
You can’t test the algorithm in the local server because request.ip is only available on Vercel.
As usual, follow the commands below to push the local changes to GitHub:
git add .

git commit –m "rate limiting algorithm done"

git push –u origin main
After the update is successful, visit your project deployment page on Vercel to confirm that the GitHub changes have been successfully deployed.
Now visit the link of the deployed site and paste the script below to confirm that your rate-limiting algorithm has been successfully implemented.
//function to send the request
const getCompletion = async (prompt) => {
  try {
    const response = await fetch('/api/ai', {
      method: 'POST',
      body: JSON.stringify({ prompt }),
      headers: {
        'Content-Type': 'application/json',
      },
    });

    if (!response.ok) {
      return { role: 'assistant', content: 'Internal server error' };
    }

    const result = await response.json();
    return result;

  } catch (error) {
    return { role: 'assistant', content: 'Something went wrong' };
  }
};

//function for sending the request 50 times
const attackServer = async () => {
  const prompt = ['Write about a lion', 'How are you', 'write about america', 'write about ice cream', 'what is your name'];

  const numRequests = 50;

  const results = [];

  for (let i = 0; i < numRequests; i++) {
    const startTime = performance.now();
    const result = await getCompletion( prompt[Math.floor(Math.random()*4)] );
    const endTime = performance.now();
    const responseTime = endTime - startTime;

    results.push({
      index: i,
      result,
      responseTime,
    });

    console.log(`Request ${i + 1}: Response time = ${responseTime}ms`);
  }

  return results;
};

// command to activate the attack and display the result
attackServer().then((results) => {
  console.log('All requests completed');
  console.table(results);
});
Here is how mine went:
From the video above, you can see that most of the responses were error messages. This means the rate-limiting algorithm is working. If any user tries to send more than 1 request every 30 seconds, they’ll get an error message.
Here’s the video for this section:
Vercel and Cloudflare DDOS protection
In addition to rate limiting, you can use the Vercel automatic DDOS mitigation. According to the Vercel website, there aren’t any charges for the DDOS protection. So all you can do is trust their service.
Also, if you have (or want to purchase) a domain name, you can use Cloudflare and get free, unlimited DDOS protection and security for your app. You can check the Cloudflare site for more information.
Vercel security features
In addition to the above measures, you can also use a combination of spend management, attack challenge mode, Vercel WAF rules, and website monitoring to enhance the security of your app.
First, you set up spend management to notify you when your bills reach certain thresholds and pause your projects when they reach an amount. Once you know how much you’ll be spending, you can set the amount in your spend management setting.
Another Vercel security feature is the attack challenge mode. You can use attack challenge mode to make your users pass some verification checks before they can continue using your site. These should be done temporarily when you receive a notification about your bills or notice unusual traffic on your site.
There are also the custom WAF rules. There are different rules in the settings that you can use. You can set rules that restrict access to specific endpoints and request methods. You can also restrict users with a specific request header, ip address, protocol, continent, and country.
It’s always important to monitor your site traffic and your resource usage. If you notice any spike directed at a specific route without the proper usage flow, you can set up attack challenge mode and custom WAF rules to reduce the possibility of an attack.
In summary, to protect your AI app from a DOS/DDOS attack, you can set up rate limiting, spend management, custom firewalls, attack challenge mode, and website monitoring.
I think it’s safe to say this vulnerability has been fixed.
Vulnerability 3: No Authentication and Authorization
Although you've implemented some measures that protect your site from different forms of attack, another vulnerability can undermine the work you've done so far.
Do you know what it is?
It’s the lack of authentication and authorization mechanisms.
For an app that connects to an external API, the absence of authentication and authorization mechanisms can make your website extremely vulnerable to attacks like DDOS and CSRF. This is because anyone can visit the website and use it without going through any security checks.
Your rate limiting and DDOS security can’t do much if the requests look legitimate and are coming from thousands (or millions) of users. And if all the requests are responded to, it can cost you a lot of money.
Just as I’m able to send prompts to the endpoint, millions of potential users can also do so.
And that is why you need to implement authentication and authorization.
Authentication is when users are verified before they can access a site. Authorization checks if a user is authorized to access or use a feature.
For this job, you’ll be using the next-auth library. Next-auth is a library that allows you to implement different forms of authentication in your Next.js site.
You’ll be using this library to set up GitHub OAuth authentication. This way only those who are authenticated via GitHub will be allowed to send requests to your api/ai route.
First, you must get your Client ID and Client Secret from your GitHub dashboard. Without this, your site won’t be able to use GitHub authentication.
To get this, you must create a GitHub OAuth app (Settings > Developer settings), and then generate and copy the client id and secret to your .env.local file.
You can check the video below to learn how to do this:
In your .env.local file, the keys should be GITHUB_CLIENT_SECRET and GITHUB_SECRET_ID.
GITHUB_CLIENT_ID=Ov23liRYdIehpA61t3Js
GITHUB_SECRET_ID=547vfbsjgfsk4859030
Next, you also need a create a secret key that’ll be used by next-auth to encrypt your JWT tokens. The value must not be easily guessable. You can use the openssl (if you have it installed in your PC) command in your command line so that you can get a complex value that can’t be guessed.
openssl rand –base64 32
Once that's done, you should copy the value and paste it in your .env.local file
If you don’t have openssl, you can create a complex random value and use it instead.
NEXTAUTH_SECRET=OtPuemlSrP8At2uZFIMrc47WBT14pifeKhziIW8
Next, you need to specify the base path for the authentication. It’s generally the homepage URL of the site. This means the authentication and authorization will encompass all your routes. Since you’ll be testing the site in the local environment, you’ll use http://localhost:3000/.
This means that you must have another key (NEXTAUTH_URL) in your .env.local file.
NEXTAUTH_URL=http://localhost:3000/
Once that's done, you need to create a helper function that’ll store the configurations for next-auth.
Within the app folder, create a helper folder and add an authOption.ts file to it.
Next, add this code to the app/helper/authOptions.ts file:
import { NextAuthOptions } from "next-auth";

import GithubProvider from "next-auth/providers/github";

export const authOptions: NextAuthOptions = {
  // Configure one or more authentication providers
  providers: [
    GithubProvider({
      clientId: process.env.GITHUB_CLIENT_ID as string,
      clientSecret: process.env.GITHUB_SECRET as string,
    })
  ],
  secret: process.env.NEXTAUTH_SECRET as string,
  session: {
    strategy: 'jwt',
    maxAge: 60 * 2 //expires 2 minutes after the last request
  },
};
From the code above, you created the configuration that’ll be used by next-auth. The configuration specifies that the app will be using the GitHub provider for authentication. The secret was also added to the configuration. And finally, you’ll be using a JWT token configured to expire 2 minutes after the last request.
Next, create an api/auth/[…nextauth]/route.ts file in your app folder.
The folder structure should look like this:
Next, add the code below to the file:
import NextAuth from "next-auth";

import {authOptions} from "@/app/helper/authOption";

const handler = NextAuth(authOptions);

export { handler as GET, handler as POST };
From the code above, you imported NextAuth and the authOptions function (from app/helper/authOption). Next, you used this authOption to initialize next-auth. Finally, you exported the handler so that you can use it on the server side.
Next, create a client component that makes the session accessible on the client side. The component will be used to wrap the content of the root layout file (app/layout.tsx).
Within your helper folder, create a provider.tsx file and add this code to it:
"use client";

import {SessionProvider} from "next-auth/react";

export function Provider({children}: {children: React.ReactNode}) {
  return <SessionProvider>{children}</SessionProvider>;
}
Next, in your root layout (app/layout.tsx), import the session provider and wrap it around the children prop of the RootLayout component:
//layout.tsx

import {Provider} from "@/app/helper/provider";

//…other code

export default function RootLayout({
  children,
}: Readonly<{
  children: React.ReactNode;
}>) {
  return (
    <html lang="en">
      <body className={inter.className}>
        <Provider>{children}</Provider>
      </body>
    </html>
);
}
Once the session provider has been wrapped around the project, it means you can use the session on the client side to enforce authentication and authorization.
In your app/page.tsx file, you need to import the signIn, signOut, and useSession function from next-auth/react. This will allow the users to be able to sign in, sign out, and view their profile information.
import {signIn, signOut, useSession} from 'next-auth/react';
Next, within the Home component, add this code to it:
const {data: session, status} = useSession();
console.log("status", status);
console.log("session", session);
The code above gets the session and status (authenticated or unauthenticated) of the user from the useSession hook. Then the status and session will be displayed in the browser’s console so that the behavior can be observed. When you’re deploying the changes you can remove the console.log.
Next, replace the code in the header element (from lines 92 to 94) with this:
<header className="flex flex-row fixed w-[100%] top-0 left-0 p-[10px] px-[20px] text-white text-center bg-[#242424]">
    <a className='text-[15px]'>WriterAI</a>
    <div className="ml-auto flex flex-row gap-[10px]">
        { session
            ? <a>{session.user.name}</a>
            : <a onClick={() => { signIn('github') }} className="cursor-pointer">Sign in</a>
          }
          { session && <a onClick={() => { signOut() }} className="cursor-pointer">Sign out</a>}
    </div>
</header>
From the code above, when the user clicks on the sign-in link, they will be redirected to GitHub to authorize the information transfer. And when the sign-out link gets clicked, the session will be destroyed.
Also, if the page is loaded while the session is still active, the user information and a sign-out link will be displayed. But if there is no session, only a sign-in link will be displayed.
Also, replace the code in the form container (lines 129 to 135) so the form is hidden from unauthenticated users and only those who are authenticated can send prompts to the server.
<div className='fixed w-[100%] p-[10px] bottom-0 bg-[#242424]'>
     {/*when the form is submitted, activate a submit event that sends the value of the input and the event to the handleChat function */}
     {session
       ? <form action='' onSubmit={(e) => handleChat(input, e)}>
           <input className=" lg:w-[50%] w-[70%] ml-[5%] lg:ml-[20%] p-[10px] outline-none bg-[#4d4d4dff] text-[15px] text-[#f2f2f2ff]" type='text' value={input} placeholder='Ask your questions' onChange={ (e) => setInput(e.target.value)}/>
           <button className='py-[10px] px-[20px] bg-black text-[15px] text-[#f2f2f2ff]'>Ask</button>
         </form>
       : <a className="block text-white text-[20px] text-center cursor-pointer" onClick={() => { signIn('github') }}>Sign in to send messages</a>
     }
</div>
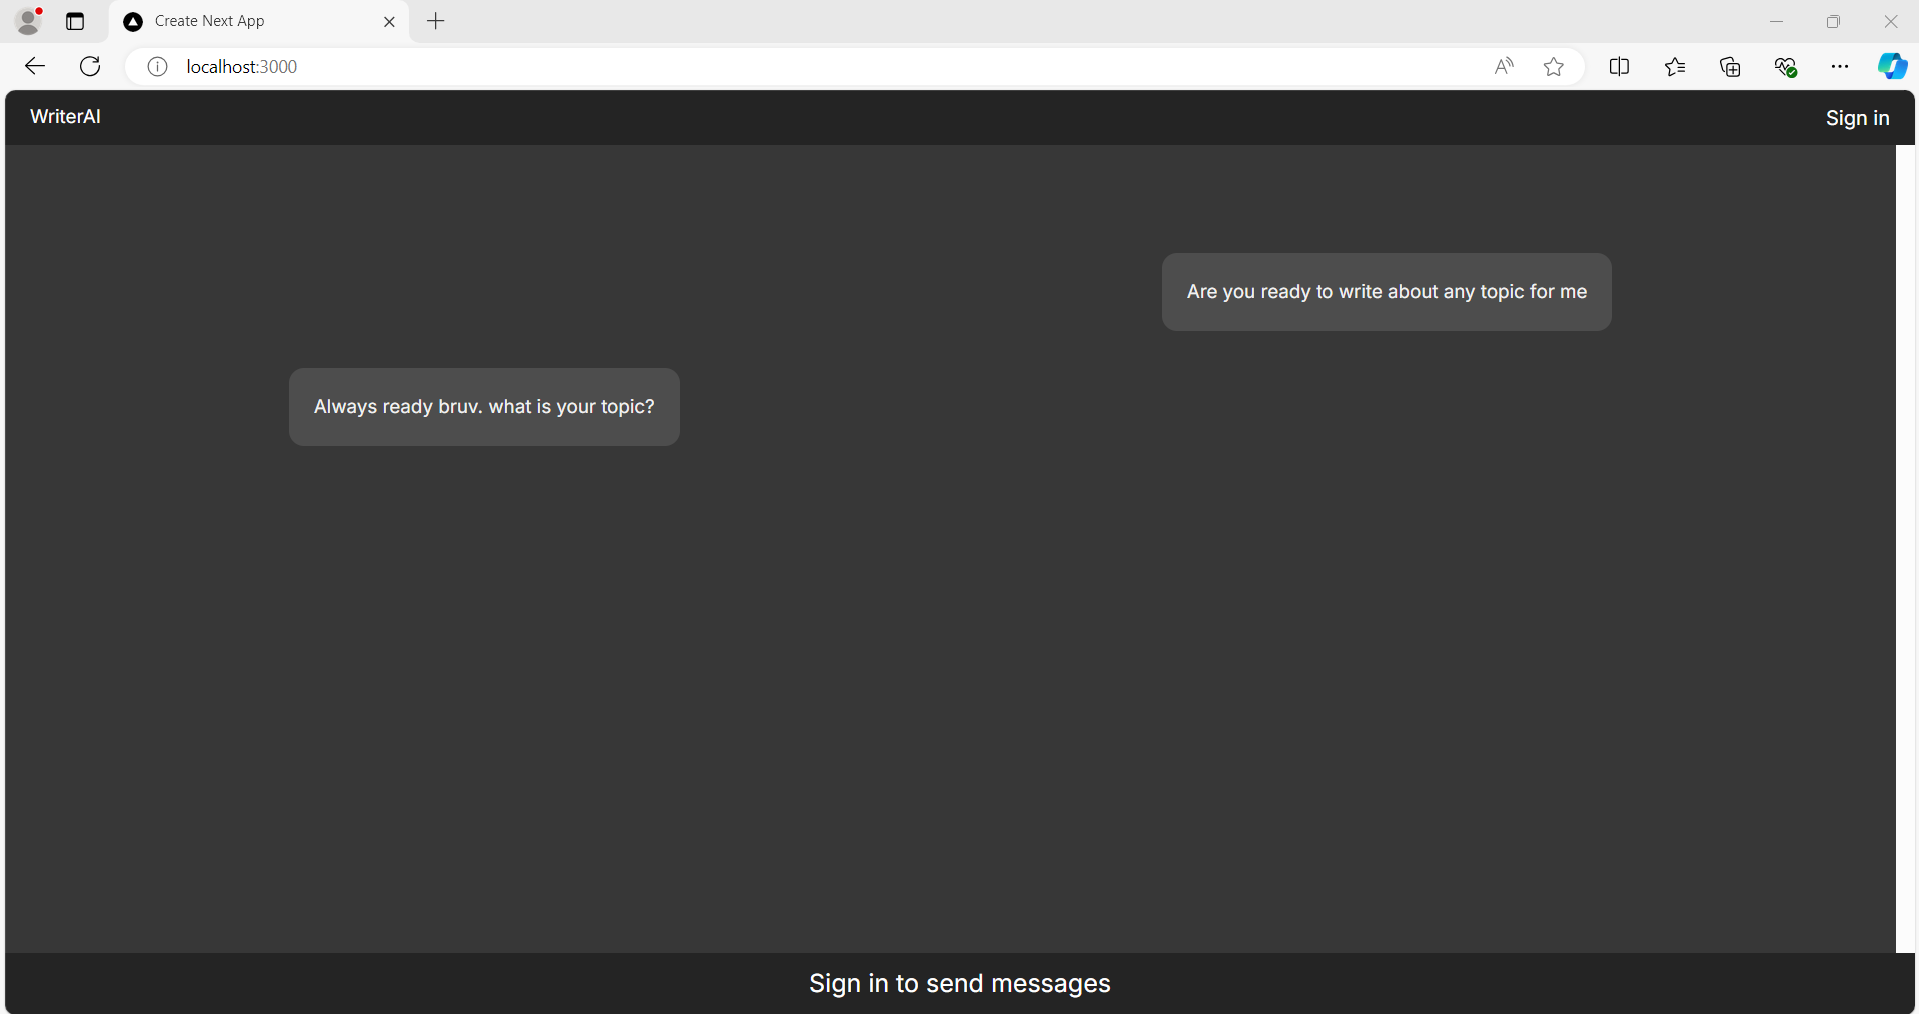
Now if you save the changes and reload your site, this should be how your site looks:
When you click on the sign-in link, you’ll be redirected to GitHub for authorization and redirected back to the site after that. Once the authorization is successful, the user information will be visible in the site.
Here is mine:
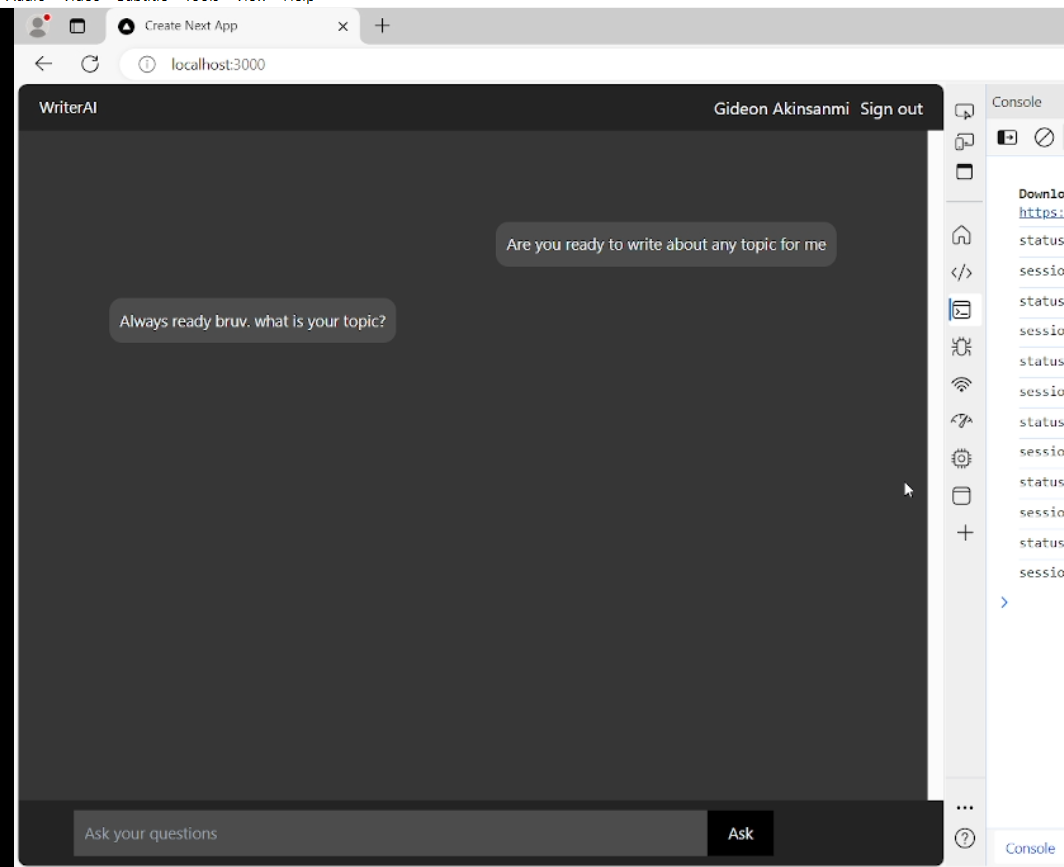
If you check the browser’s console, you’ll see the information of the session including the name, email, and expiration time/date. Remember that we configured the session to expire 2 minutes after the last request sent to the server. If you don’t send any request to the server within 2 minutes, the session will be destroyed and you’ll be asked to sign in again.
Remember that this is the setting I added in my helper/authOption.ts file. You can configure the session to be active for days, weeks, or months.
There’s no need to worry when you send a prompt and get error messages. This is because you have some environment variables in Vercel that haven’t been added to the .env.local file. When you finally update the changes, you’ll be able to send your prompts to the deployed site as usual.
When you also click on the sign-out link, the session will be destroyed, the app will be reloaded, and the form will be hidden.
If it works as I just explained, that means everything went well.
Also, you need to add authorization in the api/ai route so that unauthorized users won’t be able to send requests directly to the endpoint.
In your api/ai/route.ts file, you need to import getServerSession and authOptions.
import {authOptions} from "@/app/helper/authOption";

import { getServerSession} from "next-auth";
Next, within the POST function, add this code to it:
let session = await getServerSession(authOptions);

if (!session) {
  return NextResponse.json({content: 'Unauthorized access. Authentication required'}, {status: 401})
}
The code above also prevents unauthorized users from getting responses from the api/ai route by sending a 401 status code and an error message.
Once that's done, it’s time to push the changes to the GitHub repo.
But before that, you need to copy the environment variables (GITHUB_CLIENT_ID, GITHUB_SECRET, NEXTAUTH_SECRET, NEXTAUTH_URL) in your .env.local file and paste into the environment variables section of your project settings page on Vercel.
After that, run the code below to push the changes to GitHub:
git add .

git commit –m "added GitHub authentication and authorization"

git push –u origin main
After the update is successful, visit your project deployment page on Vercel to confirm that the GitHub changes have been successfully deployed.
But unfortunately, an error we didn’t notice will make the deployment fail.
This is the error message:
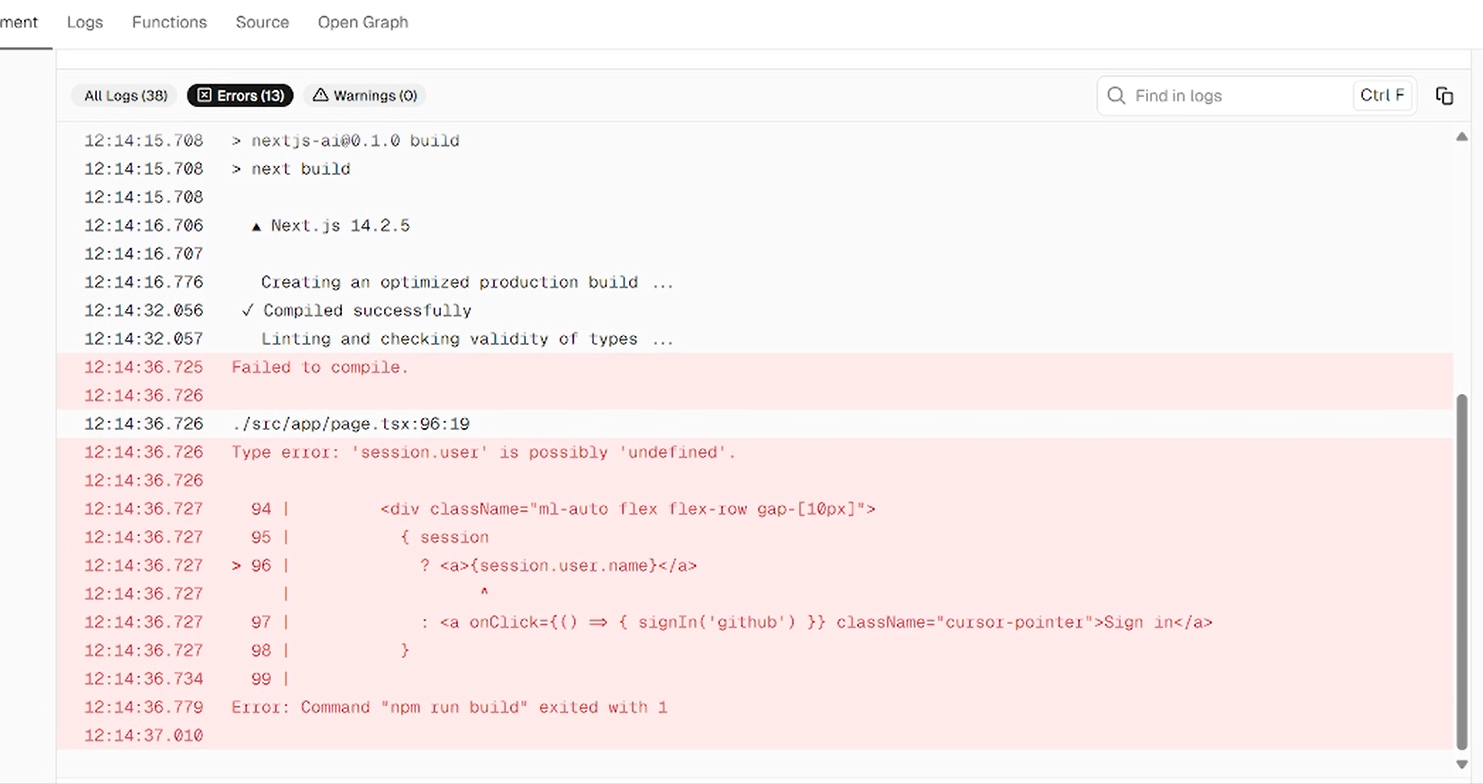
Since I also didn’t know what went wrong, I asked ChatGPT for help. And I was able to find the issue.
The deployment failed because we didn't ensure that session.user was defined before accessing it

So in your page.tsx file, make sure you fix the code as shown below:
{ session && session.user
    ? <a>{session.user.name}</a>
    : <a onClick={() => { signIn('github') }} className="cursor-pointer">Sign in</a>
}
After that, push the changes to GitHub and wait for the project to be successfully deployed to Vercel.
Now you can visit the deployed link to start testing the authentication.
But when you click on the sign-in link, the page doesn’t load. This is because you haven’t changed the URL in your environment variable and GitHub from http://localhost:3000 to the domain of your deployed project.
So you need to check your Project deployment information on Vercel and copy the domain name.
Next, go to your environment variables setting and update the NEXTAUTH_URL to the project’s domain name. Mine is https://nextjs-ai-pro.vercel.app.
Next, go to the OAuth app you created, replace the domain name in the homepage URL and callback URL from http://localhost:3000/ to the Vercel domain name.
Remember that if you have your domain name (for example, domain.com), it’ll be used instead of the Vercel domain name.
If you reload the site and click on the sign-in link, you’ll be redirected to GitHub and your session will be created. When you sign out, the session will also be destroyed.
When you also try executing the script below in your browser’s console, you’ll get an error message because you haven’t signed in.
//function to send the request
const getCompletion = async (prompt) => {

  try {
    const response = await fetch('/api/ai', {
      method: 'POST',
      body: JSON.stringify({ prompt }),
      headers: {
        'Content-Type': 'application/json',
      },
  });

  const result = await response.json();

  if (!response.ok) {
    return { role: 'assistant', content: result.content };
  }

  return result;

  } catch (error) {
    return { role: 'assistant', content: 'Something went wrong' };
  }
};

getCompletion().then( (result) => {
    console.log(result)
})
This means that unauthorized users won’t be able to run any script in your developer tools to get an AI response.
You can also test the site and send some prompts.
If it all works as explained, that means that authentication and authorization have been successfully implemented. Congratulations!
You can watch the video for this section below:
Optimizing the Code
Now most of the work is done. But you can do some other things to further optimize your code. This completely depends on how you want it to be.
For example, you can refactor the code, improve the styling, increase the function timeout for longer prompts, optimize the logs, handle errors in the middleware, set up unit and integration testing, set up a CI/CD pipeline, update your project metadata (title, description, logo), create a preview environment for your deployments, redirect unsuccessful sign-ins to a landing page, and add many more features to your app.
Conclusion
In this tutorial, we’ve explored a lot of things. You learned how to integrate your Next.js app with third-party APIs. You also learned how to secure your app from the most common cyberattacks by implementing strategies like rate limiting, setting up firewalls, and implementing authentication and authorization on your AI app deployed on Vercel.
By applying the same logic in your Next.js AI app, I’m confident that you’ll be able to deploy your app safely without the fear of waking up to an astronomical bill or server crashes.
To be on the safe side, make sure you monitor your Vercel deployment daily. You can also hire a professional software engineer to verify the security of your app if you don't feel confident in your skills in this area.