by rajaraodv
Jazz Up Your “ZSH” Terminal In Seven Steps — A Visual Guide
In this blog I’ll cover installing ITerm2, ZSH shell, “oh my ZSH”, Themes, ITerm2 color schemes, “oh my ZSH” plugins and enable “ligature” support to help create a beautiful and powerful Terminal.
If you want to just make your regular Bash Terminal powerful, take a look at my previous blog: “Jazz Up Your Bash Terminal”. But ZSH explained in this blog is more powerful stuff.
Summary:
We’ll be covering a lot of things. This may be confusing, so here is the summary of what we will be doing.
- Install ITerm2 — This is a better alternative to the default Terminal
- Install latest ZSH shell — This is more powerful than the regular bash shell. We will switch ITerm2 to use ZSH shell.
- Install “Oh My ZSH “— This is a CLI tool to easily configure ZSH and add themes and plugins to ZSH
- Add two types of Themes using “Oh My ZSH” — some themes need extra steps so we will cover both
- Install different ITerm2 Schemes — These are just color schemes for the UI
- Add two different Plugins using “Oh My ZSH” to improve productivity
- Enable “ligature” support so when you write an arrow =>;, it appears like a real arrow →
Step 1— Install ITerm2
A lot of programmers like ITerm2 instead of the default Terminal. It is similar to the Terminal, but has lots of features of its own. It of course can run ZSH, Bash, and other shells inside it.
The following video shows some of the new features of Item 2 (v3).
For this blog we’ll use ITerm2. When I mention “Terminal”, I mean ITerm2. Although the steps are the same for both Terminal or ITerm2.
Step 2— Change Shell To ZSH
The following video shows why ZSH is better than just a bash shell.
Option 1 — Use Mac’s own ZSH:
Mac comes with a ZSH out-of-the-box, so we don’t need to install it. However, sometimes it’s an older version of ZSH. Typically it’s located at /bin/zsh. To use it, all we need to do is to change shell (chsh).
- Open the Terminal (or ITerm2) and type the following command.
$ chsh -s $(which zsh)2. Enter the password and it will change the shell, upon logout and login.
3. Logout and re-login
4. To test, open the Terminal and type the following, and it should say zsh.
$ echo $0
zsh //should return zsh
Option 2— Install Homebrew and Install latest ZSH via Homebrew
This option is pretty common among users, because some of the plugins only work with the latest ZSH.
Homebrew, simply said, is a command line installer for all sorts of software. Let’s install that first.
- Install Homebrew by running the following command.
ruby -e "$(curl -fsSL https://raw.githubusercontent.com/Homebrew/install/master/install)"2. If you get Command Line Tools for Xcode error, it means you haven’t installed the CLI tools for Xcode. If you don’t get the error, you can skip this step, because you already have it installed.
XCode Developer CLI tools are used by various apps that manipulate core OSX features. So make sure to install the Xcode CLI tools by running the following command.
$ xcode-select —-install
Note: The above command opens up Mac’s installer and installs the XCode Developer CLI tools. If it doesn’t work, try xcode-select -r to reset.3. Install ZSH via Homebrew
Run the following command to install ZSH. It gets installed at /usr/local/bin/zsh PS: Mac’s default ZSH is at /bin/zsh
brew install zsh4. Use the Homebrew version of ZSH
Run the following command. You will be prompted to enter Mac’s password.
chsh -s /usr/local/bin/zsh5. Logout and log back in.
6. Test if we are using ZSH and the correct ZSH
$ echo $0
zsh   //correct

$ which zsh
/usr/local/bin/zsh   //correct
Step 3— “Oh My ZSH”
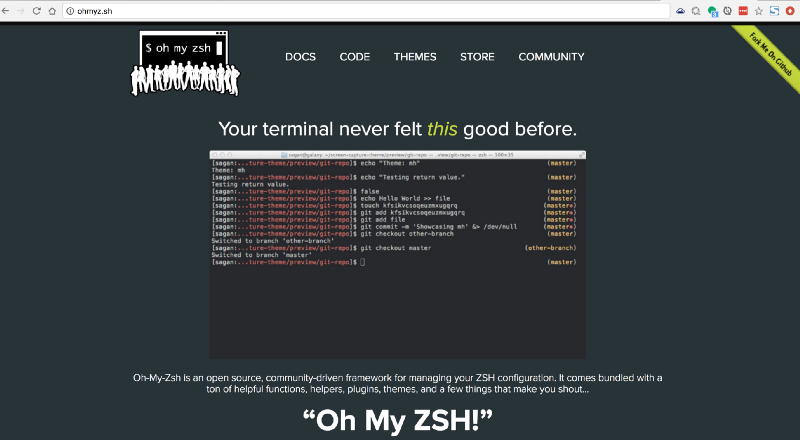
“Oh My ZSH” is a plugin that runs on top of ZSH. It provides default config for ZSH (~/.zhrc file) and also provides themes and more features.
From what I know, most power users who use ZSH also use “Oh My ZSH”.
- Install “Oh My ZSH”
Run the following command to install “oh My ZSH”.
sh -c "$(curl -fsSL https://raw.github.com/robbyrussell/oh-my-zsh/master/tools/install.sh)"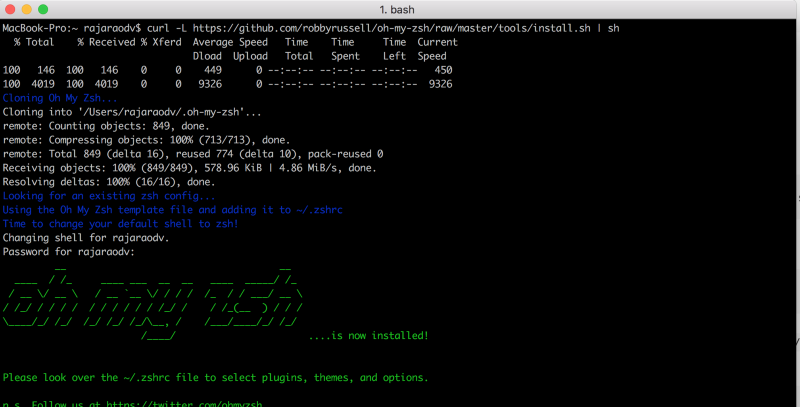
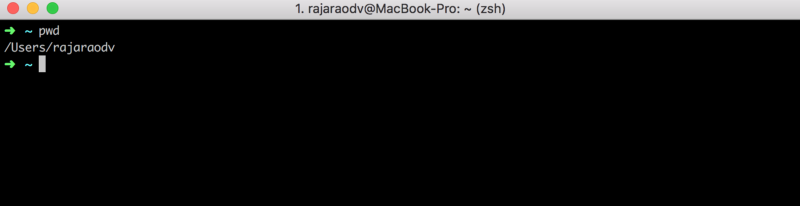
2. Close and quit ITerm2 and reopen it.
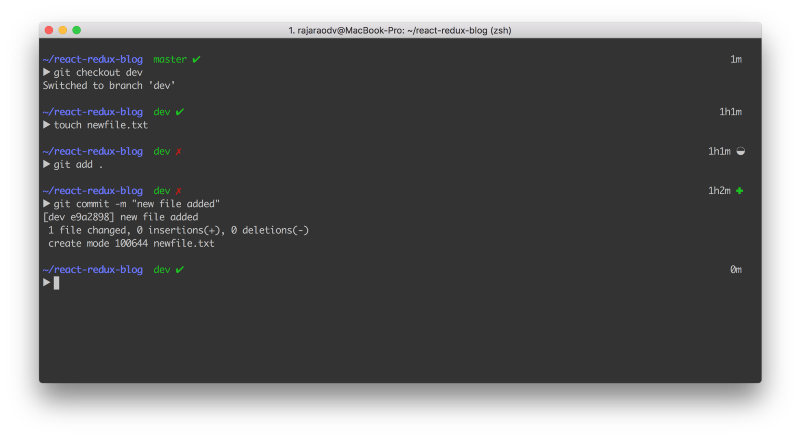
It should look something like below. Notice that the prompt has changed and the theme is a bit different — That’s “Oh My ZSH” in action for you.
Step 4— Change Themes And Install Fonts
In this step, we’ll add two different “Oh My ZSH” Themes. “Oh My ZSH” comes with tons of themes. PS: But some Themes need extra steps like installing specific fonts and so on.
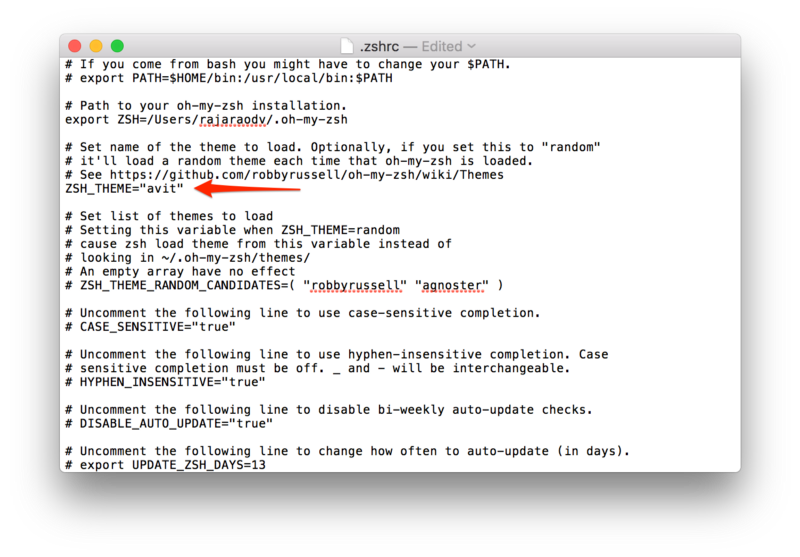
To set a Theme, simply open ~/.zshrc file (created by “Oh My ZSH”) and change the theme as shown below.
PS: .zshrc is the config file for ZSH shell. People who don’t use “Oh My ZSH” will have to manually create this file and add any configs themselves. “Oh My ZSH” automatically creates this file if it doesn’t exist and then adds its own set of configs into this file.
Theme 1 — Let’s add a Theme called “Avit”
- Open .zshrc
$ open ~/.zshrc2. Change the Theme to “Avit”
You can browse all the “Oh My ZSH” Themes here. To change the Theme, simply change the ZSH_THEME value in ~/.zshrc file from robbyrussell to Avit.
3. Update ZSH config
Run the following command to update the config.
$ source ~/.zshrc
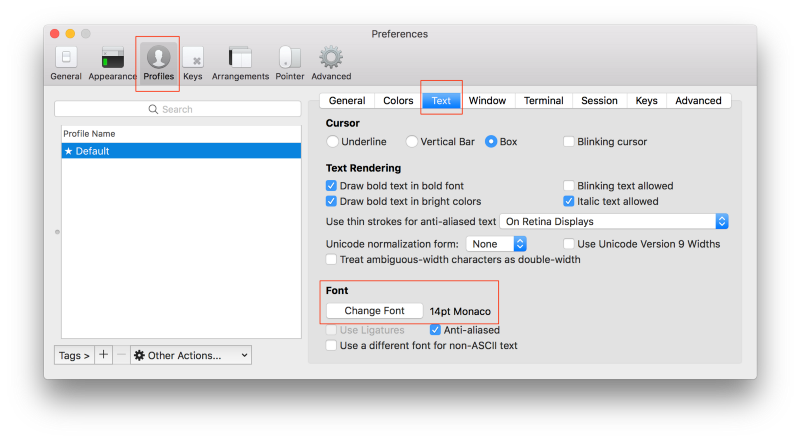
4. Change the background color and font size
Open ITerm2 > Preferences > Profiles > Colors and change the background black color to use 20% gray as shown below.

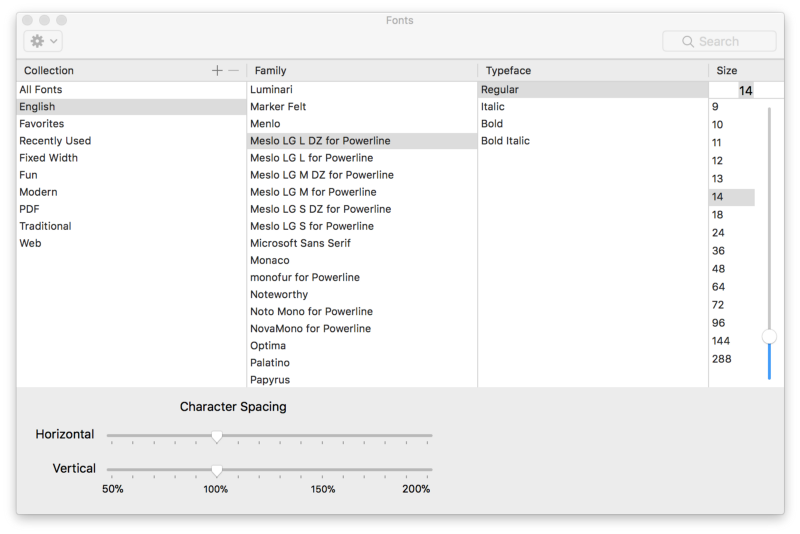
Then open Text > Change Font and change the size to 14pt.
OK, Let’s install a different Theme that needs fonts.
Theme 2 — Installing “agnoster” Oh My ZSH theme
This is a popular theme because it emulates the Powerline Python app that enhances the terminal. The following picture shows how it looks. But this theme also needs us to install Powerline themes.
1. Install Powerline fonts
$ git clone https://github.com/powerline/fonts.git
$ cd fonts
$ ./install.sh
2. Change the Theme to “agnoster”
$ open ~/.zshrc
Set ZSH_THEME="agnoster" and save the file
3. Quit ITerm2 and reopen it.
4. Set Powerline font
You can set any Powerline patched font you like. All the fonts end with “for Powerline”.
Open ITerm2 > Preferences > Profiles > Text > Change Font and set it to something that has “for Powerline”. I’m choosing “Meslo LG DZ for Powerline” font.
Note — If you are confused about the fonts and Themes: the Themes are for “Oh My ZSH” and ZSH shell and the fonts are for the Iterm2 itself.
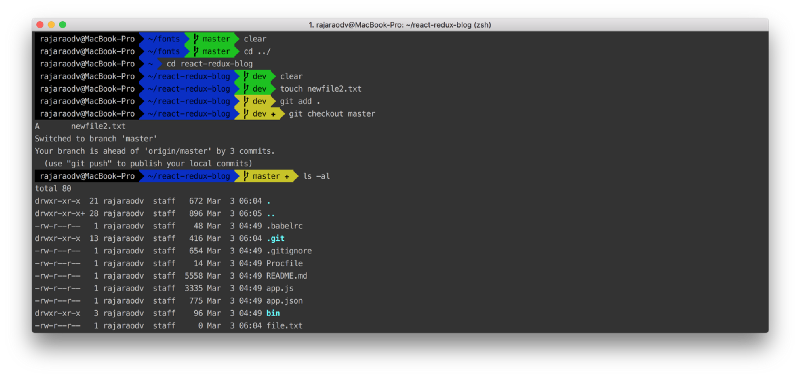
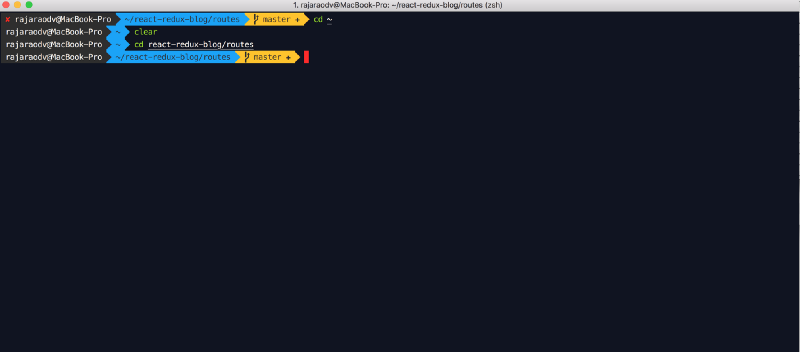
5. All Done
At this point your Terminal should look like below:
Step 5 — Install iTerm2 “color schemes” (ITerm2 Themes)
There are plenty of gorgeous color schemes for iTerm2. These schemes change the foreground color, background color, cursor color, and so on. You can find them at iTerm2-color-schemes Github repo.
Note: These are just color schemes of the ITerm2 UI and don’t deal with the command prompt’s look and feel like “Oh My ZSH”’s themes (other than just changing colors).
Follow these steps to install them.
- Download the iTerm2-color-schemes as a zip file and extract it
- The “Schemes” folder contains all the color scheme files — they end with
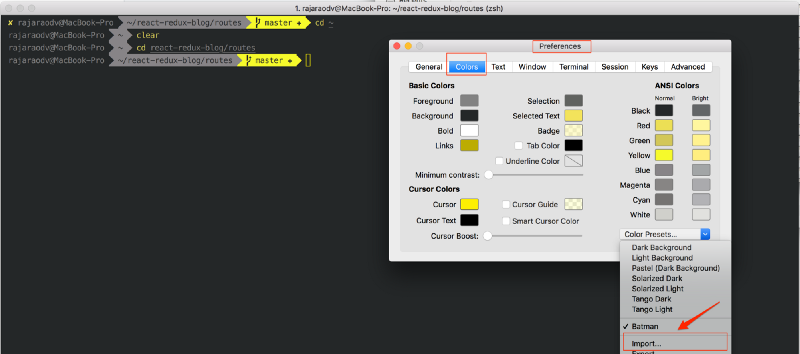
.itermcolors - Open
iTerm2 > Preferences > Profile > Colors > Color Presets > Import - In the import window, navigate to the “Schemes” folder (from step 2)
- Select all the files so you can import all the color schemes at once
- Simply select whichever color scheme you like.
My favorites are Batman and Argonaut
The Argonaut color scheme looks like below:
Step 6— Install Plugins
Plugins add more functionalities to your workflow. By default “Oh My ZSH” already has the “git” plugin! and that’s why you were able to see all those Git statuses in the prompts in earlier screenshots. Let’s add another one to see how it works.
Note: In this section, we’ll install two different plugins to show how they work.
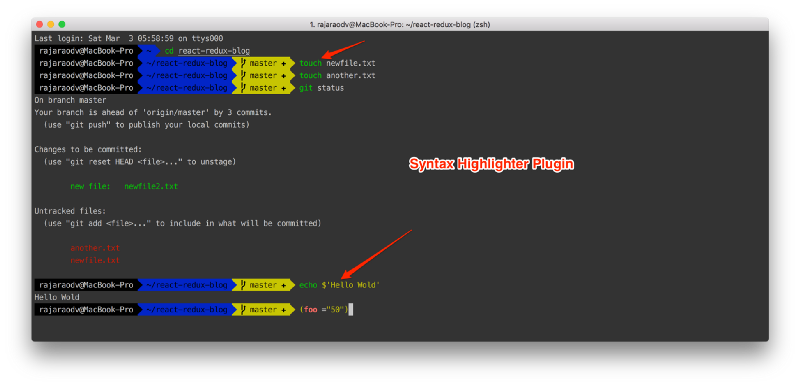
Plugin 1 — Add Syntax Highlighting Plugin
The Syntax Highlighting plugin adds beautiful colors to the commands you are typing as shown below.
- Clone the zsh-syntax-highlighting plugin’s repo and copy it to the “Oh My ZSH” plugins directory.
git clone https://github.com/zsh-users/zsh-syntax-highlighting.git ${ZSH_CUSTOM:-~/.oh-my-zsh/custom}/plugins/zsh-syntax-highlighting2. Activate the plugin in ~/.zshrc by adding `zsh-syntax-highlighting to the Plugins section as shown below.

3. Re-read zshrc configuration
source ~/.zshrcPlugin 2 — Add ZSH-AutoSuggestion Plugin
This plugin auto suggests any of the previous commands. Pretty handy! To select the completion, simply press → key.
- Install the plugin
git clone https://github.com/zsh-users/zsh-autosuggestions $ZSH_CUSTOM/plugins/zsh-autosuggestionsPS: ZSH_CUSTOM points to ~/.oh-my-zsh/custom
2. Open ~/.zshrc and add zsh-autosuggestions
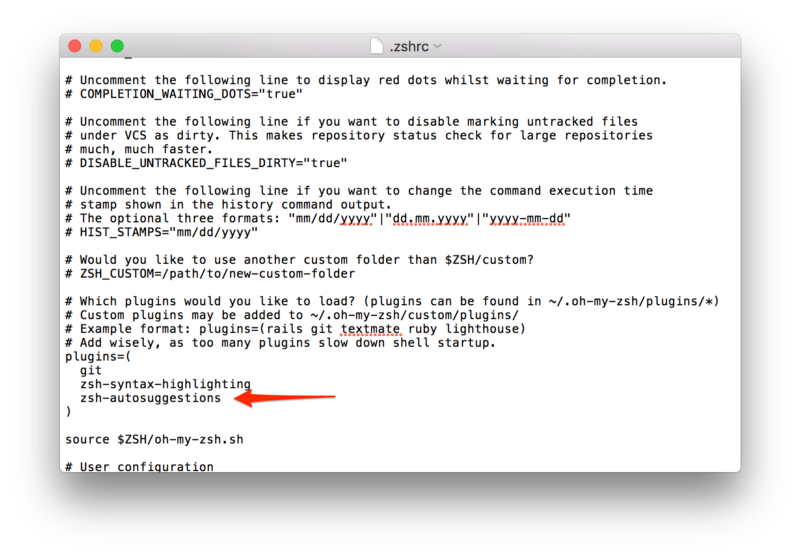
Step 7 — Use Ligature Support
There are various fonts that help make operators like less than, double equals, right arrow, not equals, and so on look beautiful. For example, every time you type: =>, it becomes: →.
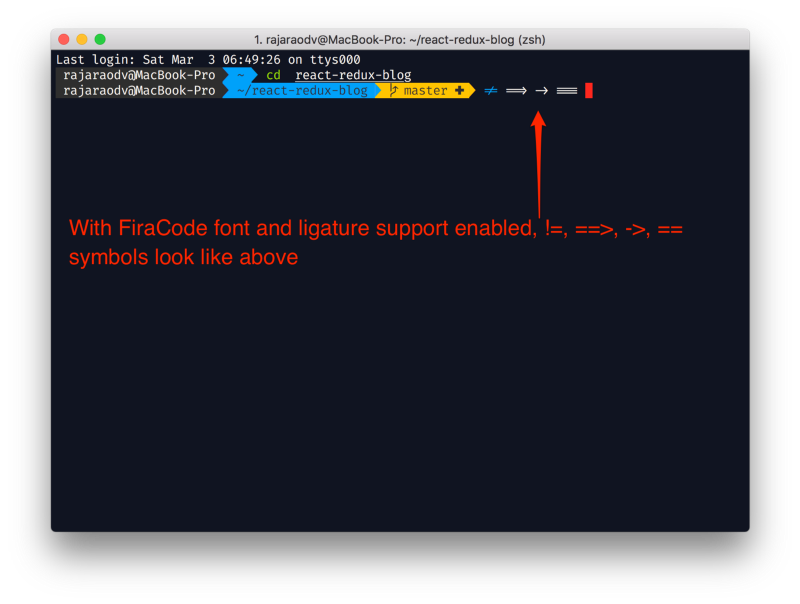
To use this, we need fonts that support ligatures. We also need to enable it in ITerm2. FiraCode is one such font. Follow the steps to install and enable ligatures.
- Download the FiraCode repo and extract the zip file (or clone it)
- Open the
dstr > ttffolder and double click on all the*.ttffiles and select the “Install font” button to install each of the font variations. - Navigate to
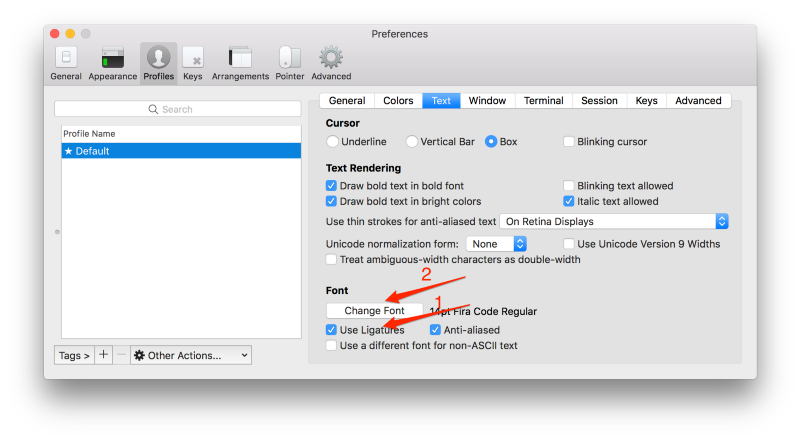
ITerm2 | Preferences | Profiles | Text - Select
Use Ligaturescheckbox - Click on
Change Fontand selectFira Code Regularfont
Summary
We have covered a lot in this blog starting from installing latest ZSH via Homebrew, Oh My ZSH, Plugins, Themes, enable “ligatures” for FiraCode font.
?? Thank you!
If this was useful, please click the clap ? button down below a few times to show your support! ⬇⬇⬇ ??
My Other Posts
https://medium.com/@rajaraodv/latest
ECMAScript 2015+
- Check out these useful ECMAScript 2015 (ES6) tips and tricks
- 5 JavaScript “Bad” Parts That Are Fixed In ES6
- Is “Class” In ES6 The New “Bad” Part?
Terminal Improvements
- How to Jazz Up Your Terminal — A Step By Step Guide With Pictures
- Jazz Up Your “ZSH” Terminal In Seven Steps — A Visual Guide
WWW
Virtual DOM
React Performance
Functional Programming
- JavaScript Is Turing Complete — Explained
- Functional Programming In JS — With Practical Examples (Part 1)
- Functional Programming In JS — With Practical Examples (Part 2)
- Why Redux Need Reducers To Be “Pure Functions”
WebPack
- Webpack — The Confusing Parts
- Webpack & Hot Module Replacement [HMR] (under-the-hood)
- Webpack’s HMR And React-Hot-Loader — The Missing Manual
Draft.js
React And Redux :
- Step by Step Guide To Building React Redux Apps
- A Guide For Building A React Redux CRUD App (3-page app)
- Using Middlewares In React Redux Apps
- Adding A Robust Form Validation To React Redux Apps
- Securing React Redux Apps With JWT Tokens
- Handling Transactional Emails In React Redux Apps
- The Anatomy Of A React Redux App
- Why Redux Need Reducers To Be “Pure Functions”
- Two Quick Ways To Reduce React App’s Size In Production
If this was useful, please click the clap ? button below a few times to show your support! ⬇⬇⬇ ??
If you have questions, please feel free to ask me on Twitter: https://twitter.com/rajaraodv